

Image search has become an intuitive way to browse the internet. Tools like Google Lens and even Amazon reverse image search can find identical items on a website based on an uploaded photo, which is useful but generic.
If you live in the UK or Canada and just want search results of product listings from your local Amazon marketplace or some other local online retailer, the breadth of results Google Lens returns can be overwhelming, time-wasting, and mostly useless. Oftentimes, it will return similar items, just not readily accessible items.
Given Amazon’s scale and inventory depth, a focused search that goes straight to the right marketplace is the most efficient approach.
In this tutorial, we will build an Amazon image search engine using ScraperAPI, LangChain, Claude 3.5 Sonnet, GPT-4o mini, and Streamlit.
Our project enables image search, particularly for Amazon Marketplaces in any region of the world, using two separate large language models (LLMs) to analyze uploaded images and generate shopping queries.
These queries are passed to a reasoning model that uses the ScraperAPI LangChain agent to search Amazon and return structured results. To build a user interface and host our app for free, we use Streamlit.
Let’s get started!
TL;DR: What we will build at a glance:
| The Project | The Tech Stack | Supported Marketplaces | Ideal Use Cases |
| An Image search engine that maps uploaded images to exact purchasable products on local Amazon marketplaces. | Python, Streamlit, LangChain, ScraperAPI, Claude 3.5 Sonnet (Vision), GPT-4o mini (Reasoning). | US, UK, Germany, Denmark, France, Italy, Spain, Canada. | High-precision e-commerce search, affiliate link generation, and competitive price monitoring. |
Why Build an Amazon Image Search Engine?
When you run a visual search on a specific Logitech mouse you intend to buy, Google Lens returns a series of PC accessories pages: a Pinterest board, an eBay listing, an Instagram vendor in Portugal, etc. It casts a wide net, which is not always what you want.
Usually, your intent is more focused: “Show me online stores within my locale where I can purchase this specific mouse”. An Amazon image search tool bridges that gap for you, omitting results that are insignificant to your query, and personalizes the results you get back down to the very color.
Here are a few advantages to building an Amazon Product Search Tool:
1. Leveraging Specialized APIs
Don’t waste valuable time filtering through tons of generic results, when you can utilize a specialized Amazon product search API that gives you exactly what you need. Pairing a visual recognition model with the ScraperAPI Amazon Search Tool, can match visual features to live product ASINs, turning a simple image query into a structured data pipeline, returning prices, reviews, and availability instantly.
2. Reasoning and Context
Even a standard Amazon reverse image search is still static. An Agent adds a layer of reasoning to the process. If the image is blurry or ambiguous, it can infer context or ask clarifying questions before executing the search. And that’s how you can transform a static lookup into an intelligent Amazon product discovery tool that understands intent better than a generic algorithm.
3. Global Marketplace Precision
Generic tools often default to the US market (Amazon.com), which renders them useless for international data. A custom solution allows for localized Amazon marketplace results, tailored to specific locations you prefer.
Understanding the Amazon Image Search Engine’s Workflow
There are three core components of our Image Search engine that work in sequence. Claude 3.5 Sonnet reads the uploaded photo and writes a short shopping caption that captures distinct attributes of the item.
GPT 4o Mini takes that caption, chooses the right Amazon marketplace, and forms a neat query. The ScraperAPI LangChain agent then runs the query against Amazon and returns structured results containing title, ASIN, price, URL link, and image, which the app shows instantly.
Let’s take a closer look at how each of these components functions:
LangChain and ScraperAPI
LangChain agents connect a reasoning model to external tools, so the model can act, not just chat. Integrating ScraperAPI as an external tool enables the agent to crawl and fetch real-time data from the web without getting blocked.
The package exposes whatever reasoning model (an LLM) you pair with the agent through three distinct ScraperAPI endpoints: ScraperAPIAmazonSearchTool, ScraperAPIGoogleSearchTool, and ScraperAPITool.
With just a prompt and your ScraperAPI key, the agent issues a tool call and ScraperAPI handles bypassing, protection, and extraction, returning clean formatted data. For Amazon, the data usually comes back as a structured JSON field containing title, ASIN, price, image, and URL link.
Claude 3.5 Sonnet and GPT 4o Mini
In this project, Claude 3.5 Sonnet, a multimodal LLM, converts each uploaded photo into a short descriptive caption that captures the key attributes of that item.
The caption becomes the query, and GPT 4o Mini, the reasoning model paired to our agent, then interprets the caption, selects the correct Amazon marketplace, and calls the ScraperAPI LangChain tool to run the search.
The tool returns structured results that the app can display directly. Splitting the work this way keeps each model focused on what it does best.
Claude Vision extracts the right details from the image. GPT 4o Mini handles reasoning and tool use. ScraperAPI provides stable access and structured data.

Obtaining Claude 3.5 Sonnet and GPT4o Mini from OpenRouter
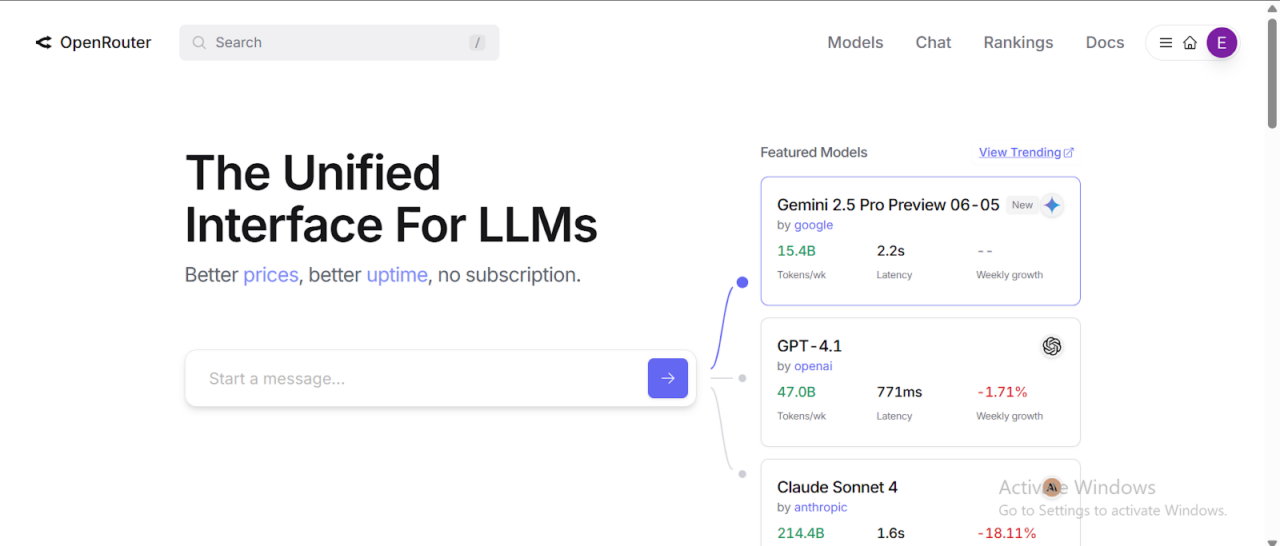
Our setup uses two separate large language models arranged in a multi-flow design. You can access LLMs from platforms like Hugging Face, Google AI Studio, AWS Bedrock, or locally via Ollama.
However, I used OpenRouter because it’s simpler to set up and supports many models through a single API, which is ideal for multi-flow LLM setups.
Here’s a guide on how to access Claude 3.5 Sonnet from OpenRouter:
- Log in to OpenRouter, sign up, and create a free account:
- After verifying your email, log in and search for Claude models (or any other LLM of our choice) in the search bar:

- Select Claude 3.5 Sonnet and click on the “Copy” icon just below the model’s name:
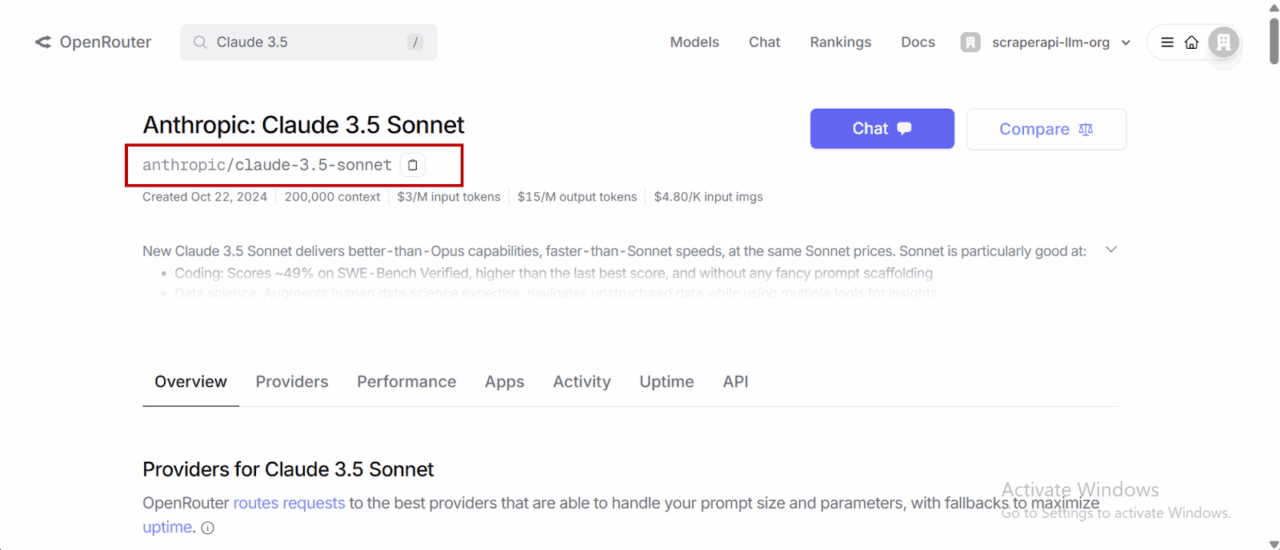
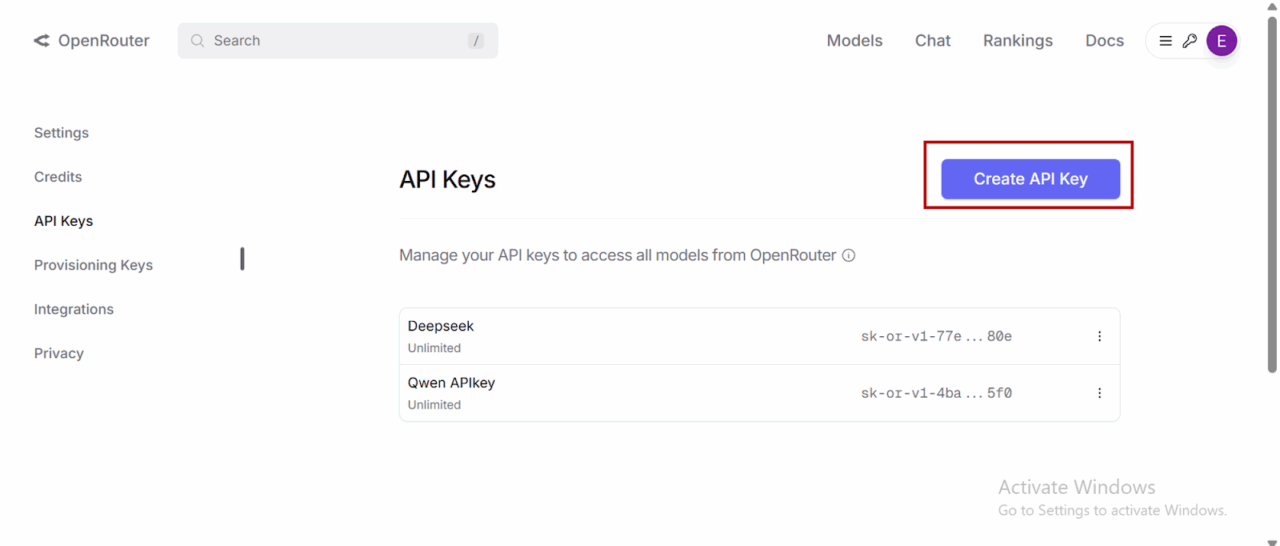
- Click on “API” to create a personal API access key for your model.

- Select “Create API Key” and then copy and save your newly created API key.
- You do not have to repeat the entire process to access GPT 4o Mini. Simply copy and paste the model link highlighted below into the code, and your single API key will be able to access both LLMs.

Do not share your API key publicly!
Getting Started with ScraperAPI
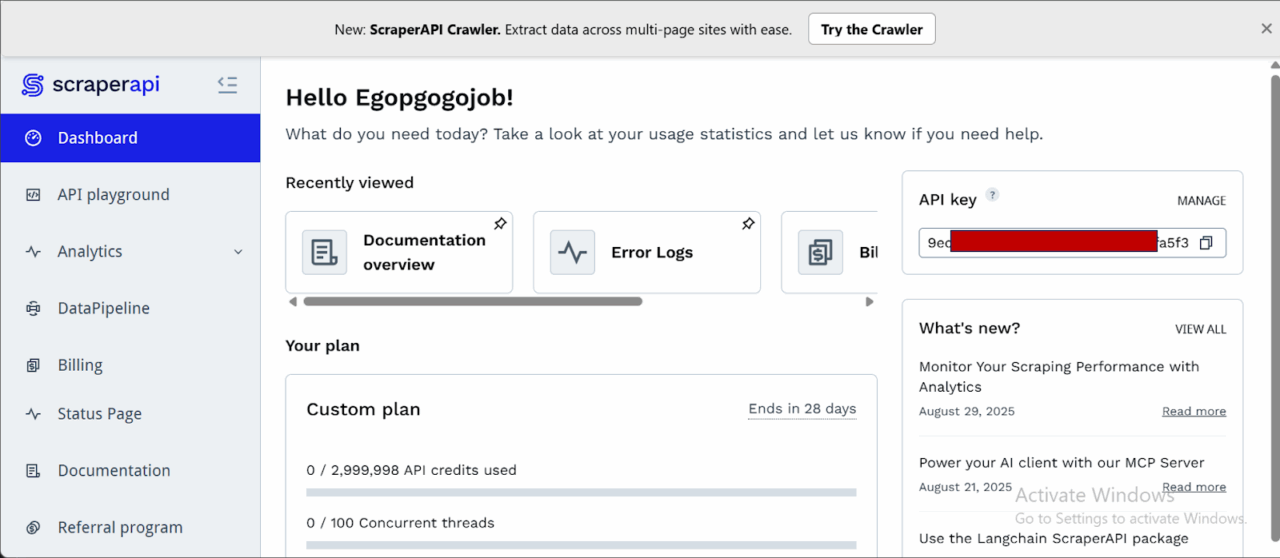
- If you don’t have a ScraperAPI account, go to scraperapi.com, and click “Start Trial” to create one or “Login” to access an existing account.:

- After creating your account, you’ll have access to a dashboard providing you with an API key, access to 5000 API credits (7-day limited trial period), and information on how to get started scraping.
- To access more credits and advanced features, scroll down and click “Upgrade to Larger Plan.”

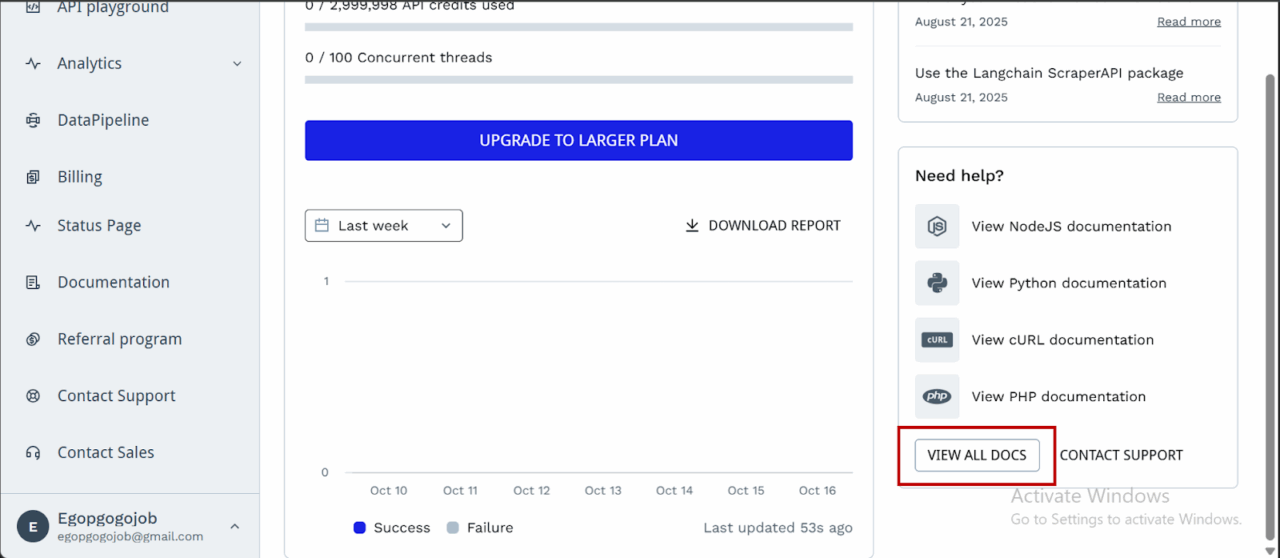
- ScraperAPI provides documentation for various programming languages and frameworks, such as PHP, Java, and Node.js, that interact with its endpoints. You can find these resources by scrolling down on the dashboard page and clicking “View All Docs”:
Now we’re all set, let’s start building our tool.
Prerequisites and Tools Used
To build this Amazon visual search engine, we need to utilize tools that can facilitate computer vision, logic orchestration, and anti-bot evasion.
Here is the breakdown of our toolkit:
- Python 3.8+: The latest versions of Python we’ll need to build with.
- Streamlit: For building the frontend and deploying it as a fully interactive web UI in Python without needing HTML/CSS knowledge.
- LangChain: This is the orchestration layer. We will use it to build an autonomous agent that connects our LLM “brain” to our search tools.
- ScraperAPI: Our tool for data extraction. We’re using the langchain-scraperapi package to access ScraperAPI’s Amazon Search Tool, which then handles CAPTCHAs, IP rotation, and HTML parsing automatically.
- OpenRouter: We need this to access the specific model types in this tutorial: a Vision Model (Claude 3.5 Sonnet) to visually interpret the product, and a Reasoning Model (GPT-4o) to execute the search logic.
- Pillow (PIL): A lightweight library to process the raw image data uploaded by a user.
- Required API Keys: To follow along, you will need to grab credentials from ScraperAPI (for the Amazon data) and OpenRouter (for the models).
Building the Image Search Engine for Amazon
Step 1: Setting Up the Project
Create a new project folder, a virtual environment, and install the necessary dependencies.
<pre>```bash
mkdir amzn_image_search  # Creates the project folder
cd amzn_image_search # Moves you inside the project folder```</pre>
Set up a virtual environment
<pre>```bash
python -m venv venv```</pre>
Activate the environment:
- Windows:
<pre>```bash
venvScriptsactivate```</pre>
- macOS/Linux:
<pre>```bash
source venv/bin/activate```</pre>
Now, install the dependencies we’ll need:
<pre>```bash
pip install streamlit Pillow requests aiohttp openai langchain-openai langchain langchain-scraperapi python-dotenv```</pre>
The key dependencies and their functions are:
- streamlit: The core library for building and running the app’s UI.
- openai: To interact with OpenRouter’s API, which is compatible with the OpenAI library’s structure.
- langchain-openai: Provides the LangChain integration for using OpenAI-compatible models (like those on OpenRouter) as the “brain” for our agent.
- langchain-scraperapi: Provides the pre-built
ScraperAPIAmazonSearchToolthat our LangChain agent will use to perform searches on Amazon. - langchain: The framework that allows us to chain together our language model (the brain) and tools (the search functionality) into an autonomous agent.
- Pillow: A library for opening, manipulating, and saving many different image file formats. We use it to handle uploaded images.
- requests & aiohttp: Underlying HTTP libraries used by the other packages to make API calls.
Step 2: Keys, Environment, and Model Selection
Let’s set up the necessary API keys and define which AI models will be used for different tasks.
In a file .env, add:
<pre>SCRAPERAPI_API_KEY="Your_SCRAPERAPI_API_Key"</pre>
In a file main.py, add the following code:
<pre>```python
import os, io, base64, json
import streamlit as st
from PIL import Image
from openai import OpenAI
from langchain_openai import ChatOpenAI
from langchain.agents import AgentExecutor, create_tool_calling_agent
from langchain_core.prompts import ChatPromptTemplate, MessagesPlaceholder
from langchain_core.tools import StructuredTool
from langchain_scraperapi.tools import ScraperAPIAmazonSearchTool
from dotenv import load_dotenv
load_dotenv()
# secure api keys from .env using os
SCRAPERAPI_KEY = os.environ.get("SCRAPERAPI_API_KEY")
OPENROUTER_API_KEY_DEFAULT = os.environ.get("OPENROUTER_API_KEY")
if SCRAPERAPI_KEY:
    os.environ["SCRAPERAPI_API_KEY"] = SCRAPERAPI_KEY
else:
    print("Warning: SCRAPERAPI_API_KEY environment variable not set.")
# allocating models as per their tasks
CAPTION_MODEL = "anthropic/claude-3.5-sonnet"  # vision model for captioning
AGENT_MODEL = "openai/gpt-4o-mini" # reasoning model (cheaper alternative to claude```</pre>
Here’s a breakdown of what the code above does:
- Imports: All the necessary libraries for the application are imported at the top, including
StructuredToolwhich we’ll use to create a custom, reliable search tool. - API Keys: The script handles API key management by using
load_dotenv()to retrieve keys from a.envfile and assigns them to variables:SCRAPERAPI_KEYandOPENROUTER_API_KEY_DEFAULT. - Environment Setup:
os.environ["SCRAPERAPI_API_KEY"] = SCRAPERAPI_KEYis a crucial line. LangChain tools often look for API keys in environment variables, so this makes ourSCRAPERAPI_KEYavailable to theScraperAPIAmazonSearchTool. - Model Selection: Since we’re using two different models for two distinct tasks, the
CAPTION_MODELwill be Claude 3.5 Sonnet due to its multimodal capabilities. TheAGENT_MODELis GPT-4o mini because it’s cheaper and very efficient at understanding instructions and using tools, which is exactly what the agent needs to do.
Step 3: App Configuration and UI Basics
Here we’ll configure the Streamlit page and set up some basic data structures and titles. Add this to your file:
<pre>```python
st.set_page_config(page_title=" Amazon Visual Match", layout="wide")
st.title("Amazon Visual Product Search Engine")```</pre>
Here’s what this code achieves:
- st.set_page_config(…): Sets the browser tab title and uses a “wide” layout for the app.
- st.title(…): Displays the main title on the web page.
- AMZ_BASES: This dictionary is essential. It maps a marketplace name ( “ES (.es)”) to the two codes ScraperAPI needs: the
tld(top-level domain, likees) and thecountrycode for that domain. Providing both is critical to ensuring we search the correct local marketplace.
Step 4: Adding Support for Amazon US, UK, DE, FR, IT, ES, and CA marketplaces
To enable purchasing items and extracting data internationally from local Amazon marketplaces. Our Amazon image search engine supports scraping data from:
- amazon.com
- amazon.co.uk
- amazon.de
- amazon.fr
- amazon.it
- amazon.es
- amazon.ca.
Allowing us to find products not only within the US, but also in the UK, Germany, France, Italy, Spain, and Canada:
<pre>```python
AMZ_BASES = {
   "US (.com)": {"tld": "com", "country": "us"},
   "UK (.co.uk)": {"tld": "co.uk", "country": "gb"},
   "DE (.de)": {"tld": "de", "country": "de"},
   "FR (.fr)": {"tld": "fr", "country": "fr"},
   "IT (.it)": {"tld": "it", "country": "it"},
   "ES (.es)": {"tld": "es", "country": "es"},
   "CA (.ca)": {"tld": "ca", "country": "ca"},
}```</pre>
The code above achieves this:
- AMZ_BASES: It maps a marketplace name ( “ES (.es)”) to the two codes ScraperAPI needs: the tld (top-level domain, like es) and the country code for that domain. Providing both is critical to ensuring we search the correct local marketplace.
Step 5: Creating the Image Captioning Function
This is the first major functional part of the app. It defines the logic for sending an image to the vision LLM (Claude 3.5 Sonnet) to get a descriptive caption. Continue in your file by adding this:
<pre>```python
# captioning stage
def caption_with_openrouter_claude(
       pil_img: Image.Image,
       api_key: str,
       model: str = CAPTION_MODEL,
       max_tokens: int = 96,
) -> str:
   if not api_key:
       raise RuntimeError("Missing OpenRouter API key.")
   client = OpenAI(base_url="https://openrouter.ai/api/v1", api_key=api_key)
   b64 = _image_to_b64(pil_img)
   prompt = (
       "Describe this product in ONE concise shopping-style sentence suitable for an Amazon search. "
       "Include brand/model if readable, color, material, and 3-6 search keywords. "
       "No commentary, just the search-style description."
   )
   resp = client.chat.completions.create(
       model=model,
       temperature=0.2,
       max_tokens=max_tokens,
       messages=[{
           "role": "user",
           "content": [
               {"type": "text", "text": prompt},
               {"type": "image_url", "image_url": {"url": f"data:image/png;base64,{b64}"}}
           ],
       }],
   )
   return resp.choices[0].message.content.strip()```</pre>
Let’s break this down:
_image_to_b64: A helper function that takes an image opened by the Pillow library and converts it into a Base64 string. This is the standard format for embedding image data directly into an API request.caption_with_openrouter_claude: Initializes theOpenAIclient, pointing it to OpenRouter’s API endpoint and instructs the vision model on exactly how to describe the image: as a single, concise sentence suitable for a product search.- Finally, it sends the request and returns the clean text response from the AI model.
Step 6: Initializing the LangChain Agent
This function builds the agent that will perform the Amazon search. To make our agent robust, we won’t give it the ScraperAPIAmazonSearchTool directly. Instead, we’ll wrap it in a custom StructuredTool to “lock” the marketplace settings. This prevents the agent from getting confused and defaulting to the US marketplace: amazon.com
First, we define a function to create this “locale-locked” tool.
<pre>```python
def make_amazon_search_tool(tld: str, country_code: str) -> StructuredTool:
   base_tool = ScraperAPIAmazonSearchTool()
   def _search_amazon(query: str) -> str:
       return base_tool.invoke({
           "query": query,
           "tld": tld,
           "country_code": country_code,
           "output_format": "json",
       })
   return StructuredTool.from_function(
       name="scraperapi_amazon_search",
       func=_search_amazon,
       description=(
           f"Search products on https://www.amazon.{tld} "
           f"(locale country_code={country_code}). "
           "Input: a plain natural-language product search query."
       ),
   )```</pre>
Now, we create the agent initializer, which uses the helper function above.
<pre>```python
# langchain agent setup
def initialize_amazon_agent(openrouter_key: str, tld: str, country_code: str) -> AgentExecutor:
   llm = ChatOpenAI(
       openai_api_key=openrouter_key,
       base_url="https://openrouter.ai/api/v1",
       model=AGENT_MODEL,
       temperature=0,
   )
   amazon_tool = make_amazon_search_tool(tld=tld, country_code=country_code)
   tools = [amazon_tool]
   prompt = ChatPromptTemplate.from_messages([
       (
           "system",
           "You are an Amazon product search assistant. "
           "You MUST use the `scraperapi_amazon_search` tool for every search. "
           "Return ONLY the JSON from the tool. Do not invent or change tld/country."
       ),
       ("human", "{input}"),
       MessagesPlaceholder(variable_name="agent_scratchpad"),
   ])
   agent = create_tool_calling_agent(llm, tools, prompt)
   return AgentExecutor(agent=agent, tools=tools, verbose=True)```</pre>
The code achieves the following:
- make_amazon_search_tool: This wrapper function takes the
tldandcountry_codefrom the dropdown selection box and creates a new, simple tool for the agent. When the agent uses this tool, it only provides the search query. Thetldandcountry_codeare hard-coded into the tool’s_search_amazonfunction, guaranteeing it searches the correct marketplace. - LLM Initialization: It sets up the
ChatOpenAIobject, configuring it to use theAGENT_MODEL(GPT-4o mini) via OpenRouter. Thetemperature=0makes the model’s responses highly predictable. - Agent Creation: It assembles the final agent using our special
amazon_tooland a system prompt that explicitly tells the agent to only return the JSON from the tool. This, combined with the wrapper tool, makes parsing the results reliable. - The
AgentExecutoris the runtime that executes the agent’s tasks.verbose=Trueis helpful for debugging, as it prints the agent’s thought process to the console.
Step 7: Building the User Input Interface
Now let’s build the interactive sidebar and main input column within our Streamlit app.
<pre>```python
with st.sidebar:
   st.subheader("LLM Configuration")
   openrouter_key = st.text_input(
       "OPENROUTER_API_KEY (Unified Key)",
       type="password",
       value=OPENROUTER_API_KEY_DEFAULT,
       help="Used for both caption + agent models.",
   )
   st.markdown(f"**Vision Caption Model:** `{CAPTION_MODEL}`")
   st.markdown(f"**Agent Reasoning Model:** `{AGENT_MODEL}`")
col_l, col_r = st.columns([1, 1.25])
with col_l:
   region_label = st.selectbox("Marketplace", list(AMZ_BASES.keys()), index=0)
   selected_market = AMZ_BASES[region_label]
   marketplace_tld = selected_market["tld"]
   country_code = selected_market["country"]
   uploaded = st.file_uploader("Upload a product photo", type=["png", "jpg", "jpeg"])
   manual_boost = st.text_input(
       "Optional extra keywords",
       help="e.g. brand/model/color to append to the caption",
   )
   run_btn = st.button("Search Amazon")
with col_r:
   st.info(
       f"Flow: (1) Caption image with **{CAPTION_MODEL}** "
       f"(2) Agent with **{AGENT_MODEL}** calls ScraperAPI Amazon Search locked to "
       f"**amazon.{marketplace_tld}** (3) Display JSON results."
   )```</pre>
Here’s what the code does:
- Sidebar: A sidebar is created to hold the configuration. It includes a password input for the OpenRouter API key and displays the names of the two models being used.
- Main Columns: The main area is split into a left column (
col_l) and a right column (col_r). col_lcontains all the user inputs: the marketplace dropdown, file uploader, optional keyword box, and the search button.- Most importantly, when a marketplace is selected, we now pull both
marketplace_tldandcountry_codefrom theAMZ_BASESdictionary. col_rcontains anst.infobox that clearly explains the app’s workflow to the user, dynamically showing which marketplace (amazon.{marketplace_tld}) is being searched.
Step 8: The Main Application Logic and Search Execution
Now to the heart of the application, where everything is tied together. This block of code runs when a user clicks the “Search Amazon” button.
<pre>   ```python
if run_btn:
   if not uploaded:
       st.warning("Please upload a photo first.")
       st.stop()
   if not openrouter_key:
       st.error("Please paste your OPENROUTER_API_KEY.")
       st.stop()
   img = Image.open(io.BytesIO(uploaded.read())).convert("RGB")
   st.image(img, caption="Uploaded photo", use_container_width=True)
   with st.spinner(f"Describing your image via {CAPTION_MODEL}..."):
       try:
           caption = caption_with_openrouter_claude(img, openrouter_key)
       except Exception as e:
           st.error(f"Captioning failed: {e}")
           st.stop()
   query = f"{caption} {manual_boost}".strip()
   st.success(f"Caption: _{caption}_")
   st.write("**Agent Query:**", query)
   agent_executor = initialize_amazon_agent(
       openrouter_key,
       tld=marketplace_tld,
       country_code=country_code,
   )
   with st.spinner(
           f"Searching amazon.{marketplace_tld}"
   ):
       try:
           result = agent_executor.invoke({"input": f"Search for: {query}"})
       except Exception as e:
           st.error(f"LangChain Agent execution failed: {e}")
           st.stop()
   agent_output_str = result.get("output", "").strip()
   if not agent_output_str:
       st.error("Agent returned empty output.")
       st.stop()
   json_start_brace = agent_output_str.find('{')
   json_start_bracket = agent_output_str.find('[')
   if json_start_brace == -1 and json_start_bracket == -1:
       st.error("Agent output did not contain any valid JSON.")
       with st.expander("Debug: Raw agent output"):
           st.code(agent_output_str)
       st.stop()
   if json_start_brace == -1:
       json_start_index = json_start_bracket
   elif json_start_bracket == -1:
       json_start_index = json_start_brace
   else:
       json_start_index = min(json_start_brace, json_start_bracket)
   cleaned_json_str = agent_output_str[json_start_index:]
   try:
       decoder = json.JSONDecoder()
       raw_data, _ = decoder.raw_decode(cleaned_json_str)
   except json.JSONDecodeError as e:
       st.error(f"Failed to parse JSON from agent output: {e}")
       with st.expander("Debug: Raw agent output (before clean)"):
           st.code(agent_output_str)
       with st.expander("Debug: Sliced/Cleaned string that failed"):
           st.code(cleaned_json_str)
       st.stop()
   items = []
   if isinstance(raw_data, dict) and isinstance(raw_data.get("results"), list):
       items = raw_data["results"]
   elif isinstance(raw_data, list):
       items = raw_data
   else:
       st.warning("Unexpected JSON shape from tool. See raw output below.")
       with st.expander("Debug: Raw JSON"):
           st.json(raw_data)
       st.stop()```</pre>
Let’s break it down below:
- Input Validation: It first checks if an image has been uploaded and if an API key is present.
- Image Processing: It opens the uploaded image file, displays it, and prepares it for captioning.
- Caption Generation: It calls the
caption_with_openrouter_claudefunction inside anst.spinner. - Query Construction: It creates the final search query by combining the AI-generated caption with any optional keywords.
- Agent Execution: This is the key update. It now initializes the agent by passing both the
marketplace_tldandcountry_codeto ourinitialize_amazon_agentfunction. - Robust JSON Parsing: This is the second critical part. The agent’s raw output can sometimes be messy (invisible characters or extra text after the JSON ends).
- We first find the start of the JSON (
{or[) to trim any leading junk. - We then use
json.JSONDecoder().raw_decode(). to ignore any “extra data” that might come after it. Thereby solving parsing errors. - It then safely extracts the list of products from the
"results"key.
- We first find the start of the JSON (
Step 9: Displaying the Search Results
The final step is to take the list of product items extracted in the previous step and render it in a user-friendly format. Add:
<pre>```python
    if not items:
       st.warning(f"No items found on amazon.{marketplace_tld} for that query.")
       with st.expander("Debug: Raw JSON"):
           st.json(raw_data)
       st.stop()
   st.subheader(f"Results ({len(items)}) from amazon.{marketplace_tld}")
   for it in items[:24]:
       with st.container(border=True):
           c1, c2 = st.columns([1, 2])
           with c1:
               if it.get("image"):
                   st.image(it["image"], use_container_width=True)
           with c2:
               st.markdown(f"**{it.get('name', 'No Title')}**")
               asin = it.get("asin")
               if asin:
                   st.write(f"ASIN: `{asin}`")
               price = it.get("price_string")
               if price:
                   st.write(f"Price: {price}")
               url = it.get("url")
               if url:
                   st.link_button("View on Amazon", url)```</pre>
The code does the following:
- No Results Check: It first checks if the
itemslist is empty and informs the user. - Results Header: It displays a subheader announcing how many results were found and from which marketplace (
amazon.{marketplace_tld}). - Loop and Display: It loops through the first 24 items (
items[:24]) and displays each product in a structured, two-column layout with its image, title, ASIN, price, and a direct link to the product page.
Step 10: Running Your Application
With the entire script in place, you can now run the application from your terminal. Make sure your virtual environment is still active.
<pre>```bash
streamlit run main.py```</pre>
Your web browser should automatically open and load up the Application. “main.py” simply references your script’s file name, the one housing the code within your IDE. So, substitute accordingly.
Here’s a snippet of what the tool’s UI looks like:

Deploying the Image Search Engine App Using Streamlit
Follow the steps below to deploy your Image Search Engine on Streamlit for free:
Step 1: Set Up a GitHub Repository
Streamlit requires your project to be hosted on GitHub.
1. Create a New Repository on GitHub
Create a new repository on GitHub and set it as public.
2. Push Your Code to GitHub
Before doing anything else, create a .gitignore file to avoid accidentally uploading sensitive files like. Add the following to it:
<pre>```bash
.env
__pycache__/
*.pyc
*.pyo
*.pyd
.env.*
.secrets.toml```</pre>
If you haven’t already set up Git and linked your repository, use the following commands in your terminal from within your project folder:
<pre>```bash
git init
git add .
git commit -m "Initial commit"
git branch -M main
# With HTTPS
git remote add origin https://github.com/YOUR_USERNAME/your_repo.git
# With SSH
git remote add origin git@github.com:YOUR_USERNAME/your-repo.git
git push -u origin main```</pre>
If it’s your first time using GitHub from this machine, you might need to set up an SSH connection. Here is how.
Step 2: Define Dependencies and Protect Your Secrets!
Streamlit needs to know what dependencies your app requires.
1. In your project folder, automatically create a requirements file by running:
<pre>```bash
pip freeze > requirements.txt```</pre>
2. Commit it to GitHub:
<pre>```bash
git add requirements.txt
git commit -m "Added dependencies”
git push origin main```</pre>
Step 3: Deploy on Streamlit Cloud
1. Go to Streamlit Community Cloud.
2. Click “Sign in with GitHub” and authorize Streamlit.
3. Click “Create App.”
4. Select “Deploy a public app from GitHub repo.”
5. In the repository settings, enter:
- Repository:
YOUR_USERNAME/Amazon-Image-Search-Engine - Branch:
main - Main file path:
main.py(or whatever your Streamlit script is named)
6. Click “Deploy” and wait for Streamlit to build the app.
7. Go to your deployed app dashboard, find your app, and find “Secrets” in “Settings”. Add your environment variables (your API keys) just as you have them locally in your .env file.
Step 4: Get Your Streamlit App URL
After deployment, Streamlit will generate a public URL (e.g., https://your-app-name.streamlit.app). You can now share this link to allow others to access your app!
Here’s a short YouTube video demonstrating the Image Search Engine in action.
Conclusion
Congratulations. You just built an Image Search engine for Amazon. Your tool converts uploaded photos into search queries that yield targeted results based on visual similarities.
We achieved this using the ScraperAPI-Langchain agent for real-time web scraping, Claude 3.5 Sonnet for image captioning, GPT-4o Mini as a reasoning model for our agent, and Streamlit for building the UI and free cloud hosting.
The result is a fast, intuitive, and relevant tool that helps consumers find Amazon products instantly, even when they are unable to provide written search queries, thereby reducing the time to purchase and improving customer satisfaction.
FAQs
Is scraping Amazon legal for building a search tool?
Scraping public data (like product prices and titles) is considered legal in many jurisdictions, provided you don’t infringe on copyright, hide behind a login, or disrupt the website’s operation. However, Amazon’s Terms of Service explicitly prohibit scraping. To minimize risk, providers like ScraperAPI handle ethical scraping and request rate management for you. But you are still responsible for using the data in a way that complies with legal and platform requirements.
How do I avoid getting blocked when scraping Amazon search results?
The safest way is to use a scraping provider that already manages anti-bot bypassing through sophisticated measures like proxy rotation, CAPTCHAs, and header tuning. ScraperAPI’s Amazon endpoints are designed to handle these automatically, for you.
Can I adapt this Amazon image search engine to other ecommerce sites like eBay or Walmart?
Yes. The core pattern is straightforward: a vision model translates the image into a text caption, which the agent then uses to execute a search with ScraperAPI handling unblocking. To target other online stores such as eBay and Walmart, you’ll swap the ScraperAPIAmazonSearchTool for a more generic search tool then adjust prompts and parsing logic for that site’s layout.
Can I use this Amazon image search tool outside the US?
Yes, you can. This tool supports accessing marketplaces in the United Kingdom, Denmark, Germany, France, Italy, Spain, and Canada, alongside the United States. You can select your choice of country from the sidebar widget.