
Cheerio and Puppeteer are libraries made for Node.js (a backend runtime environment for JavaScript) that can be used to scrape the web. However, there are significant differences that you need to consider before picking a tool for your project.
In this web scraping guide, we’ll compare Cheerio and Puppeteer so you know which one to choose for a specific web scraping project. Then, we’ll show you how to build a web scraping using Cheerio and Puppeteer, with full code included. Let’s get started!
What is Cheerio?
Cheerio is a Node.js framework that parses raw HTML and XML data and provides a consistent DOM model to help us traverse and manipulate the result data structure. To select elements, we can use CSS and XPath selectors, making navigating the DOM easier.
However, Cheerio is well known for its speed. Because Cheerio doesn’t render the website like a browser (it doesn’t apply CSS or load external resources), Cheerio is lightweight and fast. Although in small projects we won’t notice, in large scraping tasks it will become a big time saver.
What is Puppeteer?
On the other hand, Puppeteer is actually a browser automation tool, designed to mimic users’ behavior to test websites and web applications. It “provides a high-level API to control headless Chrome or Chromium over the DevTools Protocol.”
In web scraping, Puppeteer gives our script all the power of a browser engine, allowing us to scrape pages that require Javascript execution (like SPAs), scrape infinite scrolling, dynamic content, and more.
Cheerio vs. Puppeteer: Differences and When to Use Them
Before moving into the details for each library, here’s an overview comparison between Cheerio and Puppeteer:
Cheerio |
Puppeteer |
|
|
|
|
|
|
|
|
|
|
|
|
Now that you have a big-picture vision, let’s dive deeper into what each library offers and how you can use them to extract alternative data from the web.
Should You Use Cheerio or Puppeteer for Web Scraping?
Although you might already have an idea of the best scenarios, let us remove all doubts. Cheerio is the best option for scraping static pages that don’t require any interactions like clicks, JS rendering, or submitting forms. However, if the website uses any form of Javascript to inject new content, you’ll need to use Puppeteer.
The reasoning behind our recommendation is that Puppeteer is just overkill for static websites. Cheerio will help you scrape more pages faster and in fewer lines of code.
That said, there are multiple cases where using both libraries is the best solution. After all, Cheerio can make it easier to parse and select elements, while Puppeteer would give you access to content behind scripts and help you automate events like scrolling down for infinite paginations.
How to Build a Scraper with Cheerio and Puppeteer [Code Example]
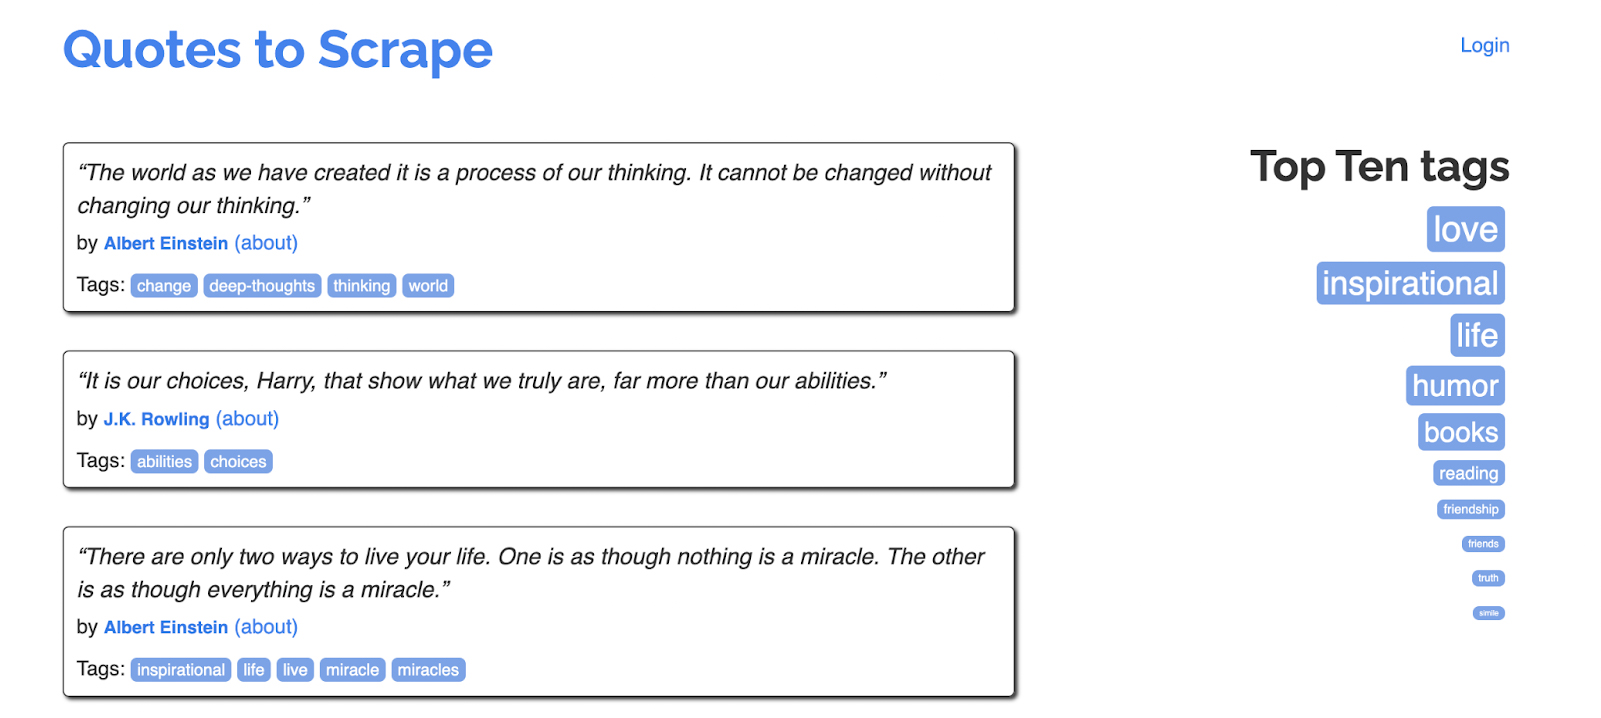
To make this example easy to follow, we’ll build a scraper using Puppeteer and Cheerio that’ll navigate to https://quotes.toscrape.com/ and bring back all quotes and authors from page 1.
Step 1. Installing Node.js, Cheerio, and Puppeteer
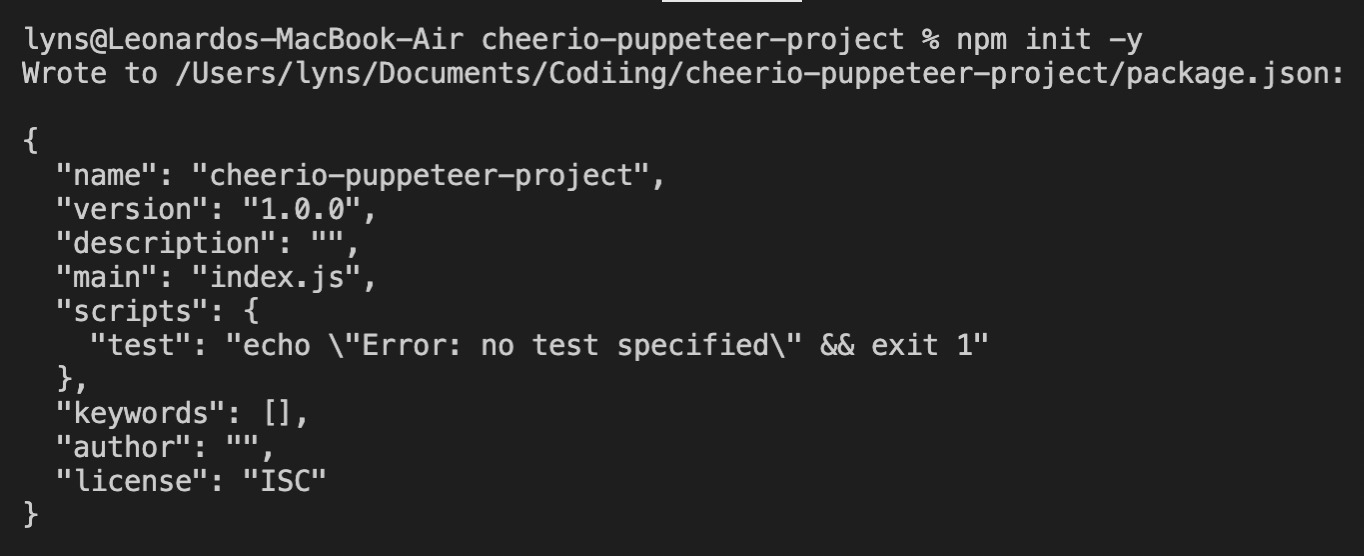
We’ll download Node.js from the official site and follow the installer’s instructions. Then, we’ll create a new project folder (we named it ‘cheerio-puppeteer-project’) and open it inside VScode – you can use any other editor you’d prefer. Inside your project folder, open a new terminal and type npm init -y to kickstart your project.
Step 2. Open the Target Website Using Puppeteer
Now we’re ready to install our dependencies using npm install cheerio puppeteer. After a few seconds, we should be ready to go. Create a new file named ‘index.js’ and import our dependencies at the top.
</p>
const puppeteer = require('puppeteer');
const cheerio = require('cheerio');
<p>
Next, we’ll create an empty list named
scraped_quotes to store all our results, followed by our async function, so we can have access to the await operator. Just so we don’t forget, we’ll write a browser.close() method at the of our function.</p>
scraped_quotes = [];
(async () => {
await browser.close();
});
<p>Using Puppeteer, let’s launch a new browser instance, open a new page and navigate to our target website.
</p>
 const browser = await puppeteer.launch();
const page = await browser.newPage();

await page.goto('https://quotes.toscrape.com/');
<p>
Parsing the HTML with Cheerio
To get access to the HTML of the website, we can use evaluate and return the raw HTML data – this is an important step because Cheerio can only work with HTML or XML data, so we need to access it before being able to parse it.
</p>
 const pageData = await page.evaluate(() => {
return {
html: document.documentElement.innerHTML,
};
});

<p>
For testing purposes, we can use
console.log(pageData) to log the response to our terminal. Because we already know it works, we’ll send the raw HTML to Cheerio for parsing.</p>
const $ = cheerio.load(pageData.html);
<p>Now, we can use
$ to refer to the parsed version of the HTML file for the rest of our project.
Step 3. Selecting Elements with Cheerio
Before we can actually write our code, we first need to find out how the page is structured. Let’s go to the page itself on our browser and inspect the cards containing the quotes.
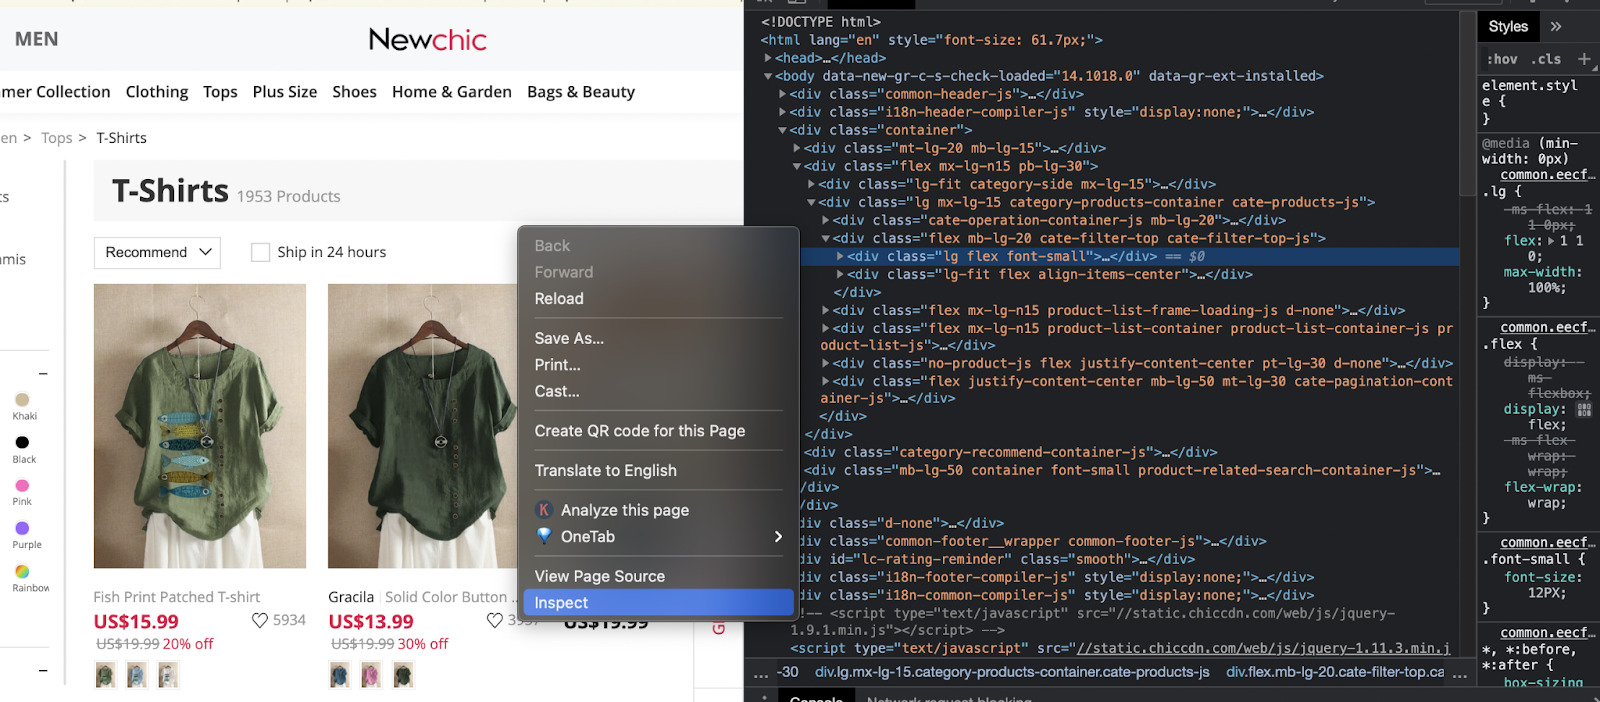
We can see that the elements we’re interested in are inside a div with the class quote. So we can select them and iterate through all of the divs to extract the quote text and the author.
After inspecting these elements, here are our targets:
- Divs containing our target elements:
$('div.quote') - Quote text:
$(element).find('span.text') - Quote author:
$(element).find('.author')
Let’s translate this into code:
</p>
 let quote_cards = $('div.quote');
quote_cards.each((index, element) => {
quote = $(element).find('span.text').text();
author = $(element).find('.author').text();
});

<p>
Using the text() method we can access to the text inside the element instead of returning the string of HTML.
Step 4. Pushing the Scraped Data Into a Formatted List
If we console.log() our data at this point, it will be a messy chunk of text. Instead, we’ll use the empty list we created outside our function and push the data over there. To do so, add these two new lines to your script right after your author variable:
</p>
 scraped_quotes.push({
'Quote': quote,
'By': author,
})

<p>
Full Web Scraper Code Built with Cheerio and Puppeteer
Now that everything is in place, we can console.log(scraped_quotes) before closing the browser:
</p>
//dependencies
const puppeteer = require('puppeteer');
const cheerio = require('cheerio');

//empty list to store our data
scraped_quotes = [];

//main function for our scraper
(async () => {
//launching and opening our page
const browser = await puppeteer.launch();
const page = await browser.newPage();

//navigating to a URL
await page.goto('https://quotes.toscrape.com/');

//getting access to the raw HTML
const pageData = await page.evaluate(() => {
return {
html: document.documentElement.innerHTML,
};
});

//parsing the HTML and picking our elements
const $ = cheerio.load(pageData.html);
let quote_cards = $('div.quote');
quote_cards.each((index, element) => {
quote = $(element).find('span.text').text();
author = $(element).find('.author').text();

//pushing our data into a formatted list
scraped_quotes.push({
'Quote': quote,
'By': author,
})
});

//console logging the results
console.log(scraped_quotes);

//closing the browser
await browser.close();
})();

<p>
Resulting in a formatted list of data:
Cheerio vs. Puppeteer in Web Scraping: Both Win
We hope you enjoyed this quick overview of arguably the two best web scraping tools available for Javascript/Node.js. Although in most cases you’ll want to use Cheerio over Puppeteer, for those extra complex projects Puppeteer brings the extra tools you’ll need to get the job done.
We created a more in-depth Cheerio and Puppeteer tutorial for beginners. You can learn more about these two libraries.
However, you can also use ScraperAPI to lower the complexity of the code by using our Javascript rendering capabilities. By just setting the render=true parameter inside the request, ScraperAPI will render the page before sending back the raw HTML data for Cheerio to use.
ScraperAPI will help you boost development time and prevent your script from being blocked by advanced anti-scraping mechanisms like browser profiling and CAPTCHAs by automation IP rotation, CAPTCHA handling, and using years of statistical analysis to determine the best headers for each request.
You can sign up for ScraperAPI and receive 5000 free API credits to kickstart your project.
Until next time, happy scraping!
Other Puppeteer and popular web scraping tutorials that may interest you:
- How to Scrape Amazon Product Data With Node.js and Puppeteer [Easy Guide]
- Web Scraping Without Getting Blocked – 10 Must-Follow Tips
- How to Build LinkedIn Data Scraper with Python (Easy Guide)
- How to Bypass and Scrape Cloudflare Protected Sites with Python
- How to Use Custom HTTP Headers and Cookies for Web Scraping