
Scraping football data (or soccer in the US) is a great way to build a comprehensive dataset that can then be used to help us create stats dashboards, run cross-analysis and use the insights for sports journalism or fantasy leagues.
Whatever your goal is, scraping football data can help you gather all the information you need to make it a reality. In this tutorial, we’re going to build a simple football data scraper with Axios and Cheerio in Node.js.
A Few Things to Consider Before Starting
Although you’ll be able to follow along with this tutorial without any prior knowledge, you’ll need a little experience in web scraping to make the most out of it and use this information in other contexts.
If you’re new to web scraping, we recommend you read our basics of web scraping in Node.js guide and our tutorial on how to build an eBay scraper to learn more about async/await.
Also, an understanding of the fundamentals of HTML and Javascript is recommended.
Building a Football Dataset with Web Scraping
1. Picking a Data Source
Although there are fundamental principles that apply to every web scraping project, every website is a unique puzzle to be solved. So is choosing where you’ll get your data from and how exactly you’ll use it.
Here are a few sources you could use to obtain football data:
For simplicity’s sake, we’ll be scraping BBC’s premier league table page, as it has all the information we’ll be scraping directly inside the HTML document, and because a lot of the data found on these websites are in the form of tables, making it crucial to learn how to scrape them effectively.
Note: Other websites like ESPN use JavaScript to inject the table’s content into the page, making it harder for us to access the data. That said, we’ll be dealing with those kinds of tables in a later entry.
2. Understanding HTML Tables
Tables are a great way to organize content and display a higher view of datasets, allowing us humans to understand it easier.
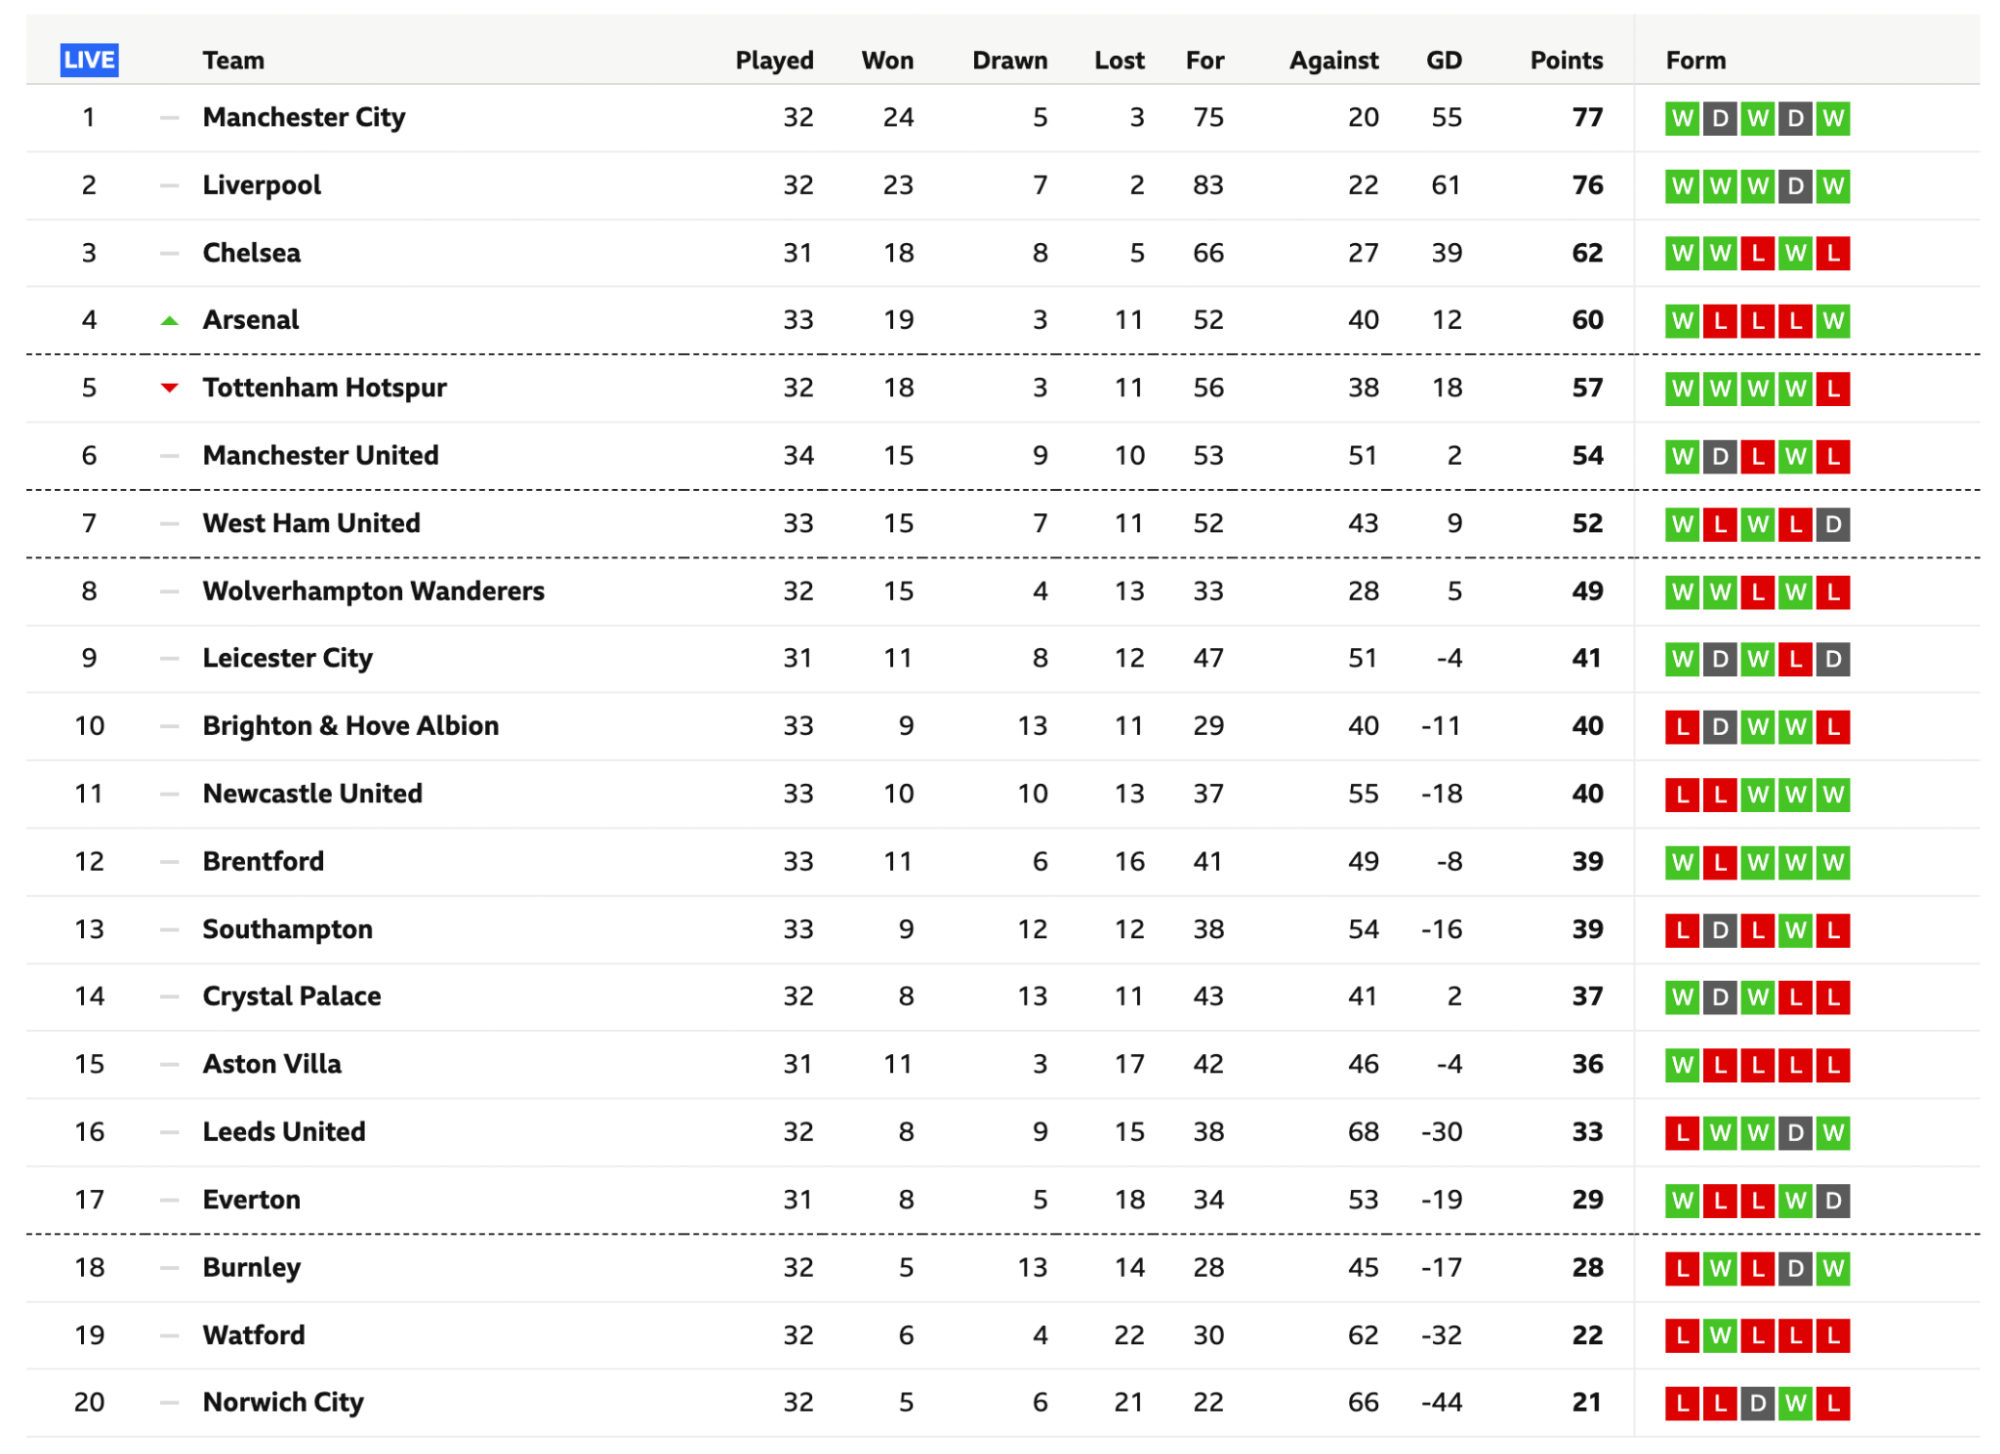
At first glance, every table is made up of two major elements: columns and rows. However, the HTML structure of tables is a little more complex than that.
Tables start with a <table> tag, telling the browser to render everything inside of it as a table. To define a row we use the <tr> tag and <td> for each table cell inside a <tr>. Something else we’ll see a lot are headers, which are represented by a <th> tag within the rows.
Here’s an example from W3school:
</p>
<table>
<tbody>
<tr>
<th>Month</th>
<th>Savings</th>
</tr>
<tr>
<td>January</td>
<td>$100</td>
</tr>
<tr>
<td>February</td>
<td>$80</td>
</tr>
</tbody>
</table>
<p>
Let’s explore our target table with this structure in mind by inspecting the page.
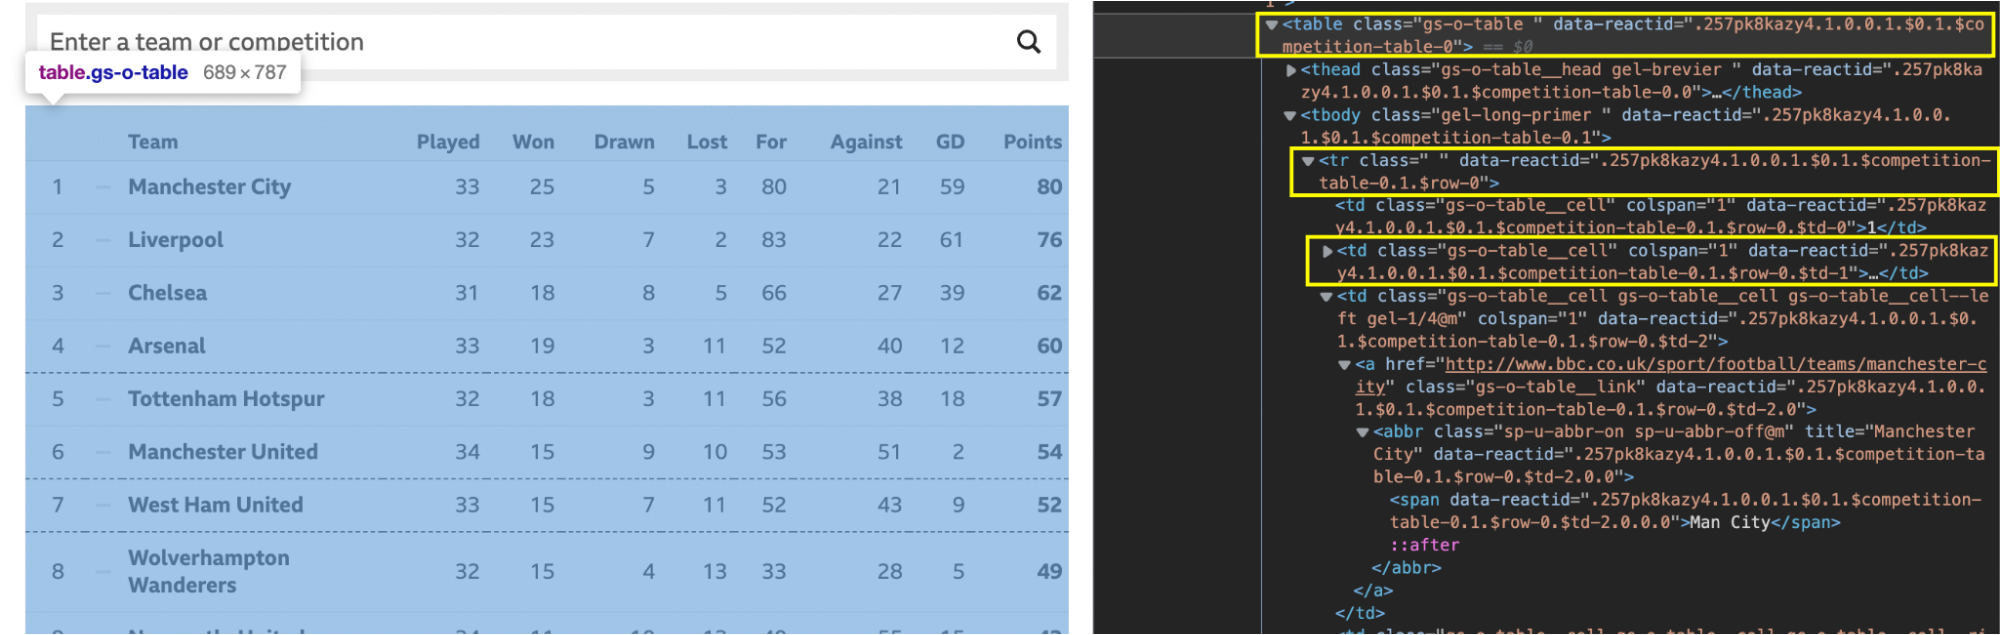
The code is a little messy, but this is the kind of HTML file you’ll find in the real world. Despite the mess, it still respects the <table>, <tr> and <td> structure we discussed above.
So what’s the best approach to scraping the football data in this table? Well, if we can create an array containing all rows, we can then iterate through each of them and grab the text from every cell. Well, that’s the hypothesis anyway. To confirm it, we’ll need to test a few things in our browser’s console.
3. Using Chrome’s Console for Testing
There are a couple of things we want to test. The first thing to test is whether the data resides in the HTML file, or if it’s being injected into it. We’ve already told you it does reside in the HTML file, but you’ll want to learn how to verify it on your own for future football scraping projects on other sites.
The easiest way to see whether or not the data is being injected from elsewhere is to copy some of the text from the table – in our case we’ll copy the first team – and look for it in the page source.
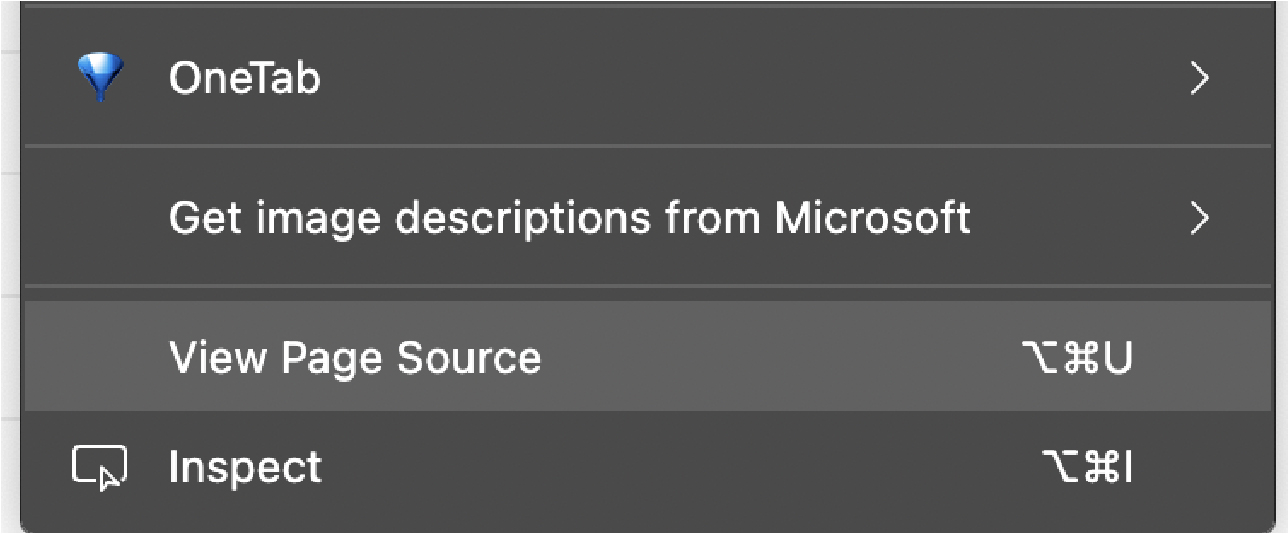
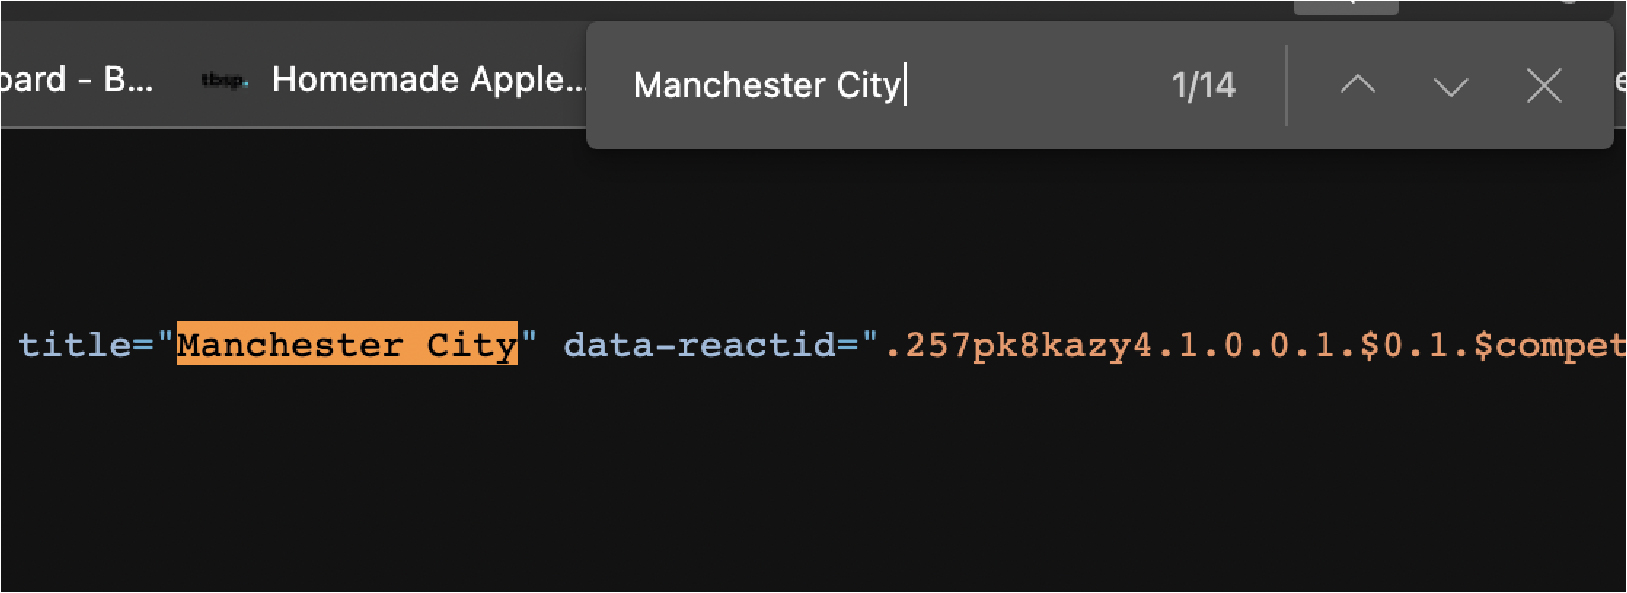
Do the same thing with a few more elements to be sure. The page source is the HTML file before any rendering happens, so you can see the initial state of the page. If the element is not there, that means the data is being injected from elsewhere and you’ll need to find another solution to scrape it.
The second thing we want to test before coding our scraper is our selectors. For this, we can use the browser’s console to select elements using the .querySelectorAll() method, using the element and class we want to scrape.
The first thing we want to do is select the table itself.
</p>
document.querySelectorAll("table")
<p>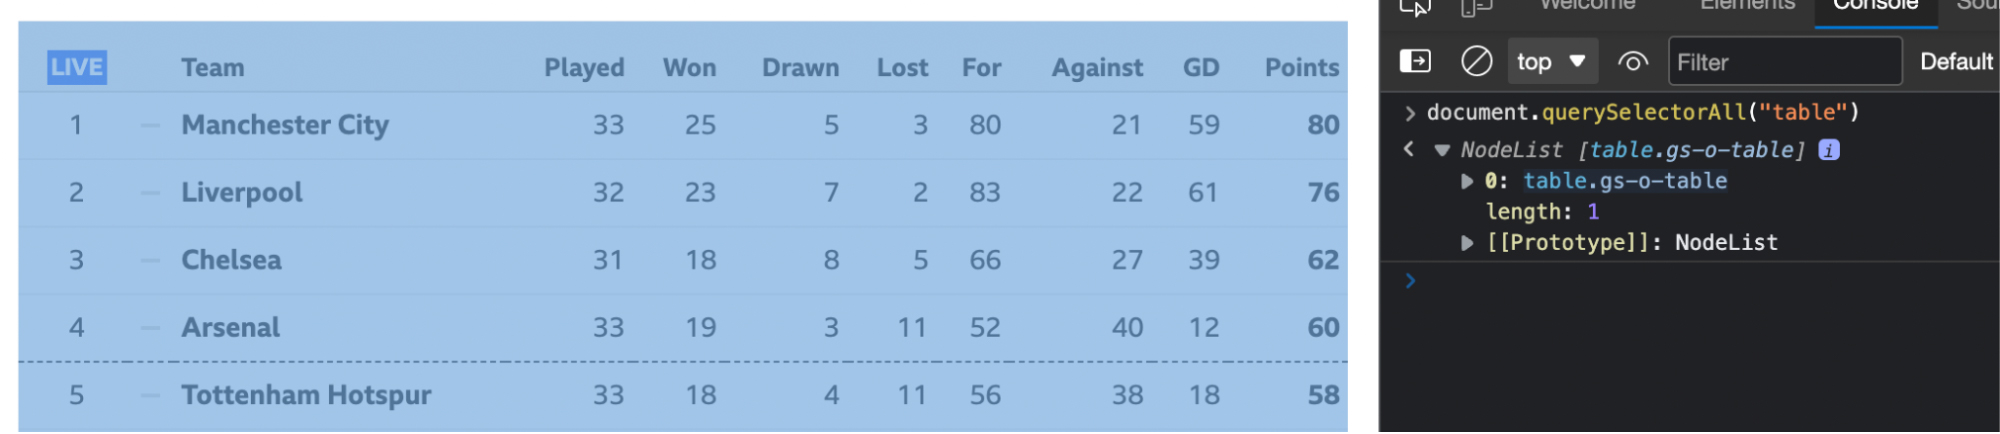
From there, we can use the child operator “>” to grab the next element
– which contains all the rows of the table.
</p>
document.querySelectorAll(“table > tbody”)
<p>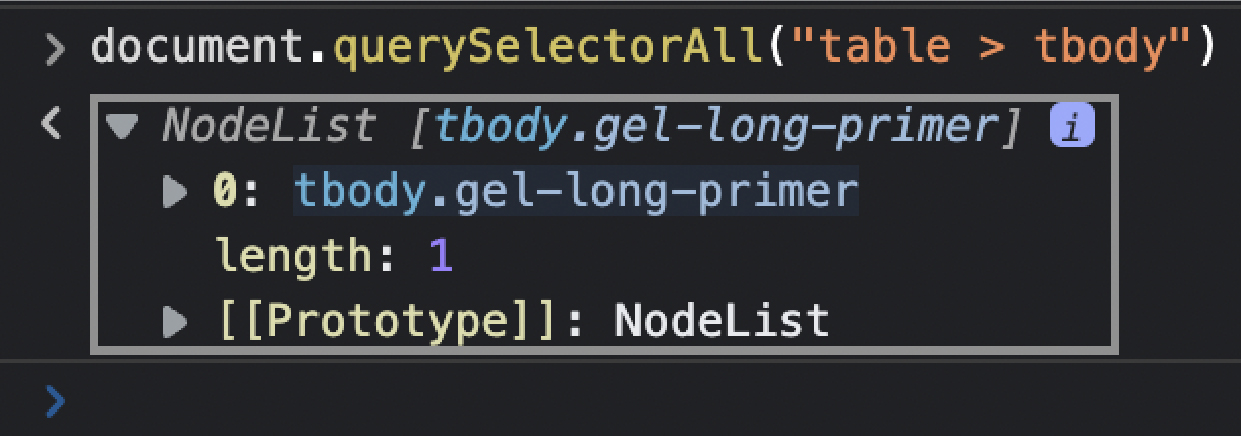
Finally we’ll select all the <tr> elements in the table: document.querySelectorAll(“table > tbody > tr”)
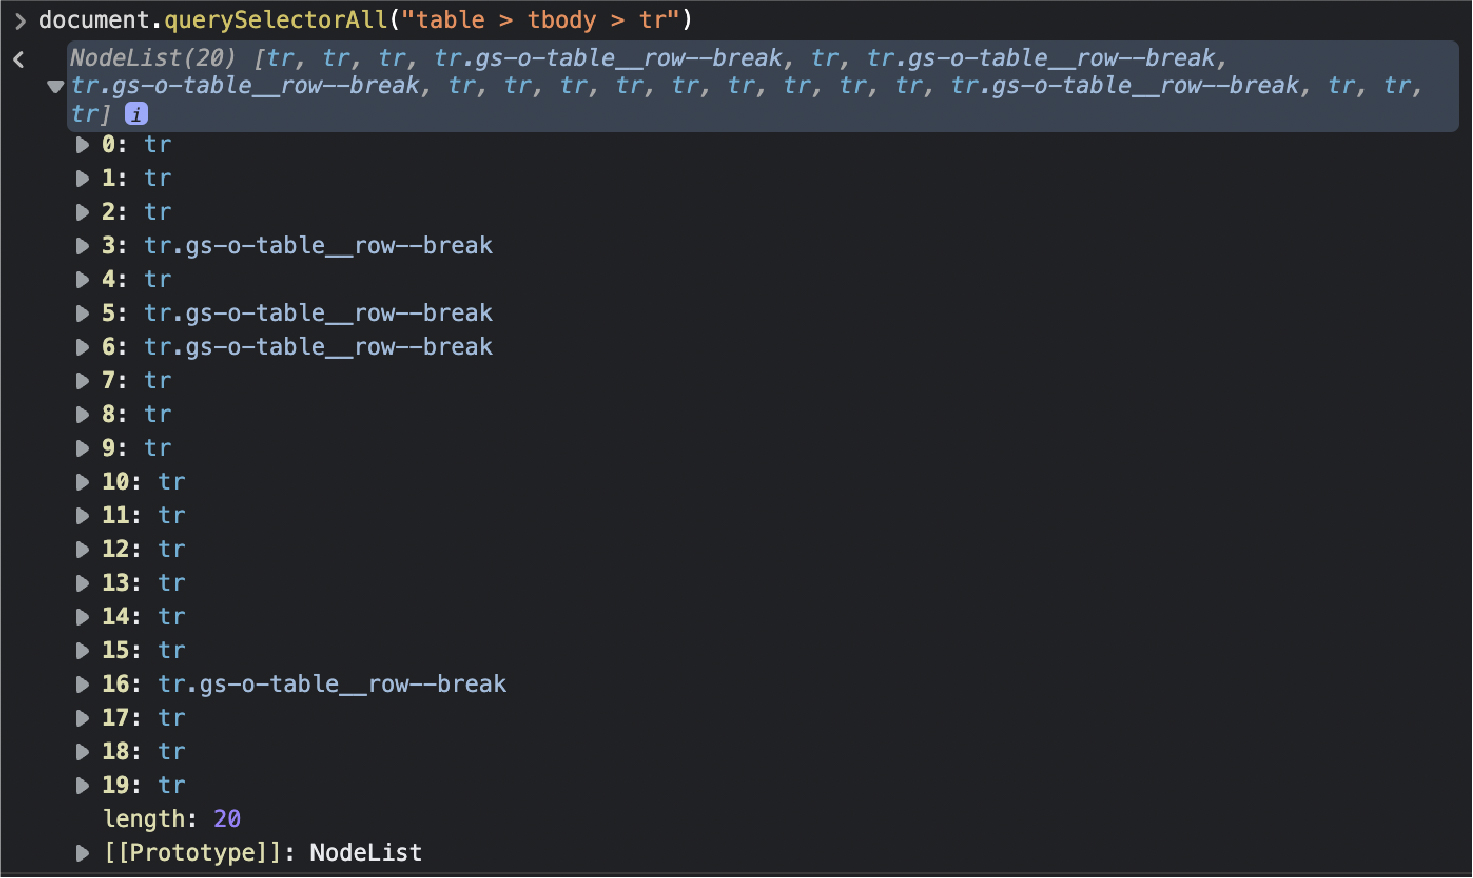
Awesome, 20 nodes! It matches the number of rows we want to scrape, so we now know how to select them with our scraper.
Note: Remember that when we have a node list, the count starts at 0 instead of 1.
The only thing missing is learning the position of each element in the cell. Spoiler alert, it goes from 2 to 10.


Awesome, now we’re finally ready to go to our code editor.
4. Getting Our Environment Ready
To begin the project, create a new directory/folder and open it in VScode or your preferred code editor. We’ll install Node.js and NPM first, then open your terminal and start your project with the command npm -y init.
Then, we’ll install our dependencies using NPM:
Everything is ready to create our index.js file and call our dependencies at the top.
</p>
const axios = require("axios");
const cheerio = require("cheerio");
const ObjectsToCsv = require("objects-to-csv");
<p>
5. Sending the Initial Request
We’ll want to build our scraper as an async function so we can use the await keyword to make it faster and more resilient. Let’s open our function and send the initial request using Axios by passing the URL to it and storing the result in a variable called response. To test if it’s working , log the status of the response.
</p>
(async function () {
const response = await axios('https://www.bbc.com/sport/football/tables');
console.log(response.status)

})();


<p>
6. Passing the Response to Cheerio for Parsing
We’re going to store the response’s data as a variable (we’ll name it html for simplicity) and pass it to Cheerio with the .load() method, inside a dollar sign $ variable, just like JQuery.
</p>
const html = await response.data;
const $ = cheerio.load(html)

<p>
Cheerio will parse the raw HTML data and turn it into a node tree we can navigate using CSS selectors like back on the browser’s console.
7. Building the Parser
Writing our parser is way easier having already tested the selectors in the browser’s console. Now we just need to translate it into Node.JS. For starters, we’ll grab all the rows in the table:
</p>
const allRows = $("table.gs-o-table > tbody.gel-long-primer > tr");
<p>
Again, try to name your variables something that makes sense. It will save you time on bigger projects, and make it so that anyone can understand what each part of your code does.
In Node.JS, we can use the .each() method to loop through all of the nodes and select the
elements. Take a closer look at the code to figure out exactly what’s going on:
</p>
 allRows.each((index, element) => {
const tds = $(element).find('td');
const team = $(tds[2]).text();
const played = $(tds[3]).text();
const won = $(tds[4]).text();
const drawn = $(tds[5]).text();
const lost = $(tds[6]).text();
const gf = $(tds[7]).text();
const against = $(tds[8]).text();
const gd = $(tds[9]).text();
const points = $(tds[10]).text();
<p>
Notice that we first store all the <td> elements into a tds variable that we can then use to pick every cell by their positions in the index.
Let’s test one of these elements to make sure that it’s working and so we can see what it returns:
</p>
 allRows.each((index, element) => {
const tds = $(element).find('td');
const team = $(tds[2]).text();
console.log(team)
});

<p>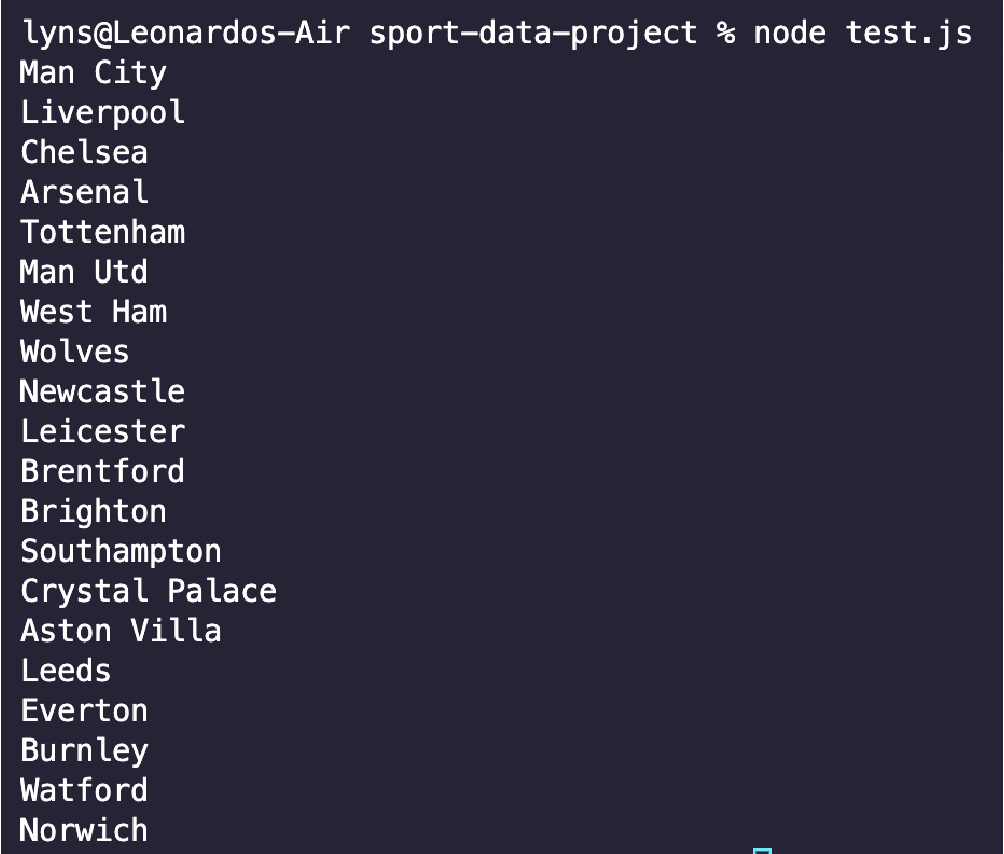
As you can see, it returns an ordered list rather than a long string – exactly what we need for the next step.
8. Saving Football Data Into a CSV File
We’ll break this process into three steps.
- Create an empty array outside of the main function.
</p>
premierLeagueTable = [];
<p>- Next, push each element scraped into the array using the .push() method and use a descriptive name to label them. You want them to match the headers from the table you’re scraping.
</p>
premierLeagueTable.push({
'Team': team,
'Played': played,
'Won': won,
'Drawn': drawn,
'Lost': lost,
'Goals For': gf,
'Goals Against': against,
'Goals Difference': gd,
'Points': points,
})
<p>- Third, use ObjectToCsv to create a new CSV file and save it into your machine with the .toDisk() method, including the file path and name of the file.
</p>
const csv = new ObjectsToCsv(premierLeagueTable);

await csv.toDisk('./footballData.csv')
<p>
That’s all we need to export our data. We could also create the sheet ourselves but there’s no need. ObjectToCsv makes the process super fast and easy.
9. Test Run and Full Code
We added a few console.log() statements for testing purposes but other than that, you should have the same code as the one below:
</p>
const axios = require("axios");
const cheerio = require("cheerio");
const ObjectsToCsv = require("objects-to-csv");

premierLeagueTable = [];

(async function () {
const response = await axios('https://www.bbc.com/sport/football/tables');
console.log('Loading tables')
console.log(response.status)
const html = await response.data;
const $ = cheerio.load(html);

const allRows = $("table.gs-o-table > tbody.gel-long-primer > tr");
console.log('Going through rows')
allRows.each((index, element) => {
const tds = $(element).find('td');
const team = $(tds[2]).text();
const played = $(tds[3]).text();
const won = $(tds[4]).text();
const drawn = $(tds[5]).text();
const lost = $(tds[6]).text();
const gf = $(tds[7]).text();
const against = $(tds[8]).text();
const gd = $(tds[9]).text();
const points = $(tds[10]).text();
premierLeagueTable.push({
'Team': team,
'Played': played,
'Won': won,
'Drawn': drawn,
'Lost': lost,
'Goals For': gf,
'Goals Against': against,
'Goals Difference': gd,
'Points': points,
})
});
console.log('Saving data to CSV');
const csv = new ObjectsToCsv(premierLeagueTable);
await csv.toDisk('./footballData.csv')
console.log('Saved to csv');
})();

<p>
Run it with node index.js, and in less than a second you’ll have a CSV file ready to use.
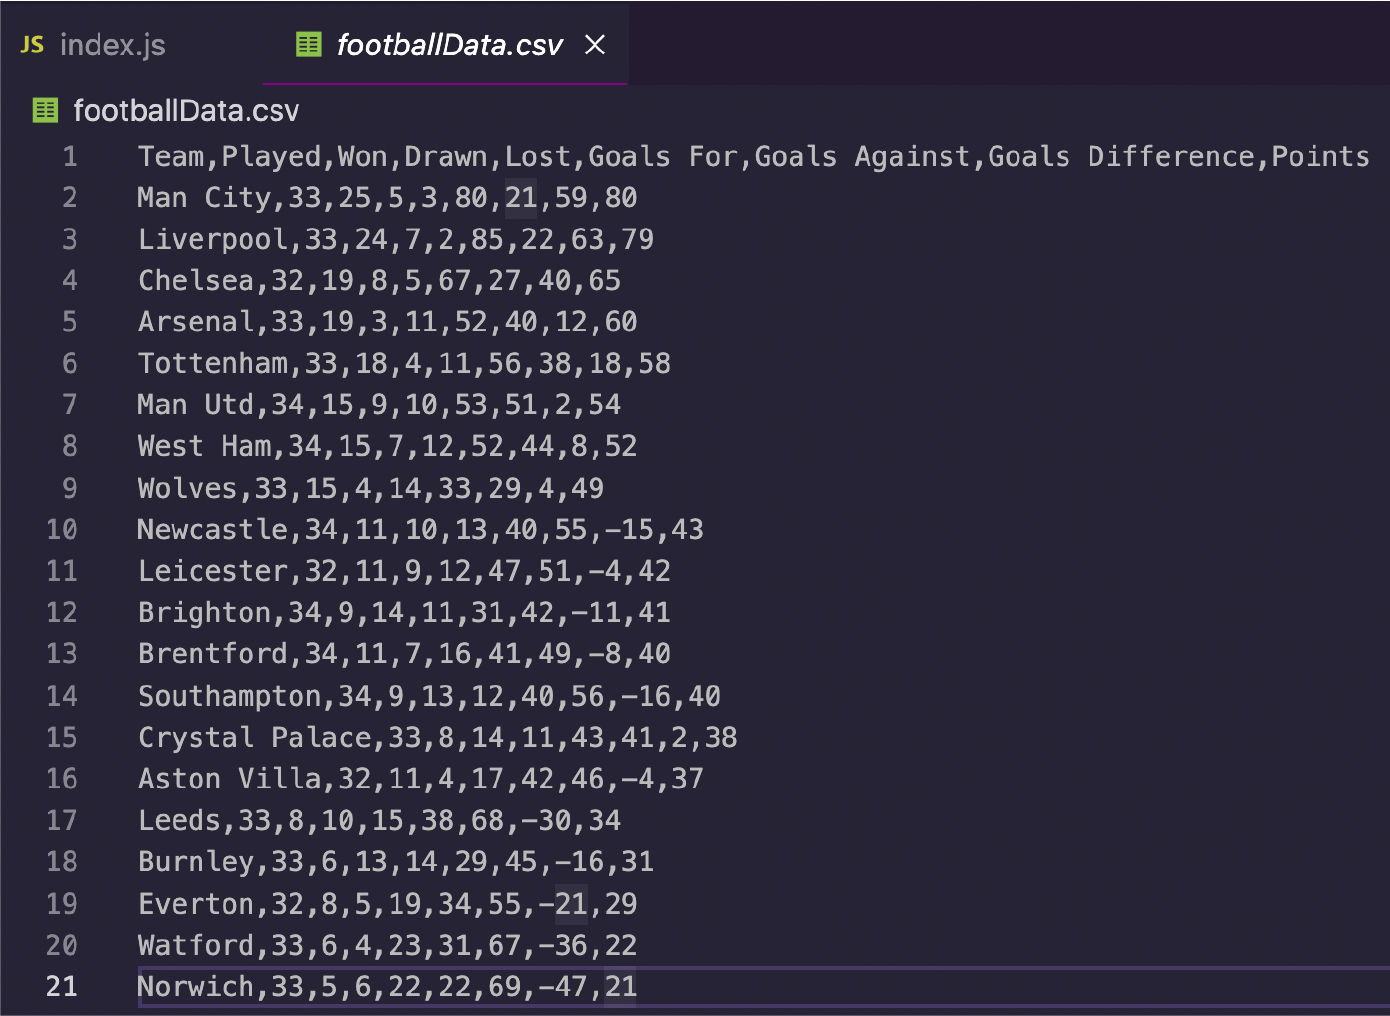
You can use the same process to scrape virtually any HTML table you want and grow a huge football dataset for analytics, result forecasting, and more.
10. Integrate ScraperAPI into Your Football Web Scraper
Let’s add a layer of protection to our scraper by sending our request through ScraperAPI. This will help us scrape several pages without risking getting our IP address blocked or being permanently banned from those pages.
First, let’s create a free ScraperAPI account to get 5000 free API calls and our key. There we’ll also see the cURL example we’ll need to use in our initial request.

As you can see, all we need to do is to replace the URL in the example with our target URL and ScraperAPI will do the rest.
</p>
 const response = await axios('http://api.scraperapi.com?api_key=51e43be283e4db2a5afb62660fc6ee44url=https://www.bbc.com/sport/football/tables');
<p>
Our request may take a little longer but in return it will rotate our IP address automatically for every request, use years of statistical analysis and machine learning to determine the best header combination and handle any CAPTCHA that might appear.
We hope you’ve enjoyed this tutorial and learned a few new tricks to add to your web scraping arsenal. It’s important that you understand how the table is organized in the HTML file before writing any code, so try to tackle every new project with that philosophy in mind.
Although some sources provide a public API, there’s value in being able to build your own database, as you can get information from different sources without the limits imposed by some APIs. However, in those cases, we highly recommend using ScraperAPI or similar tools to protect your IP address from blacklists and permanent bans.
Until next time, happy scraping!