
Customer reviews are more than just feedback. They are a rich, often untapped source of business intelligence. Paying close attention and analyzing what your customers say about their experience with your products can uncover real pain points, spot trends in complaints, and even discover areas for opportunities that might be invisible otherwise.
Scraping dynamic, high-traffic websites like Walmart can be a challenging task. Even locating the correct JavaScript tags with the data you want can be confusing and seem like an impossible task. Luckily for us, ScraperAPI provides a dedicated endpoint specifically for scraping Walmart reviews.
This article will guide you through building a unique tool that analyzes Walmart customer feedback. By using ScraperAPI’s structured Walmart reviews async endpoint, we will scrape reviews for multiple products and utilize VADER to pinpoint the emotional tone of each review.
Furthermore, we will utilize Gemini to transform this raw data into a clear, actionable report that includes recommendations, all displayed in a free, cloud-hosted web interface built with Streamlit.
Understanding VADER for Sentiment Analysis
Sentiment analysis is a method for identifying the emotions expressed in a piece of text. Since VADER (Valence Aware Dictionary and Sentiment Reasoner) is the sentiment analysis tool we’re using in this project, it’s best to understand how it works and its benefits before diving deeper.
VADER uses a predefined dictionary (lexicon) where each word is allotted a sentiment score. These scores reflect how positive, negative, or neutral a term is. In this project, VADER assigns two key metrics to each review we analyze: polarity and subjectivity.
Polarity represents the overall sentiment of a review, ranging from negative to positive. A score closer to +1 indicates a more positive review, while a score closer to -1 means a more negative review. A score near 0 signifies a neutral review. VADER calculates each score by assessing the sentiment intensity of individual words in the review, referencing its built-in dictionary.
Here’s more information on VADER that includes key advantages and features:
1. Handles Informal Language Well
VADER is excellent at analyzing the kind of casual language people use on social media. It can easily understand and interpret slang, irregularly capitalized words, and even emotional cues through punctuation, such as multiple exclamation points and emojis. With most sentiment analysis tools, it’s challenging to achieve this, making VADER particularly well-suited for our task.
2. Provides Context-Aware Sentiment Adjustment
Instead of treating words in isolation, VADER utilizes smart rules to interpret context. When a sentence includes words like “not,” it flips the meaning, such that, while “good” is positive, “not good” becomes negative.
It also notices if certain words are in all caps or if there are many exclamation points, which usually means the emotion is stronger. And, it gives priority to words like “very” or “slightly,” especially when they appear before an adjective, to figure out exactly how strong the emotion is.
3. Gives an Overall Mood Score
VADER wraps up all its analysis in a single number called the compound score, which ranges from -1 to +1. This score tells you at a glance whether the overall review feels positive (closer to +1), negative (closer to -1), or neutral (around 0). It’s like a summary mood indicator that combines all the word scores and context tweaks into one easy-to-understand value.
ScraperAPI’s Walmart Reviews API (Async Endpoint)
Web scraping is difficult for several reasons. Modern websites are built with dynamic JavaScript frameworks, which means that most of the content isn’t available in the static HTML. In practice, you’d need to understand JavaScript and know your way around web development tools to locate and extract the data you need.
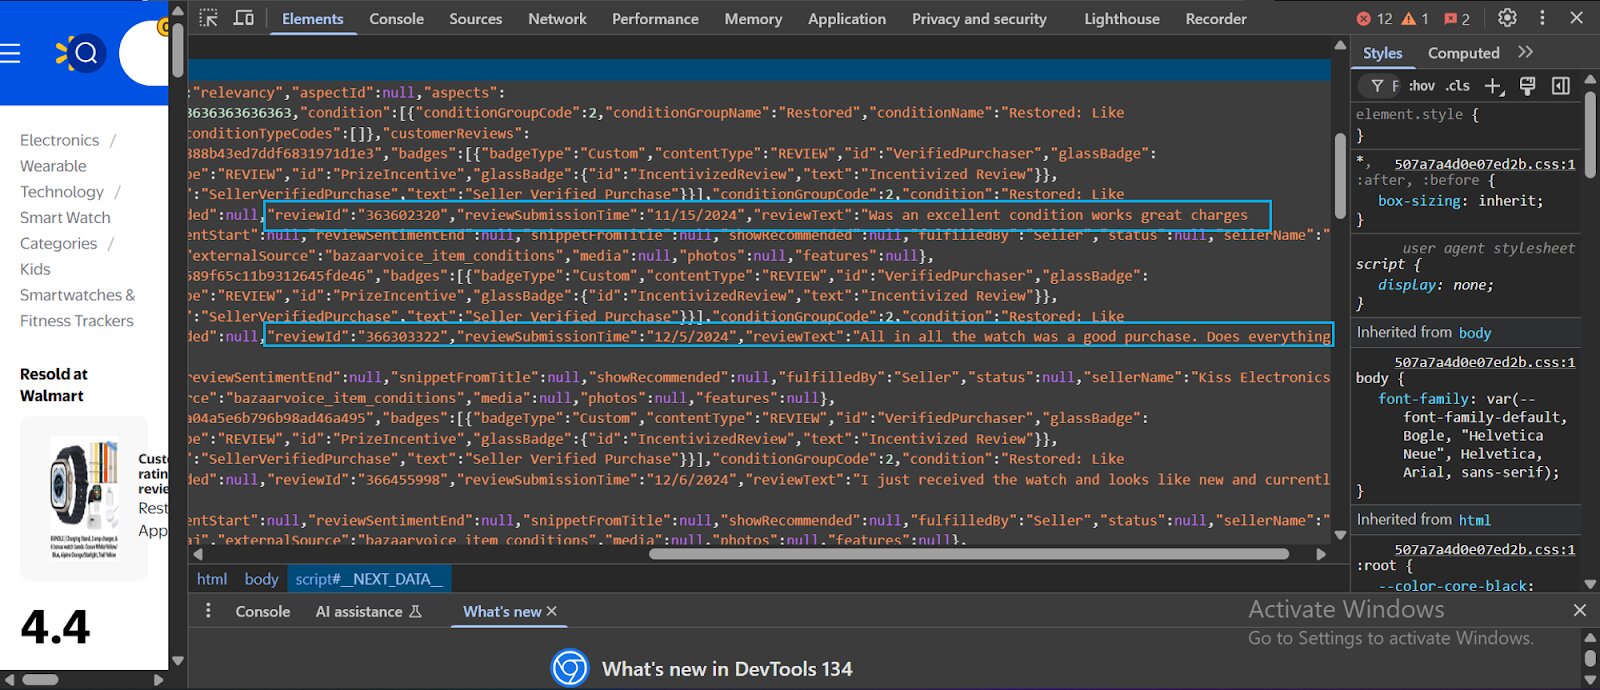
When scraping a website, the tool you use first must bypass several anti-scraping defenses that many sites employ these days. Once it’s through, it immediately comes in contact with a mountain of code. The image below shows a real-life example of the code behind Walmart’s website (right-click and select “Inspect” to see the same image below on a Walmart website) :

The code in the Elements section of a webpage is often buried under multiple layers of HTML, making it tricky to find exactly where the data is coming from. To navigate this, you typically need a good understanding of HTML, CSS, and JavaScript.
But what if you’re not a front-end developer? If you’re a data analyst, scientist, or engineer, your primary language probably isn’t JavaScript.
In most cases, you’ll need to use your browser’s developer tools to inspect the page and locate the specific elements, like reviews, ratings, or dates, that contain the data you want to scrape.
Tools like Selenium and Puppeteer can help simulate user behavior, but they add layers of complexity. If we wanted to scrape this Walmart site, usually, here’s an ideal process we’d have to go through just to locate and extract that data:
- First, you have to locate the parent container within the website’s HTML code that contains the div class where you can find the reviews data:

- Within the div class, search for “<script id = __NEXTDATA__ and type = application/json”
- Within that class, you will find the review data:
Modern websites often use dynamic rendering, which means the data loads asynchronously through JavaScript. As a result, you can’t access it with a simple HTML request—the important information is hidden behind scripts that run after the page loads.
That’s where ScraperAPI’s Walmart Reviews API (Async Endpoint) helps. It’s built to handle these challenges by bypassing Walmart’s anti-scraping defenses and delivering fully rendered page data directly to you.
Even better, the async endpoint lets you target customer reviews specifically—no need to dig through Walmart’s website yourself. While the API runs in the background, your app can continue to run as usual. Once the data is ready, you’ll get a status update.
More About ScraperAPI’s Asynchronous Feature
ScraperAPI’s async feature overcomes the challenges of large-scale web scraping, especially on websites with stringent anti-scraping measures. Instead of waiting for immediate responses that can result in timeouts and low success rates, you submit one or more scraping jobs and retrieve the results later while utilizing other functionalities within your app.
How it works is that you send a POST request with your API key and URL, using the /jobs endpoint for single URLs or the /batchjobs endpoint for multiple URLs. The service immediately assigns a unique job ID and status URL. You then poll that status URL to monitor progress until you receive the scraped content in the JSON “body” field.
This asynchronous process gives ScraperAPI more time to navigate complex websites, manage timeouts, adjust HTTP headers, and render content that is heavy on JavaScript. You also set up webhook callbacks, so the service automatically delivers data once your job is complete.
ScraperAPI’s async approach handles the heavy lifting, so you can focus on other aspects of your application instead of waiting for data to scrape fully. As a result, you receive clean, structured data that’s ready for further processing.
Getting Started with ScraperAPI
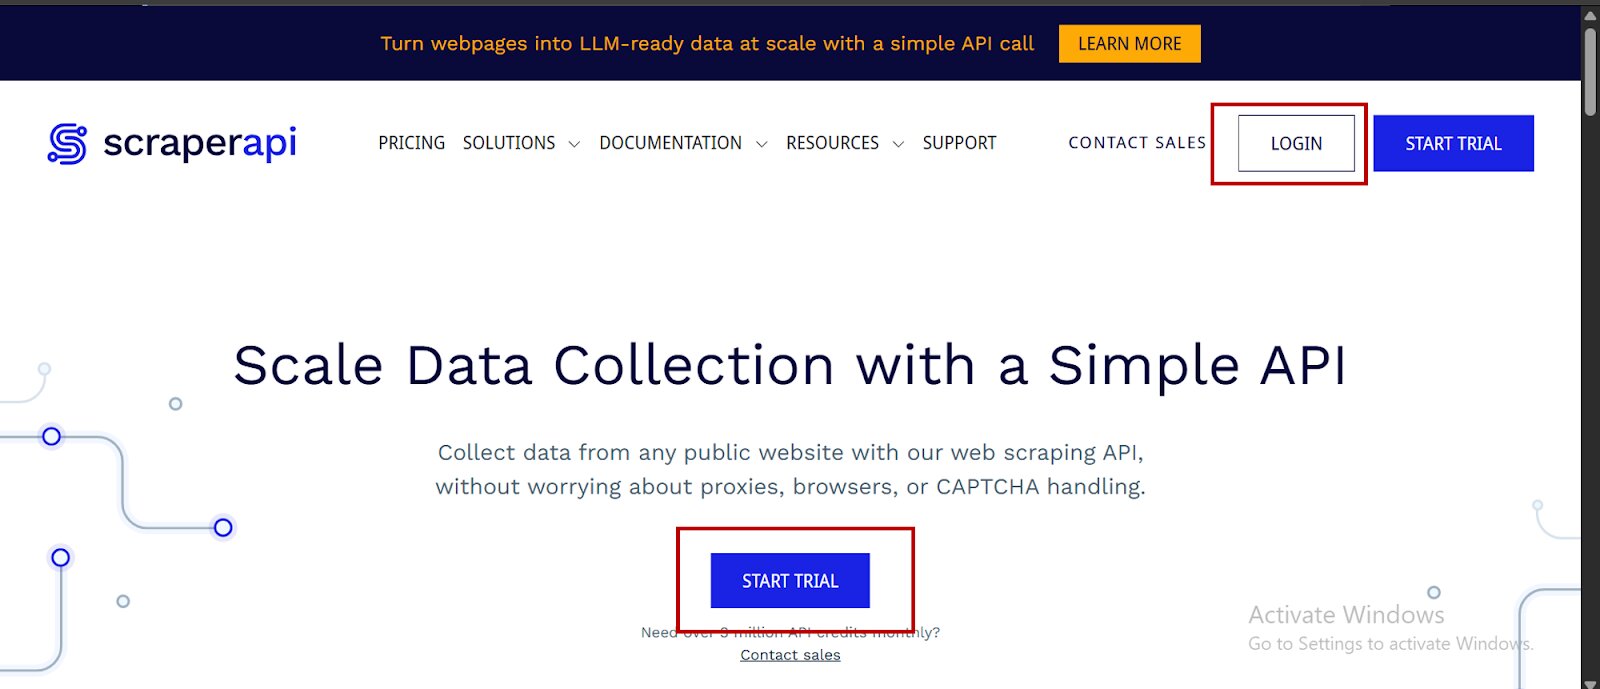
- To begin, go to ScraperAPI’s website.
- You can either log in if you have an account already or click on “Start Trial” to create one:
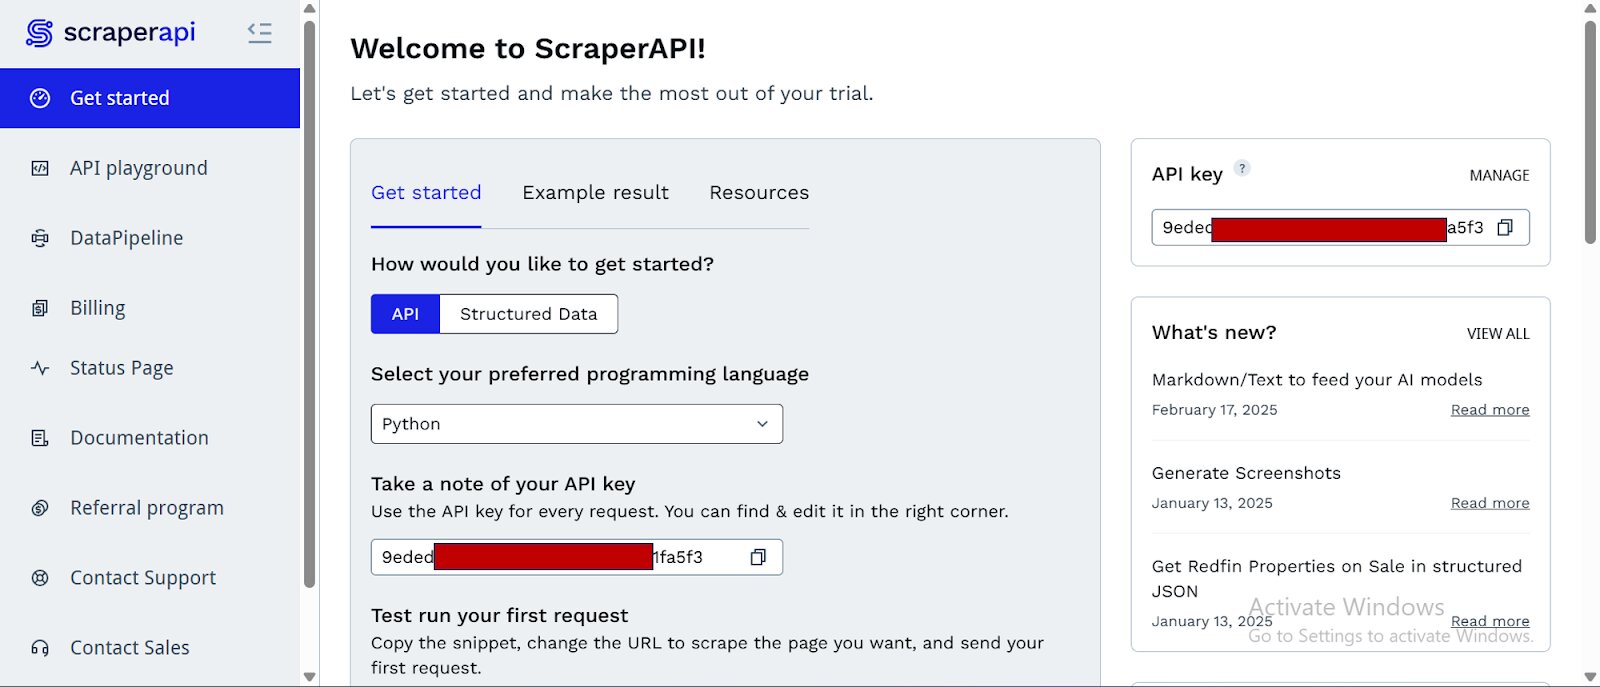
- After creating your account, you’ll see a dashboard providing you with an API key, access to 5000 API credits (7-day limited trial period), and information on how to get started scraping.
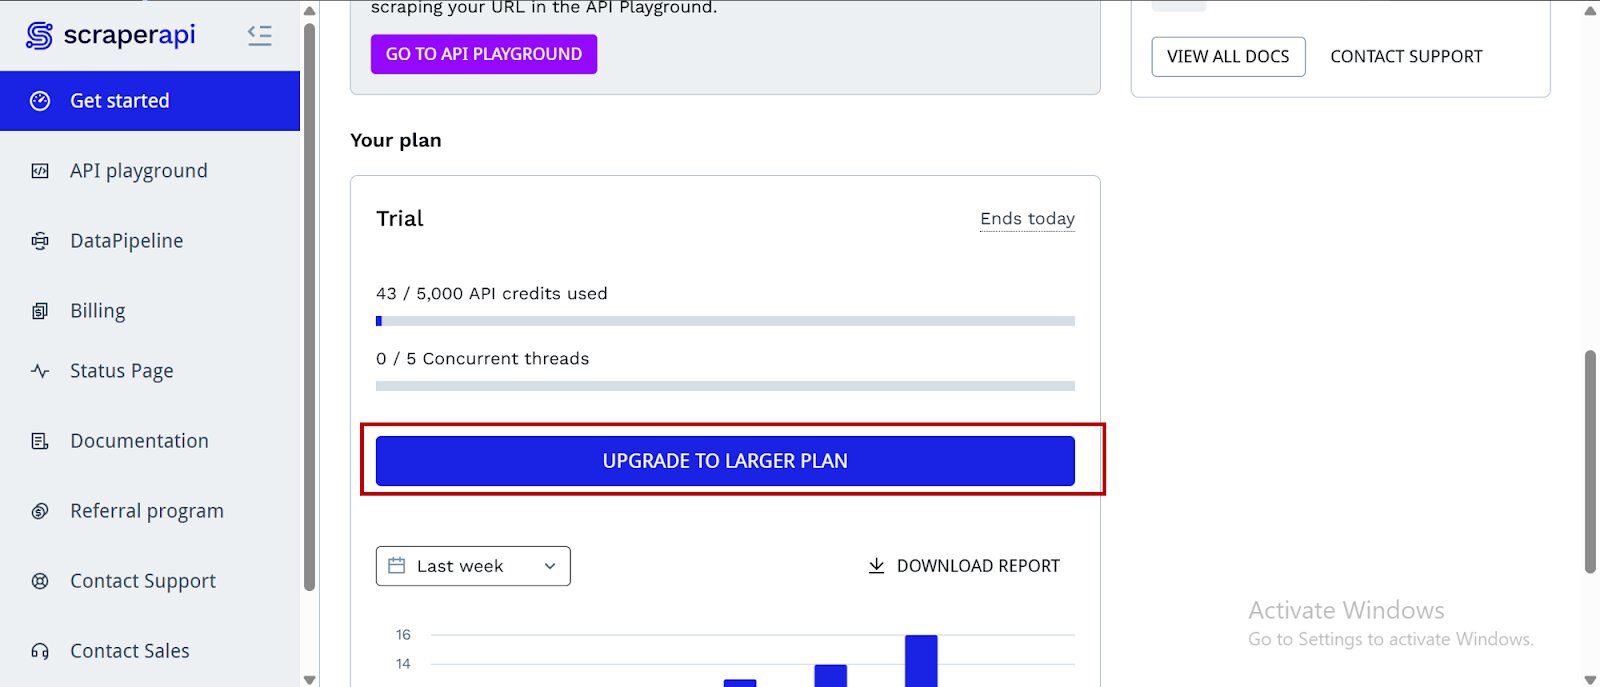
- To access more credits and advanced features, scroll down and click “Upgrade to Larger Plan.”
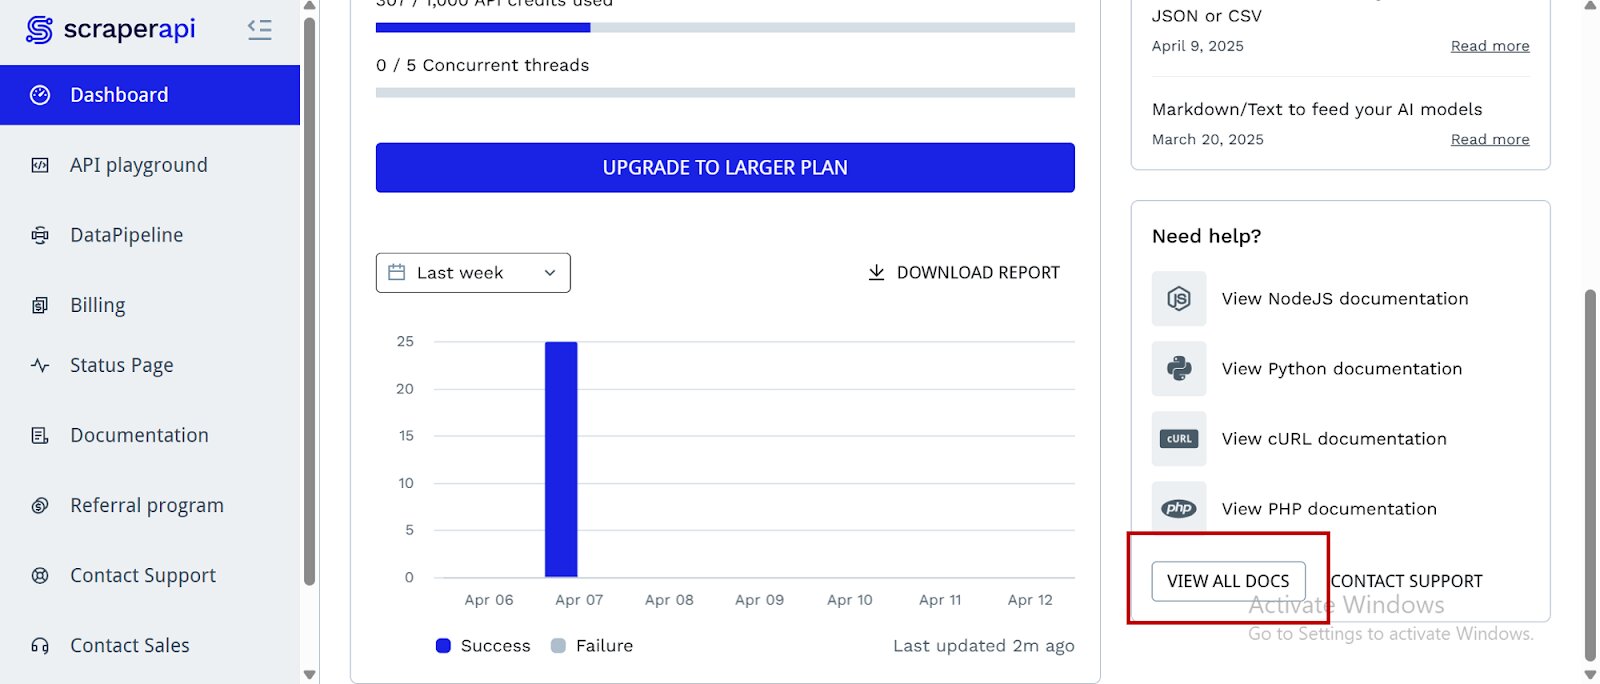
- ScraperAPI provides documentation for various programming languages and frameworks that connect to its endpoints, including PHP, Java, Node.js, and more. You’ll find these resources when you scroll down on the dashboard page and select “View All Docs”:
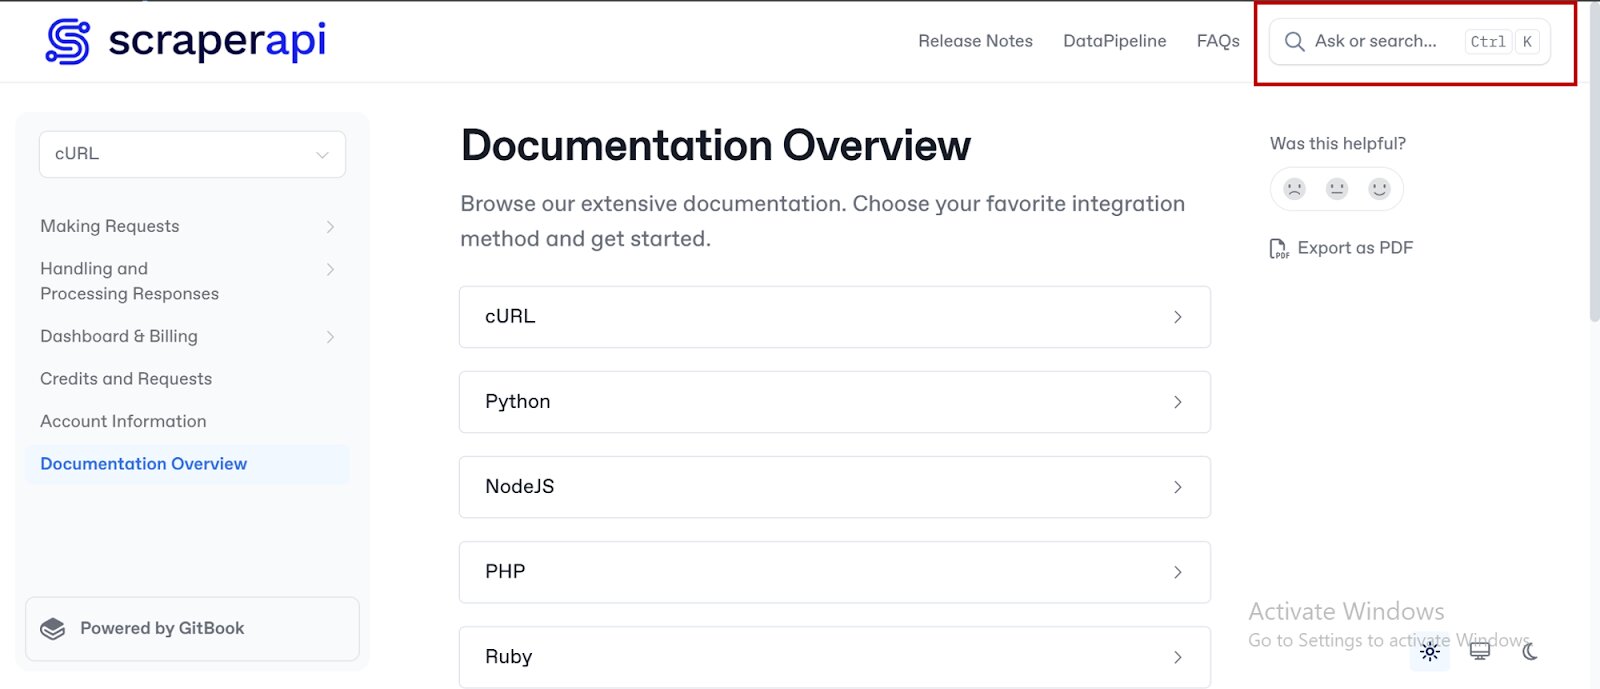
- Locate the search bar in the top right corner:
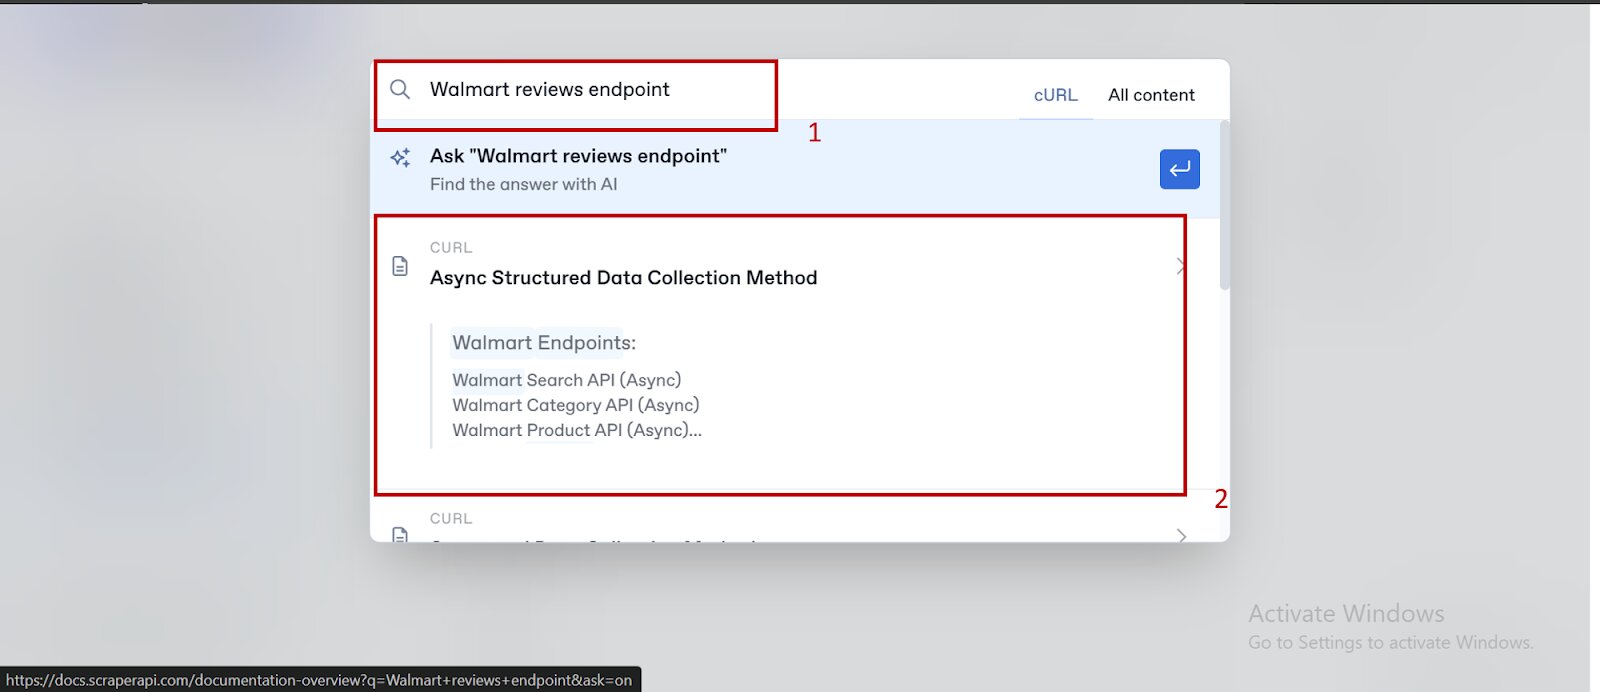
- Search for “Walmart reviews endpoint,” and click on the “Async Structured Data Collection Method” pop-up:
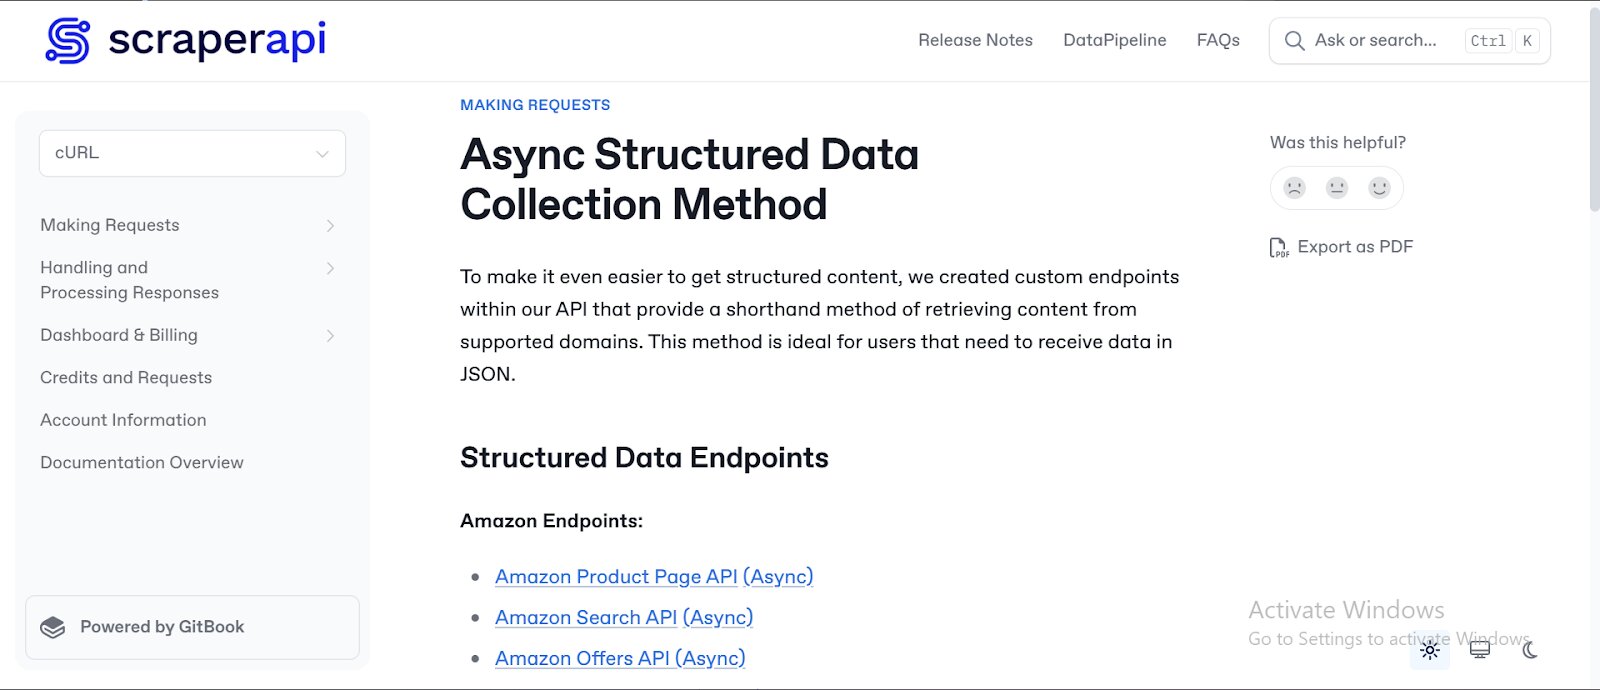
- You’ll be directed to ScraperAPI’s detailed and clear documentation on using the Async Structured Data Collection Method.
- On the documentation page, scroll down until you find the ‘Walmart Endpoint’ section. Then click on “Walmart Reviews API (Async)”
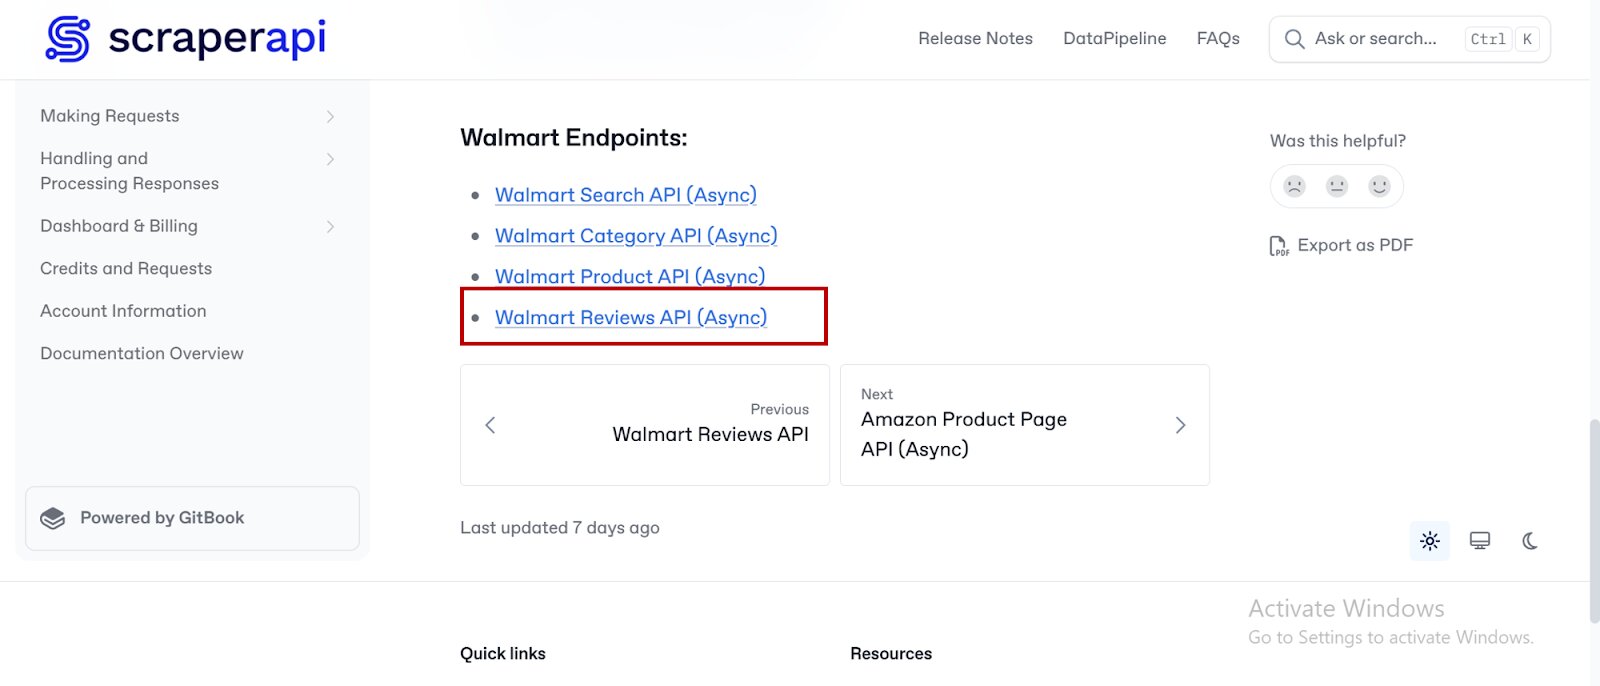
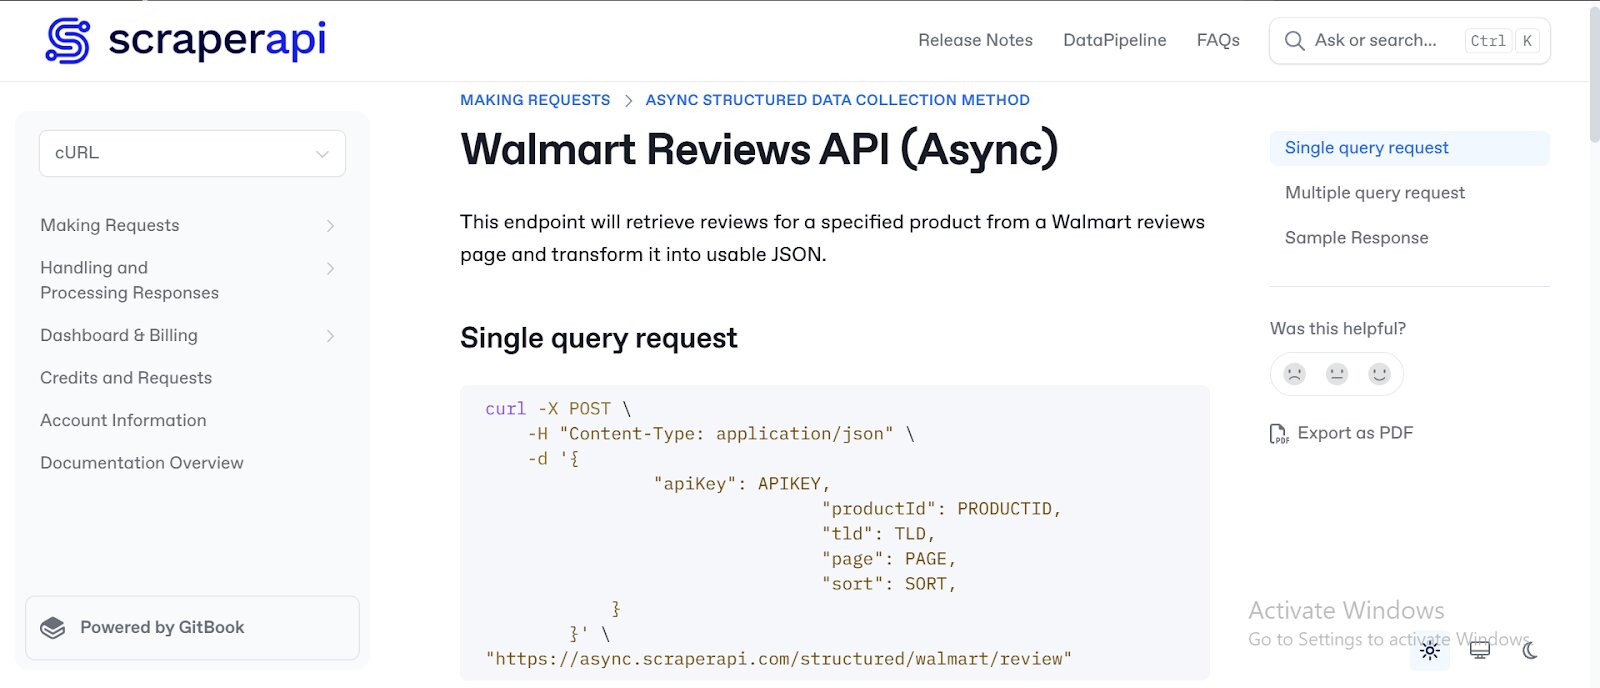
- It will take you to the Walmart Reviews API (Async) documentation, where you’ll find clear instructions and practical examples for using this feature in your application.
Building the Walmart Reviews Analysis Tool
Step 1: Setting Up the Project
Create a new project folder in a virtual environment and install the necessary dependencies.
1. Create the project folder:
mkdir walmart_rev_project
cd walmart_rev_project
2. Set up a virtual environment:
python -m venv venv
Activate the environment:
- Windows:
venvScriptsactivate
- macOS/Linux:
source venv/bin/activate
3. Install Dependencies:
pip install streamlit requests google-generativeai
To access VADER:
pip install nltk
python -c "import nltk; nltk.download('vader_lexicon')"
The key dependencies and their functions are:
- streamlit: To build an interactive web UI for the tool.
- requests: Makes HTTP requests to external services (like ScraperAPI) to send and receive data.
- google-generativeai: Interfaces with Google’s Gemini Large Language Model (LLM) to generate reports from the data we scrape.
- nltk: This is a library that provides natural language processing tools, including sentiment analysis via VADER and text tokenization for processing customer reviews.
- json (Standard Library): Handles JSON encoding and decoding for API responses.
- concurrent.futures (Standard Library): Allows the application to run tasks concurrently using thread-based parallelism.
- datetime (Standard Library): Manages date and time functions, such as timestamping reports and job submissions.
4. Define the Project Structure:
walmart_rev_project/
│── walmart_scraperapi.py
Step 2: Enabling Google’s Gemini LLM
We’ll be using Gemini 1.5 Flash as the large language model (LLM) for this tutorial. To get the same results, follow along and use the same model. Here’s how you can set it up:
- Go to the Google Developer API website.
- Create a Google account if you don’t already have one.
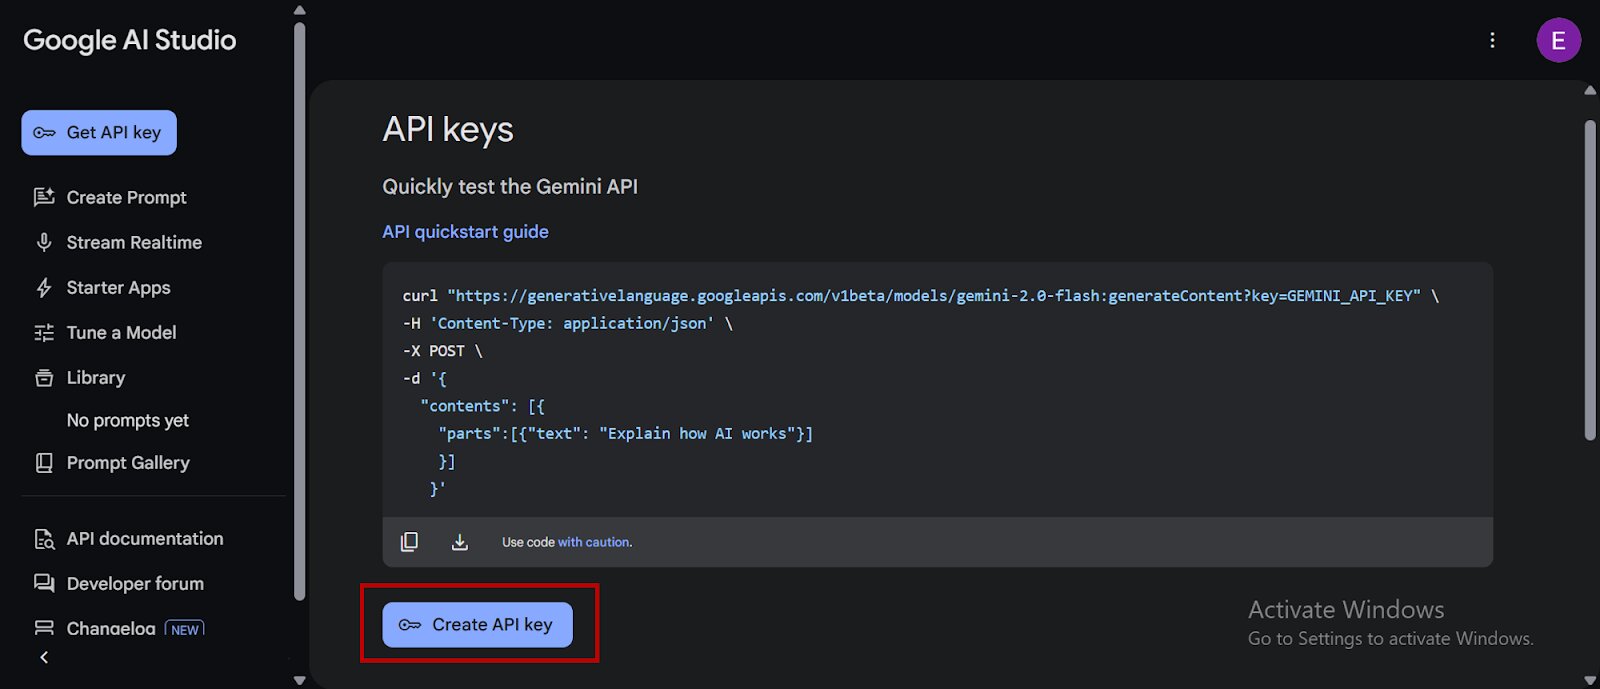
- Click on “Get a Gemini API Key”:

- You’ll be redirected to Google AI Studio, select “Create an API Key,” copy your API key, and store it as an environment variable:
Step 3: Initializing Libraries, VADER and API Keys
Now, let’s build the codebase and create a suitable prompt to guide the LLM in its task.
1. Importing Libraries and Setting Up VADER
First, the tool imports necessary libraries from installed dependencies and configures both Gemini and NLTK’s sentiment analyzer.
import streamlit as st
import requests
import google.generativeai as genai
import nltk
from nltk.sentiment.vader import SentimentIntensityAnalyzer
import json
import concurrent.futures
import datetime
# Download VADER lexicon if not already present
nltk.download('vader_lexicon')
# Initialize VADER sentiment analyzer
analyzer = SentimentIntensityAnalyzer()
The code above achieves the following:
Imports:
streamlit: Builds the web app’s user interface.requests: Enables HTTP requests to interact with external services, such as ScraperAPI.google.generativeai as genai: Integrates Google’s Gemini LLM for language generation capabilities (used later in the script).nltk: Provides tools for working with human language data, specifically for sentiment analysis.nltk.sentiment.vader.SentimentIntensityAnalyzer: A specific NLTK class used to analyze the sentiment of text.json: Enables handling data in JSON format, common for web service responses.concurrent.futures: Allows running tasks concurrently, potentially improving performance.datetime: Provides functionality for working with dates and times, likely for report generation.
VADER Setup:
nltk.download('vader_lexicon'): Downloads the VADER lexicon, a list of words and their sentiment scores, if it’s not already present.analyzer = SentimentIntensityAnalyzer(): Creates an instance of the VADER sentiment analyzer, ready for use.
2. Setting Up the API Keys and Configuring Gemini:
Further down, it sets up the API keys needed for Google Gemini and ScraperAPI and configures the Gemini API.
# Replace with your actual API keys
GOOGLE_API_KEY = "Axxxxxx"  # Replace with your Gemini API key
SCRAPERAPI_KEY = "9xxxxxx"  # Replace with your ScraperAPI key
# Configure Gemini API
genai.configure(api_key=GOOGLE_API_KEY)
Here’s what the code above achieves:
- Set up API Keys: It defines variables to hold the API keys for Gemini and ScraperAPI, which are
GOOGLE_API_KEYandSCRAPERAPI_KEY. Remember to replace the placeholder values with your actual API keys so the application can use these services. - Configuring Gemini:
genai.configure(api_key=GOOGLE_API_KEY)configures the Google Generative AI library(genai)to use the provided API key, allowing the application to authenticate and interact with the Gemini language model.
Step 4: Building the Sentiment Analysis Function
The function below, analyze_sentiment, takes text as input and initializes VADER to determine its polarity and subjectivity.
def analyze_sentiment(text):
    scores = analyzer.polarity_scores(text)
    polarity = scores['compound']
    subjectivity = 1 - scores['neu']
    return polarity, subjectivity
Below is a further breakdown of what the code above does:
- Function Definition: It defines a function named
analyze_sentimentthat accepts a single argument,text, which will contain the input string we need to perform sentiment analysis on. - Sentiment Scoring:
scores = analyzer.polarity_scores(text)calls thepolarity_scores()method of the initialized VADERanalyzerobject on the inputtext. This action returns a dictionary containing various sentiment scores, including positive, negative, neutral, and a compound score. - Extracting Polarity:
polarity = scores['compound']extracts thecompoundscore from thescoresdictionary and assigns it to thepolarityvariable. Remember, we discussed that the compound score is a normalized, weighted composite score that summarizes the overall sentiment of the text. - Calculating Subjectivity:
subjectivity = 1 - scores['neu']calculates the measure of subjectivity, while VADER provides aneuscore representing the proportion of neutral words in the text. By subtracting this from 1, the function estimates the degree to which the text expresses opinions or subjective content; a higher value indicates greater subjectivity. - Returning Results:
return polarity, subjectivity, returns two values: the calculatedpolarity(compound sentiment score) and the derivedsubjectivityscore.
Step 5: Building the Report Generation Function
Here, the function, generate_gemini_report, takes the “model” instance and a text prompt as input, then generates content based on that prompt.
def generate_gemini_report(model, prompt):
    try:
        response = model.generate_content(prompt)
        return response.text
    except Exception as e:
        return f"Error generating report: {e}"
Here is what we can understand from the code above:
- Defining Function: It defines the function
generate_gemini_reportthat accepts two arguments, which aremodel(an instance of Gemini configured earlier) andprompt(a string containing the instructions or questions for Gemini to respond to). - Content Generation:
response = model.generate_content(prompt)calls thegenerate_content()method of the providedmodelobject, passing thepromptas an argument. Thereby sending the prompt to the Gemini model to generate a textual response. - Returning the Response:
return response.textensures that if the content generation is successful, it extracts the generated text from theresponseobject and returns it. - Error Handling:
except Exception as e: handles any potential errors that might occur during the content generation process (e.g., network issues, API errors). Whilereturn f"Error generating report: {e}"returns an error message that includes a description of the exception. This section is mainly for debugging purposes.
Step 6: Building the Async Scraper Function
Let’s utilize fetch_async_reviews as a function to interact with ScraperAPI’s Walmart review endpoint (async) and submit a request for product reviews.
def fetch_async_reviews(api_key, product_id, tld, sort, page):
    url = "https://async.scraperapi.com/structured/walmart/review"
    headers = {"Content-Type": "application/json"}
    data = {
        "apiKey": api_key,
        "productId": product_id,
        "tld": tld,
        "page": str(page),
        "sort": sort,
    }
    st.info(f"Submitting job for Product ID '{product_id}' on page {page} with payload: {data}")
    response = requests.post(url, json=data, headers=headers)
    try:
        response.raise_for_status()
        return response.json()
    except requests.exceptions.HTTPError as err:
        st.error(f"HTTP error during async request: {err}")
        st.error(f"Response content: {response.text}")
        raise
    except json.JSONDecodeError as e:
        st.error(f"Error decoding async response: {e}")
        raise
    except Exception as e:
        st.error(f"Unexpected error during async request: {e}")
        raise
The code achieves the following:
1. Defining the Function:
First, it defines fetch_async_reviews, which accepts the following arguments:
api_key: Your ScraperAPI API key for authentication.product_id: The unique identifier of the Walmart product whose reviews are to be fetched.tld: The top-level domain for Walmart (e.g., “com”, “ca”).sort: The criteria by which the reviews should be sorted (e.g., “relevancy”, “helpful”).page: The specific page number of reviews to retrieve.
2. Request Details:
url = "https://async.scraperapi.com/structured/walmart/review": Defines the specific ScraperAPI endpoint for fetching structured Walmart reviews asynchronously.headers = {"Content-Type": "application/json"}: Sets the HTTP headers to indicate that the request body will be in JSON format.data = {...}: Creates a Python dictionary containing the parameters to be sent in the request body as JSON:
3. Submitting the Asynchronous Job:
st.info(...)uses Streamlit’sinfofunction to display a message in the web app indicating that a scraping job is being submitted with the provided details. Whileresponse = requests.post(url, json=data, headers=headers)sends an HTTP POST request to the ScraperAPI endpoint with the specified URL, JSON data, and headers.
4. Handling the Response:
try...exceptblock: This block handles potential errors during the API request and response processing.response.raise_for_status(): Checks if the HTTP request was successful (status code 2xx). If not, it raises anHTTPErrorexception.return response.json(): If the request is successful, it parses the JSON response from ScraperAPI and returns it. This response typically contains information about the submitted job, such as its ID and status URL.except requests.exceptions.HTTPError as err:: Catches HTTP-related errors (e.g., 4xx or 5xx status codes from ScraperAPI), displays an error message in the Streamlit app including the HTTP error and the response content, and re-raises the exception.except json.JSONDecodeError as e:: Catches errors that occur if the response from ScraperAPI is not valid JSON, displays an error message, and re-raises the exception.except Exception as e:: Catches any other unexpected errors during the process, displays an error message, and re-raises the exception.
Step 7: Checking Job Status
The function below takes the status URL (provided by ScraperAPI after submitting an asynchronous job) and retrieves the current status of that job.
def check_job_status(status_url):
    try:
        response = requests.get(status_url)
        response.raise_for_status()
        return response.json()
    except requests.exceptions.RequestException as e:
        st.error(f"Error checking job status: {e}")
        raise
    except json.JSONDecodeError as e:
        st.error(f"Error decoding job status response: {e}")
        raise
Here’s further information on precisely how the code works:
- Function Definition: It defines the
check_job_statusfunction, which accepts a single argument,status_url, that is the URL provided by ScraperAPI, allowing querying the status of a previously submitted asynchronous scraping job. - Requesting Job Status:
response = requests.get(status_url)sends an HTTP GET request to the providedstatus_urlto retrieve the current status of the scraping job.
Step 8: Retrieving the Scraped Data from the Job Result
Another function, get_job_result, takes the data representing the status of the async job and extracts the actual scraped content if the job status is successful.
def get_job_result(job_data):
    if job_data and job_data.get("status") == "finished":
        response_data = job_data.get("response")
        if response_data and isinstance(response_data, dict) and "body" in response_data:
            try:
                return json.loads(response_data["body"])
            except json.JSONDecodeError as e:
                st.error(f"Error decoding 'body' JSON: {e}")
                return None
        else:
            st.error("Could not find 'body' in the job result response.")
            return None
    return None
Below is a summary of what the code above achieves:
- Defines the Function: First, it defines
get_job_result, which accepts a single argument,job_data, a dictionary containing information about the status and result of the asynchronous job. - Checking Job Completion:
if job_data and job_data.get("status") == "finished":first checks ifjob_datais not “None” and then looks explicitly for the “status” key within it. If the value associated with “status” is “finished”, it proceeds to extract the results. - Accessing Response Data:
response_data = job_data.get("response"): retrieves the value of the “response” key from thejob_data. This “response” contains details about the HTTP response from Walmart’s website. - Verifying Response Body:
if response_data and isinstance(response_data, dict) and "body" in response_data:checks ifresponse_dataexists, is a dictionary, and contains a key named “body”. The “body” key holds the actual HTML content of the scraped webpage as a string. - Extracting and Decoding Body: The
try...except json.JSONDecodeError as e:block parses the content of the “body” as JSON. - Handling Missing Body:
else: st.error("Could not find 'body' in the job result response.") return None: this code block verifies if the “body” key is not found within theresponse_data, then displays an error message in the Streamlit app and returnsNone.
Step 9: Processing Reviews
Here, the process_reviews_for_display function takes the product ID and raw review data (from ScraperAPI) as input, then processes each review to extract relevant information, such as text, sentiment, and potential pain points.
def process_reviews_for_display(product_id, results):
    review_data_list = []
    for review in results.get("reviews", []):
        if "text" in review:
            review_text = review["text"]
            polarity, subjectivity = analyze_sentiment(review_text)
            sentences = nltk.sent_tokenize(review_text)
            pain_points = [s.strip() for s in sentences if analyzer.polarity_scores(s)['compound'] < -0.05 and len(s.strip()) > 5]
            review_data_list.append({
                "text": review_text,
                "pain_points": pain_points,
                "sentiment": {
                    "polarity": polarity,
                    "subjectivity": subjectivity
                }
            })
    return review_data_list
The code above achieves the following:
1. Function Definition:
It defines the process_reviews_for_display function, which accepts two arguments:
product_id: The ID of the product the reviews belong to.results: A dictionary containing the raw review data fetched from ScraperAPI
2. Initializing Review Data List:
review_data_list = [] creates an empty list to store the processed information for each review.
3. Iterating Through Reviews:
for review in results.get("reviews", []): iterates through the list of reviews, accessed using the .get("reviews", []) method on the results dictionary. Therefore, safely handling cases where the “reviews” key might be missing.
4. Processing Each Review:
if "text" in review:: It checks if the currentreviewdictionary contains a “text” key, which is expected to hold the actual review text.review_text = review["text"]:If the “text” key exists, its value (the review text) is assigned to thereview_textvariable.polarity, subjectivity = analyze_sentiment(review_text): Theanalyze_sentimentfunction (defined earlier) is called on thereview_textto get its sentiment polarity and subjectivity scores.sentences = nltk.sent_tokenize(review_text): The review text is split into individual sentences using NLTK’ssent_tokenizefunction.pain_points = [s.strip() for s in sentences if analyzer.polarity_scores(s)['compound'] < -0.05 and len(s.strip()) > 5]: This line identifies potential “pain points” within the review. It iterates through each sentence, calculates its compound sentiment score using VADER. If the score is below -0.05 (indicating negative sentiment) and the sentence is longer than 5 characters, it’s considered a potential pain point (after removing leading/trailing whitespace).review_data_list.append({...}): A dictionary containing the extracted and analyzed information for the current review is created and appended to thereview_data_list.
5. Returning Processed Review Data:
The function returns the review_data_list, which now contains a structured representation of each processed review, including its text, identified pain points, and sentiment analysis results.
Step 10: Building a Prompt Function to Generate the Reports
Now, we need to write and call a function that takes a list of product IDs and processed review data as input, then constructs a text prompt to send to Gemini for generating a report.
def generate_report_prompt(product_ids, processed_reviews):
    # The function up here generates a combined prompt for all products
    prompt = f"Here are the customer reviews and their associated pain points for product IDs: {', '.join(product_ids)}:nn"
    for review_info in processed_reviews:
        prompt += f"Review: {review_info['text']}n"
        if review_info['pain_points']:
            prompt += f"Pain Points: {', '.join(review_info['pain_points'])}n"
        else:
            prompt += "Pain Points: Nonen"
        prompt += f"Sentiment: Polarity={review_info['sentiment']['polarity']:.2f}, Subjectivity={review_info['sentiment']['subjectivity']:.2f}nn"
    prompt += "Based on these reviews, identify the key pain points for each product. Explain what sentiment polarity and subjectivity mean in the context of these reviews. Provide an overall sentiment summary for each product."
    return prompt
Here’s how the code works in detail:
1. Initializing the Prompt:
After defining the function, prompt = f"Here are the customer reviews and their associated pain points for product IDs: {', '.join(product_ids)}:nn" starts building the prompt string by including a header that lists the product IDs which the report will be generated for.
2. Iterating Through Processed Reviews:
for review_info in processed_reviews:: Iterates through each processed review in theprocessed_reviewslist.prompt += f"Review: {review_info['text']}n": Adds the original review text to the prompt.if review_info['pain_points']:: Checks if any pain points were identified for the current review.prompt += f"Sentiment: Polarity={review_info['sentiment']['polarity']:.2f}, Subjectivity={review_info['sentiment']['subjectivity']:.2f}nn": Adds the sentiment polarity and subjectivity scores for the current review to the prompt, formatted to two decimal places.
3. Adding Instructions for Gemini:
prompt += "Based on these reviews, identify the key pain points for each product. Explain what sentiment polarity and subjectivity mean in the context of these reviews. Provide an overall sentiment summary for each product."For a user to better understand VADER’s results, we will include instructions within the prompt, telling the Gemini what kind of information and analysis is expected in the generated report.
4. Returning the Prompt:
return prompt returns the complete prompt string, which is now ready for sending to Gemini.
Step 11. Building the Main Application Function
This main function orchestrates the entire Streamlit application, handling user input, fetching reviews asynchronously, checking job status, processing reviews, generating reports with Gemini, and displaying the results.
def main():
    st.title("ScraperAPI Walmart Customer Reviews Analysis Tool")
    st.markdown("Enter Walmart product review details below:")
    # accept multiple product IDs and page numbers as comma-separated lists
    product_ids_input = st.text_input("Walmart Product IDs (comma separated)", "")
    tld = st.selectbox("Top Level Domain (TLD)", ["com", "ca"], index=0)
    sort_options = ["relevancy", "helpful", "submission-desc", "submission-asc", "rating-desc", "rating-asc"]
    sort = st.selectbox("Sort By", sort_options, index=0)
    pages_input = st.text_input("Page Numbers (comma separated for each product, e.g., 1,2 for first product)", "1")
    # Initialize session state variables if not already set
    if 'gemini_report' not in st.session_state:
        st.session_state.gemini_report = None
    if 'model' not in st.session_state:
        st.session_state.model = genai.GenerativeModel('gemini-1.5-flash')
    if 'review_data_prompt' not in st.session_state:
        st.session_state.review_data_prompt = None
    if 'jobs' not in st.session_state:
        st.session_state.jobs = []  # this will store dicts with product_id, page, job_id, status_url
    if 'async_results' not in st.session_state:
        st.session_state.async_results = {}  # keyed by (product_id, page)
    if 'processed_reviews' not in st.session_state:
        st.session_state.processed_reviews = {} # Keyed by product_id
    if 'reports' not in st.session_state:
        st.session_state.reports = {} # kkeyed by report name
    st.sidebar.header("Previous Reports")
    if st.session_state.reports:
        selected_report_name = st.sidebar.selectbox("Select a Report", list(st.session_state.reports.keys()))
        st.sidebar.markdown("---")
        st.subheader("View Previous Report")
        st.markdown(st.session_state.reports[selected_report_name])
    else:
        st.sidebar.info("No reports generated yet.")
        st.sidebar.markdown("---")
    if st.button("Fetch Reviews (Async)"):
        if product_ids_input.strip():
            product_ids = [pid.strip() for pid in product_ids_input.split(",") if pid.strip()]
            pages_list = [p.strip() for p in pages_input.split(",")]
            st.session_state.jobs = []  # Reset jobs list for new submission
            st.session_state.async_results = {} # Reset results
            st.session_state.processed_reviews = {} # Reset processed reviews
            if len(pages_list) == 1:
                # Apply the same page number to all products
                pages_per_product = [int(pages_list[0])] * len(product_ids)
            elif len(pages_list) == len(product_ids):
                # Use the provided page numbers for each product
                pages_per_product = [int(p) for p in pages_list if p.isdigit()]
                if len(pages_per_product) != len(product_ids):
                    st.error("Number of page numbers must match the number of product IDs or be a single value.")
                    return
            else:
                st.error("Number of page numbers must match the number of product IDs or be a single value.")
                return
            for i, pid in enumerate(product_ids):
                page = pages_per_product[i]
                try:
                    async_response = fetch_async_reviews(SCRAPERAPI_KEY, pid, tld, sort, page)
                    job_id = async_response.get("id")
                    status_url = async_response.get("statusUrl")
                    st.session_state.jobs.append({
                        "product_id": pid,
                        "page": page,
                        "job_id": job_id,
                        "status_url": status_url
                    })
                    st.info(f"Submitted job for Product {pid} Page {page}: Job ID {job_id}")
                except Exception as e:
                    st.error(f"Error submitting async request for Product {pid} Page {page}: {e}")
            st.session_state.gemini_report = None  # Reset report on new fetch
        else:
            st.warning("Please enter at least one Walmart Product ID.")
    st.markdown("---")
    st.subheader("Async Job Status")
    if st.session_state.jobs:
        if st.button("Check Job Status"):
            jobs = st.session_state.jobs
            results_dict = {}  # Key: (product_id, page), Value: job result (JSON)
            with concurrent.futures.ThreadPoolExecutor() as executor:
                future_to_job = {executor.submit(check_job_status, job["status_url"]): job for job in jobs}
                for future in concurrent.futures.as_completed(future_to_job):
                    job = future_to_job[future]
                    try:
                        status_data = future.result()
                        st.write(f"Job for Product {job['product_id']} Page {job['page']} status: {status_data.get('status')}")
                        if status_data.get('status') == 'finished':
                            job_result = get_job_result(status_data)
                            if job_result and isinstance(job_result, dict) and "reviews" in job_result:
                                results_dict[(job["product_id"], job["page"])] = job_result
                                st.success(f"Job for Product {job['product_id']} Page {job['page']} finished.")
                            else:
                                st.error(f"Unexpected async results structure for Product {job['product_id']} Page {job['page']}.")
                        elif status_data.get('status') == 'failed':
                            st.error(f"Job for Product {job['product_id']} Page {job['page']} failed: {status_data.get('error')}")
                    except Exception as e:
                        st.error(f"Error checking job for Product {job['product_id']} Page {job['page']}: {e}")
            st.session_state.async_results = results_dict
            # Process all finished jobs and aggregate reviews per product
            processed_reviews_per_product = {}
            for (pid, p), job_result in results_dict.items():
                processed_reviews = process_reviews_for_display(pid, job_result)
                if pid not in processed_reviews_per_product:
                    processed_reviews_per_product[pid] = []
                processed_reviews_per_product[pid].extend(processed_reviews)
            st.session_state.processed_reviews = processed_reviews_per_product
            if st.session_state.processed_reviews and st.session_state.gemini_report is None:
                prompt = generate_report_prompt(list(st.session_state.processed_reviews.keys()),
                                                [review for reviews in st.session_state.processed_reviews.values() for review in reviews])
                st.session_state.review_data_prompt = prompt
                with st.spinner("Generating combined report with Gemini..."):
                    report = generate_gemini_report(st.session_state.model, prompt)
                    st.session_state.gemini_report = report
                    report_name = f"Combined Report for Products {', '.join(st.session_state.processed_reviews.keys())} - {datetime.datetime.now().strftime('%Y-%m-%d %H:%M:%S')}"
                    st.session_state.reports[report_name] = report
    else:
        st.info("No async job submitted yet.")
    # Display the processed review data per product
    if st.session_state.processed_reviews:
        st.markdown("---")
        st.subheader("Processed Review Data:")
        for pid, reviews in st.session_state.processed_reviews.items():
            st.markdown(f"**Product ID: {pid}**")
            for i, review in enumerate(reviews):
                st.markdown(f"- **Review {i+1}:**")
                st.markdown(f"  - **Text:** {review['text']}")
                if review['pain_points']:
                    st.markdown(f"  - **Pain Points:** {', '.join(review['pain_points'])}")
                else:
                    st.markdown("  - **Pain Points:** None")
                st.markdown(f"  - **Sentiment:** Polarity={review['sentiment']['polarity']:.2f}, Subjectivity={review['sentiment']['subjectivity']:.2f}")
            st.markdown("---")
    if st.session_state.gemini_report:
        st.markdown("---")
        st.subheader("Generated Walmart Customer Reviews Analysis Report")
        st.markdown(st.session_state.gemini_report)
        st.markdown("### Ask Additional Questions")
        user_query = st.text_input("Enter your question here", key="user_query")
        if st.button("Submit Question"):
            if st.session_state.review_data_prompt is not None:
                question_prompt = (
                        "You are an expert in customer review analysis and product evaluation. "
                        "Based on the following review data, provide a detailed, critically evaluated answer to the question below.nn"
                        "Review Data:n" + st.session_state.review_data_prompt + "nn"
                        "Question: " + user_query
                )
                with st.spinner("Generating answer from Gemini..."):
                    answer = generate_gemini_report(st.session_state.model, question_prompt)
                st.markdown("### Answer to Your Question")
                st.markdown(answer)
            else:
                st.markdown("Please generate a report first.")
if __name__ == "__main__":
    main()
The code above defines the main function that controls the flow and user interactions of the Streamlit application. Here’s a detailed breakdown of what the code does:
1. Sets up the User Interface:
st.title(...) and st.markdown(...): Display the title and introductory text of the application.st.text_input(...), st.selectbox(...): Create input fields for users to enter their Walmart product IDs, select the top-level domain, choose the sorting method for reviews, and enter page numbers.
2. Managing Application State:
- It initializes several
st.session_statevariables. Session state allows the application to remember information across user interactions, such as generated reports, fetched jobs, and processed reviews. This way, we prevent data from being reset on every rerun.
3. Displaying Previous Reports:
- Further down, it checks if any reports have been generated previously (stored in
st.session_state.reports). If so, it displays a sidebar with a dropdown to select and view these previous reports.
4. Handling Review Fetching: When the user clicks the “Fetch Reviews (Async)” button:
- It parses the entered product IDs and page numbers.
- It resets the
jobs, async_results, andprocessed_reviewssession state variables for a new request. - It iterates through the provided product IDs and pages, calling the
fetch_async_reviewsfunction to submit a scraping job to ScraperAPI for each. - It stores information about each submitted job (product ID, page, job ID, status URL) in the
st.session_state.jobslist. - It displays messages to the user indicating the submission of each job.
5. Checking Asynchronous Job Status:
Here, when the user clicks the “Check Job Status” button:
- It iterates through the jobs stored in
st.session_state.jobs. - It uses a
concurrent.futures.ThreadPoolExecutorto concurrently call thecheck_job_statusfunction for each job’s status URL, improving efficiency. - For each job, it displays the current status.
- If a job is finished, it calls
get_job_resultto retrieve the scraped data. - If the data is successfully retrieved, it stores it in the
st.session_state.async_resultsdictionary. - It then calls
process_reviews_for_displayto analyze the sentiment and extract pain points from the retrieved reviews, storing the processed data inst.session_state.processed_reviews, organized by product ID.
6. Generating the Gemini Report:
After the jobs are checked and reviews are processed, if there are processed reviews and a report hasn’t been generated yet:
- It calls
generate_report_promptto create a prompt for the Gemini model based on the processed reviews. - It uses
st.spinnerto display a loading message while callinggenerate_gemini_reportto get the report from Gemini. - It stores the generated report in
st.session_state.gemini_reportand saves it as a named report inst.session_state.reports.
7. Displaying Results:
- It displays the processed review data (text, pain points, sentiment) for each product.
- If a Gemini report has been generated, it displays the report.
- It provides an input field for the user to ask additional questions about the reviews, which are then sent to Gemini for an answer.
8. Running the Application:
if __name__ == "__main__": main(): This standard Python construct ensures that themain()function is executed when the script is run directly.
In essence, the main function ties together all the other functions in the script to create a functional web application that allows a user to fetch, process, and analyze Walmart customer reviews using ScraperAPI and Gemini. It manages the user interface, handles user interactions, orchestrates the data fetching and processing pipelines, and displays the results in a suitable, user-friendly format.
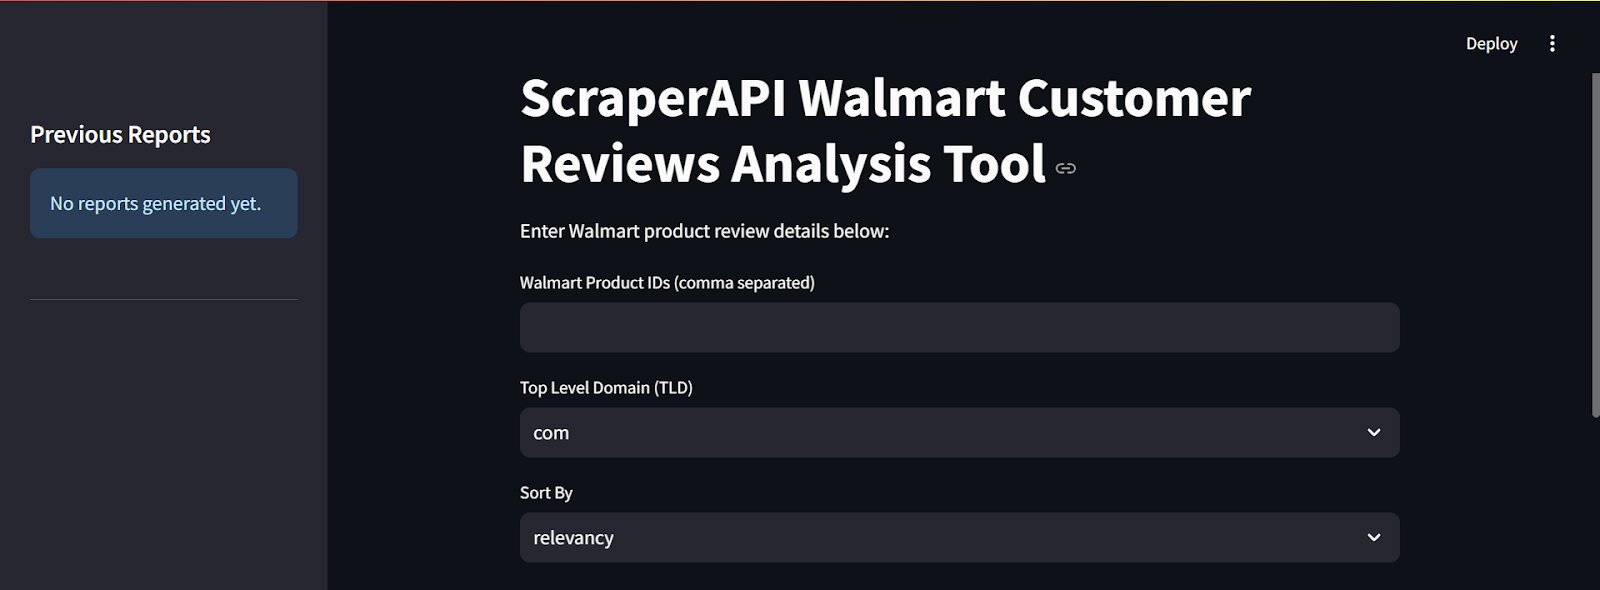
Here’s a snippet of what the tool’s UI looks like:
Deploying the Walmart Reviews Analysis App Using Streamlit
Here’s how to deploy our Walmart analysis app on Streamlit for free cloud hosting in just a few steps:
Step 1: Set Up a GitHub Repository
Streamlit requires your project to be hosted on GitHub.
1. Create a New Repository on GitHub
Create a new repository on GitHub and set it as public.
2. Push Your Code to GitHub
If you haven’t already set up Git and linked your repository, use the following commands in your terminal:
git init
git add .
git commit -m "Initial commit"
git branch -M main
git remote add origin https://github.com/YOUR_USERNAME/walmart_reviews_tool.git
git push -u origin main
Step 2: Store Your Gemini Token as an Environment Variable
Before deploying your app, you have to securely store your Gemini token within your system as an environment variable to protect it from misuse by others.
1. Set Your Token As an Environment Variable (Locally):
- macOS/Linux
export GOOGLE_API_TOKEN="your_token"
- Windows (PowerShell)
set GOOGLE_API_TOKEN="your_token"
- Use os.environ to retrieve the token within your script:
import os
GOOGLE_API_TOKEN = os.environ.get("GOOGLE_API_TOKEN")
if GOOGLE_API_TOKEN is None:
    print("Error: Google API token not found in environment variables.")
    # Handle errors
else:
    # Use GOOGLE_API_TOKEN in your Google Developer API calls
    print("Google API token loaded successfully")
- Restart your code editor.
Step 3: Create a requirements.txt file
Streamlit needs to know what dependencies your app requires.
1. In your project folder, create a file named requirements.txt.
2. Add the following dependencies:
streamlit
requests
google-generativeai
nltk
3. Save the file and commit it to GitHub:
git add requirements.txt
git commit -m "Added dependencies"
git push origin main
4. Do the same for the app.py file containing all your code:
git add app.py
git commit -m "Added app script"
git push origin main
Step 4: Deploy on Streamlit Cloud
1. Go to Streamlit Community Cloud.
2. Click “Sign in with GitHub” and authorize Streamlit.
3. Click “Create App.”
4. Select “Deploy a public app from GitHub repo.”
5. In the repository settings, enter:
- Repository:
YOUR_USERNAME/Walmart-Reviews-application - Branch:
main - Main file path:
app.py(or whatever your Streamlit script is named)
6. Click “Deploy” and wait for Streamlit to build the app.
Step 5: Get Your Streamlit App URL
After deployment, Streamlit will generate a public URL (e.g., https://your-app-name.streamlit.app). You can now share this link to allow others access to your tool!
Conclusion
Within this tutorial, we’ve built a powerful tool that combines ScraperAPI’s Walmart Reviews Async Endpoint with VADER for sentiment analysis, and Gemini for generating insightful reports—all presented through a clean and interactive Streamlit interface.
This application is a game-changer for market research, in that it can identify customer sentiment trends, highlight potential pain points early, and support competitor analysis by examining how shoppers react to similar products.
Ready to build your own? Start using ScraperAPI today and turn raw Walmart customer reviews into valuable business insights!