


While R may not be the most widely used programming language, it offers unique advantages for web scraping, especially within the data science community. Its built-in data analysis tools simplify data cleaning, manipulation, and analysis, while specialized web scraping packages like rvest and RSelenium provide efficient tools for extracting data from various web structures.
In this web scraping tutorial, we’ll guide you through building an R web scraping tool to extract large datasets from websites. Let’s dive in and explore the power of R for web scraping!
How to Install R and RStudio
Let’s dive into our R web scraping project by setting up R and RStudio. If you’re new to web scraping, we recommend reviewing the “Understanding Web Page Structure: HTML and CSS” section at the end of this blog for a foundational understanding of website structure.
Installing R on Your Computer System
The first thing we need is to install R into our machine. For that, head to r-project.org and click on “download R” under the getting started section.
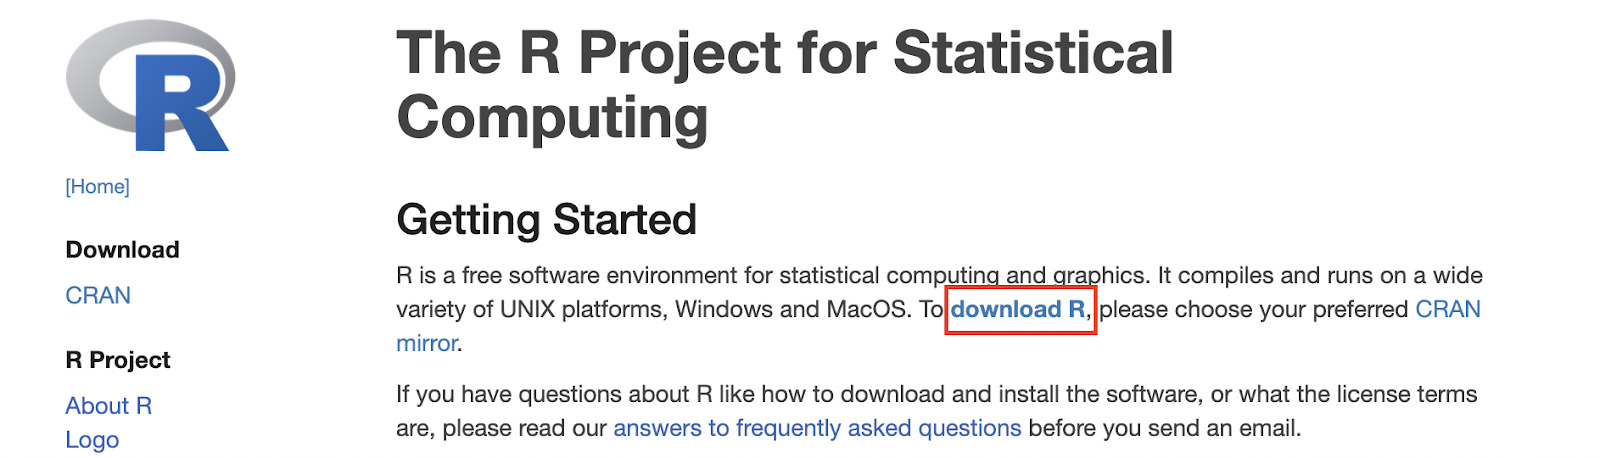
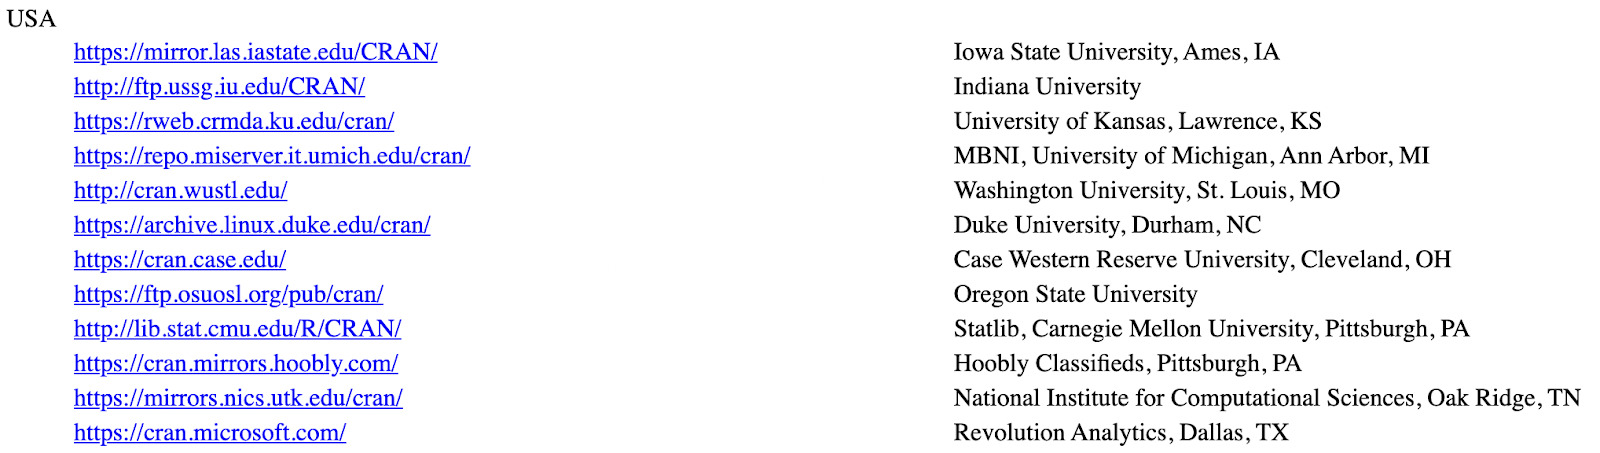
Then, pick the CRAN mirror you prefer.
Pick your system.
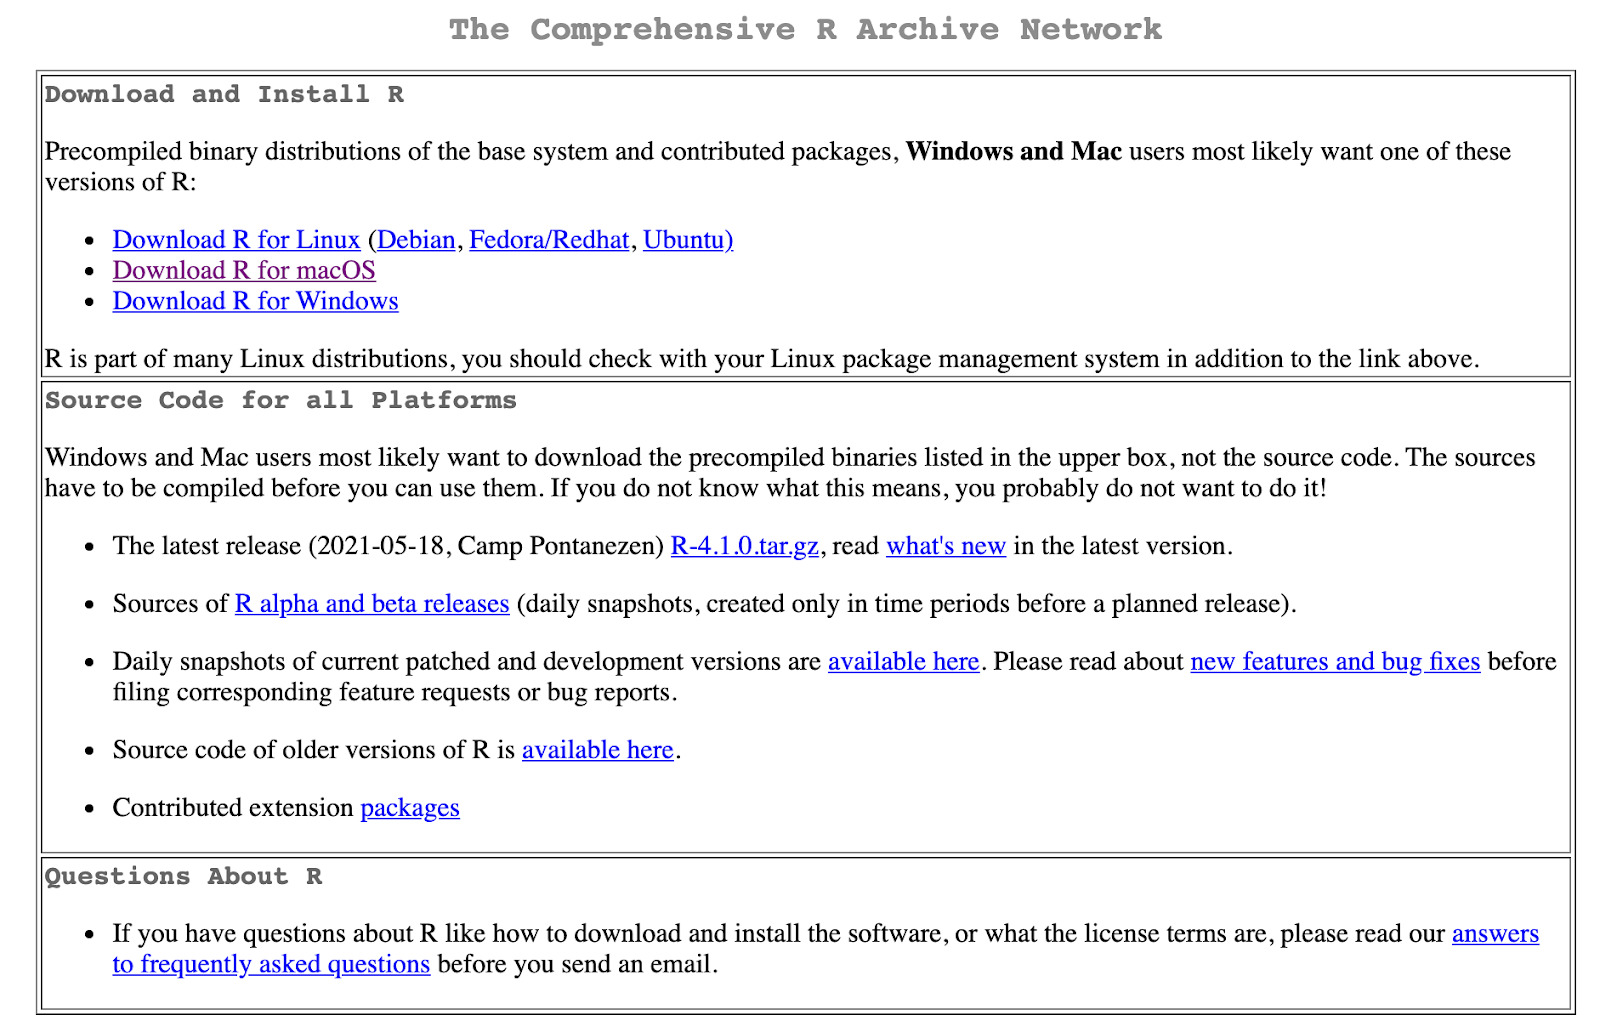
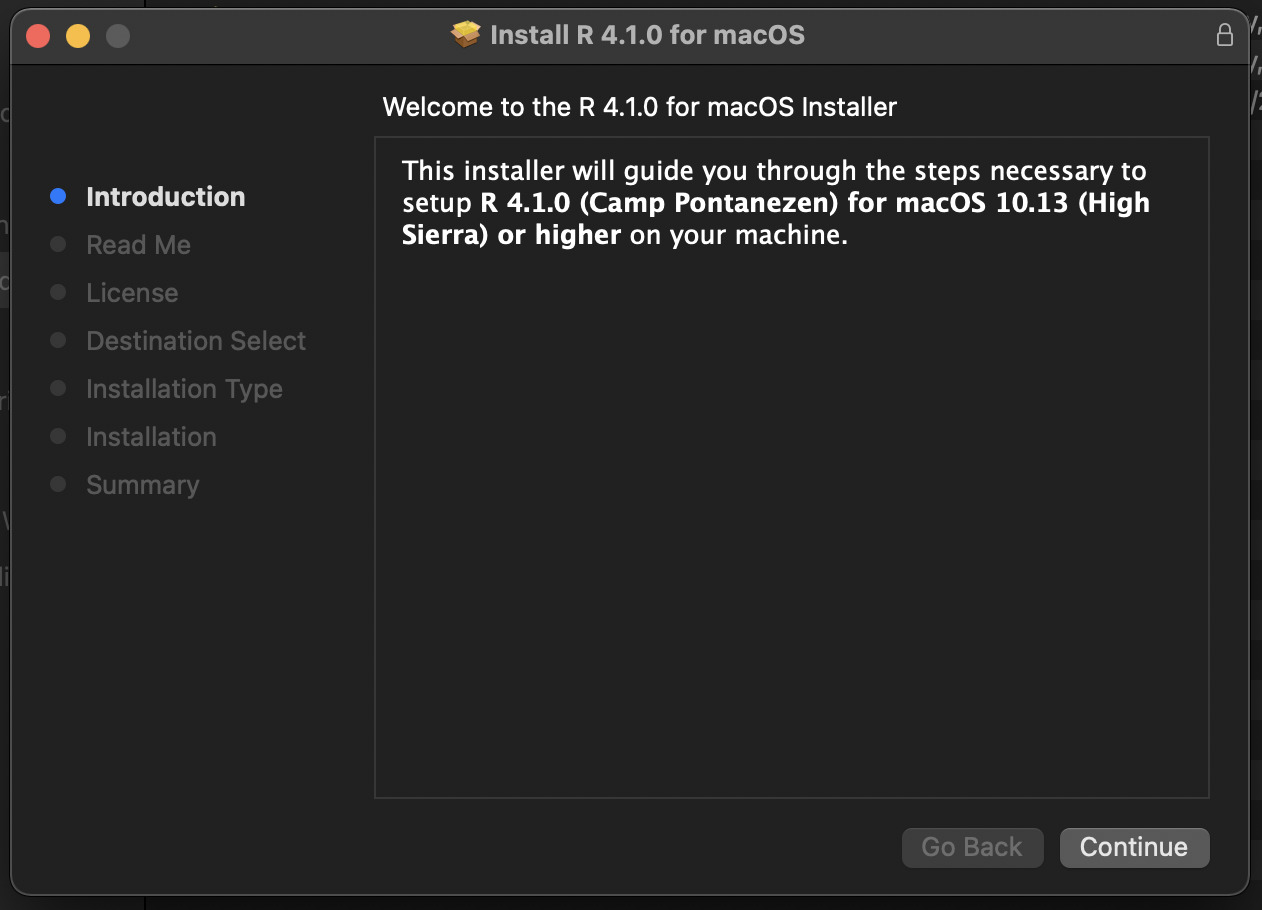
And finally, click on the most recent version of R you’d like to download – make sure it is a .pkg file. At the time we’re writing this piece, the file’s name is R-4.1.0.pkg.
After the file is finished downloading, follow the instructions in the installation wizard.
Installing RStudio
RStudio is an integrated development environment (IDE) for R, equipped with tools to manage our workspace, execute R code, debugging, and much more.
Note: It’s essential to install R before installing RStudio. The software requires R 3.0.1 or higher to work.
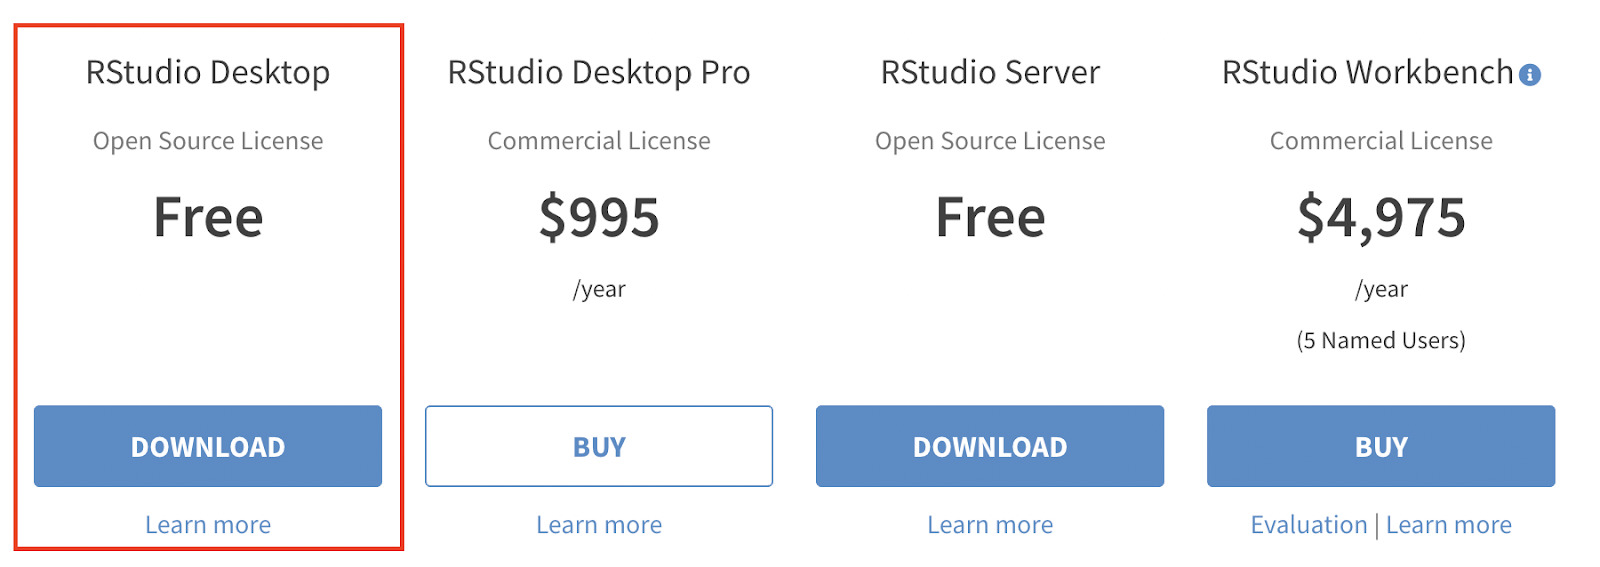
Because we have already installed it, let’s go to the download page of RStudio and pick the free version.
It will redirect you to the correct version of RStudio for your OS. In our case it’s MacOS, so the page looks like this:
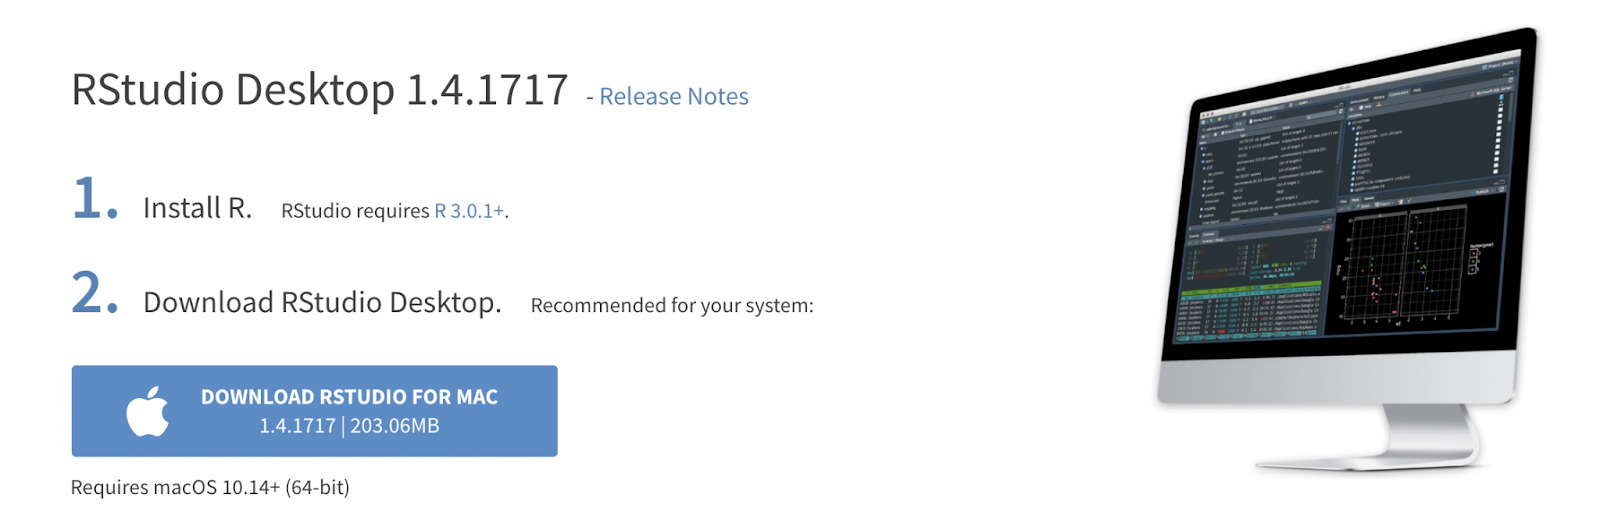
For Mac users, move the downloaded app to the Applications folder to install it.
Note: You can delete all installers if you’d like to at this point.
With these two installed, let’s move to the actual code.
How to Build R Data Scraper with R and Rvest
R is a programming language built for data analysis. You can pretty much do all your scraping just by writing R commands.
However, we can accomplish much more with fewer lines of code and less time using the R package Rvest.
Web scraping with R in Rvest is similar to scraping in Python with libraries like Beautiful Soup– Rvest is designed to simplify web scraping processes in R.
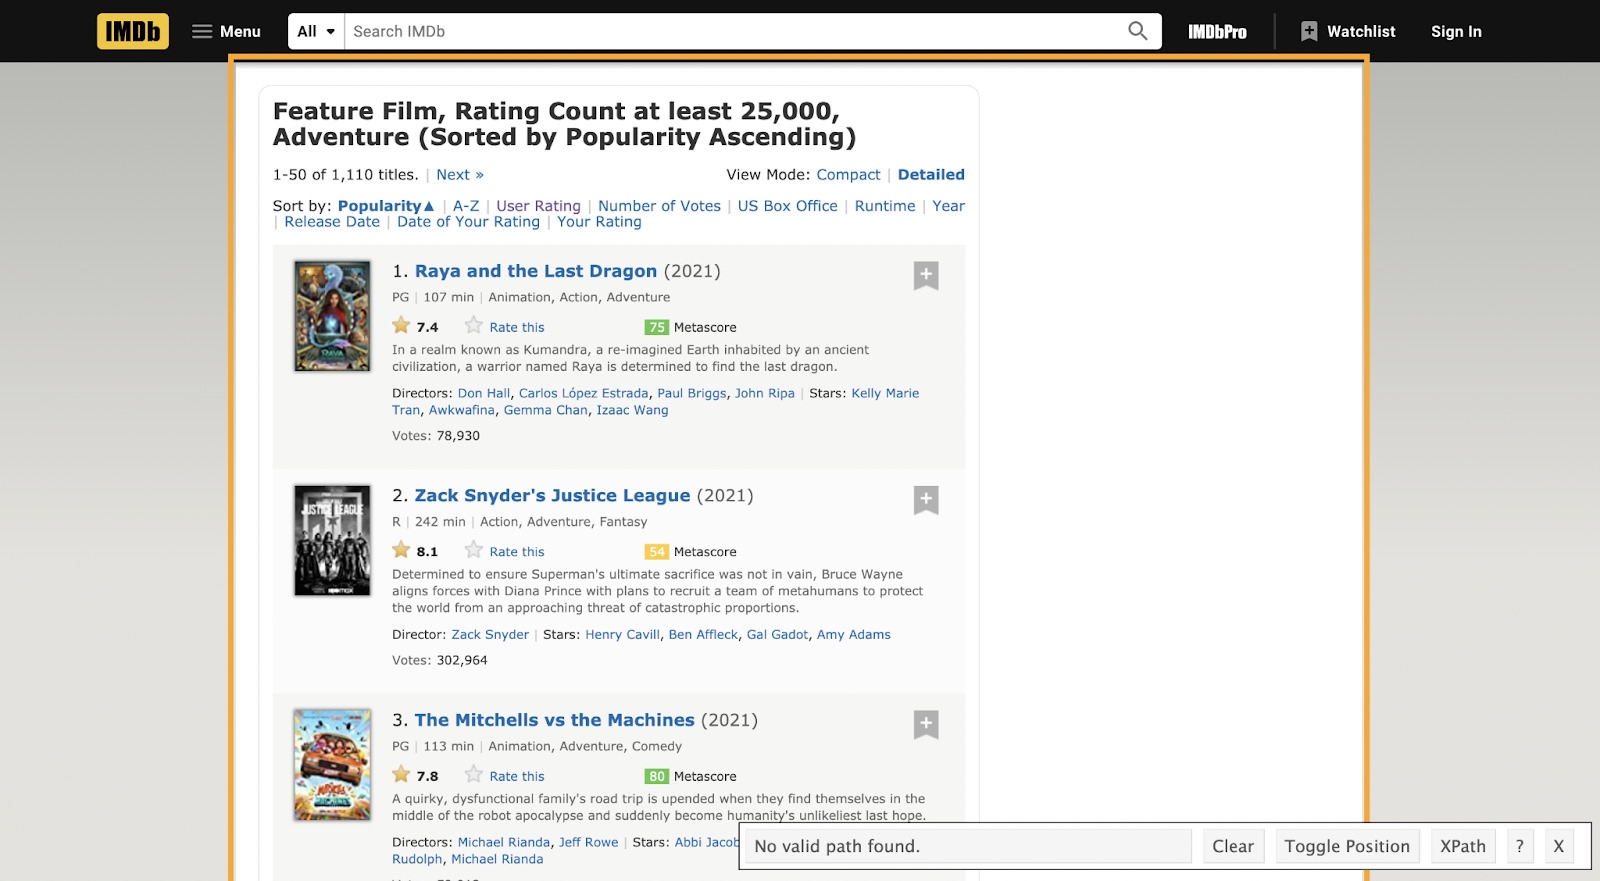
So, for this tutorial, we will scrape IMDb to extract the titles, ratings, links, and cast members and add them into a data frame for easy access.
To start our project, let’s open RStudio.
1. Install Rvest and Dplyr
With RStudio opened, click on ‘create a project’ to create a new directory for your code.
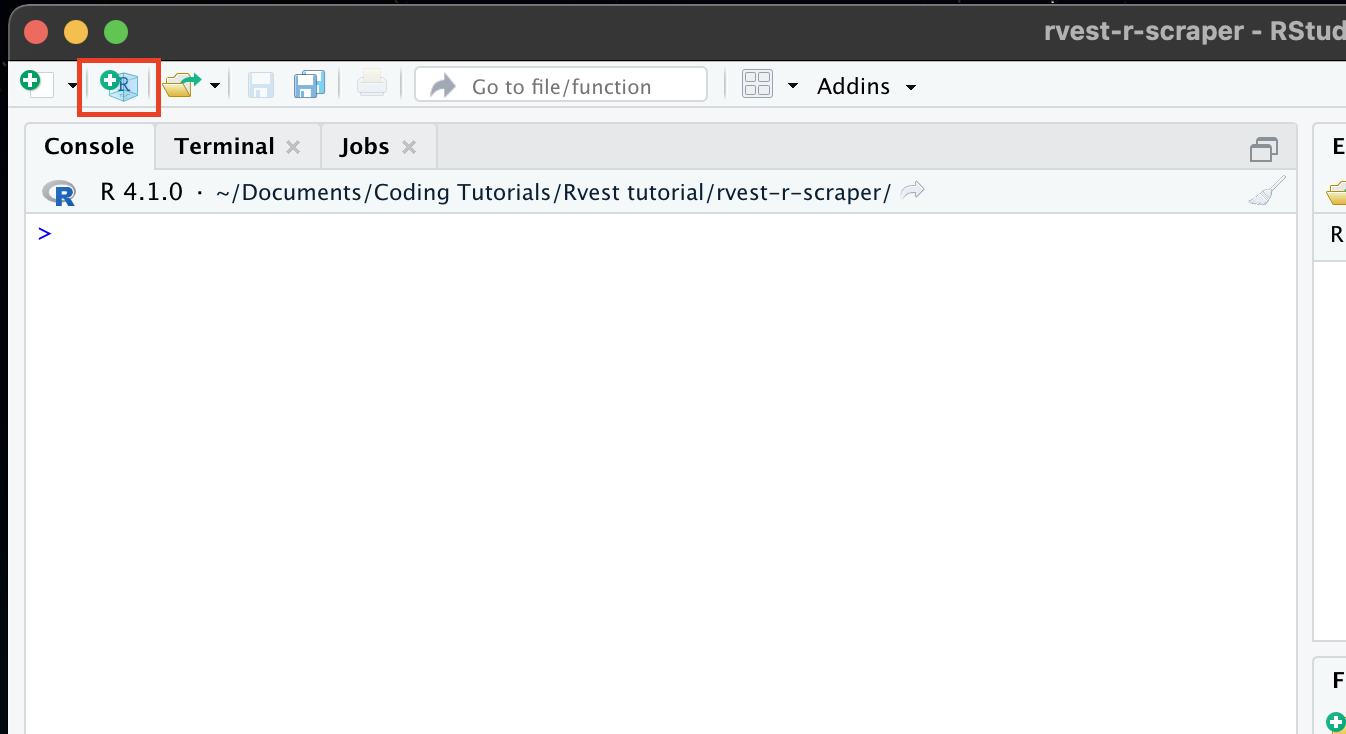
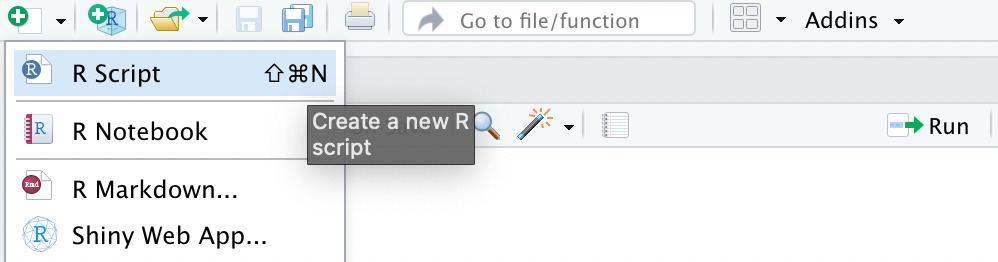
Once inside, click on ‘new file’ and create an R script. You can call it rvest_scraper.
We’ll start by installing our two main libraries using install.packages(“packageName”).
install.packages("rvest")
install.packages("dplyr")
Then, click on Run to install both libraries.
We’ll be using Dplyr alongside Rvest to use the pipe operator (>), which makes it easier to code in R. It also has an extensive grammar for data manipulation that will come in handy as you move forward in your career.
Now that those are installed, you can delete the install lines or convert them into a comment by adding a # in front of them.
# install.packages("rvest")
# install.packages("dplyr")
2. Download the HTML
Let’s load our libraries into our project by typing library(rvest) and library(dplyr), respectively.
Every web scraping project starts with requesting the HTML document from the server. To do that, we’re adding the URL of our target page as a variable and using the command read_html() to download its source code.
link = "https://www.imdb.com/search/title/?title_type=feature&num_votes=25000&genres=adventure"
page = read_html(link)
With just two lines, our scraper has access to the HTML and is ready to parse it.
3. Use the SelectorGadget to Get the Titles of the Movies
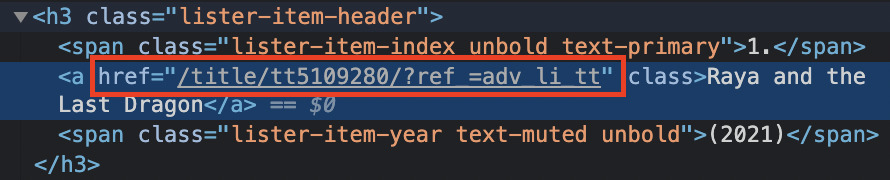
If you installed the SelectorGadget correctly, the extension should be in the top right of Google Chrome. Just click on it, and a box will appear in the bottom right of your screen.
Click on the first title of the list, and you’ll notice that many elements will highlight.
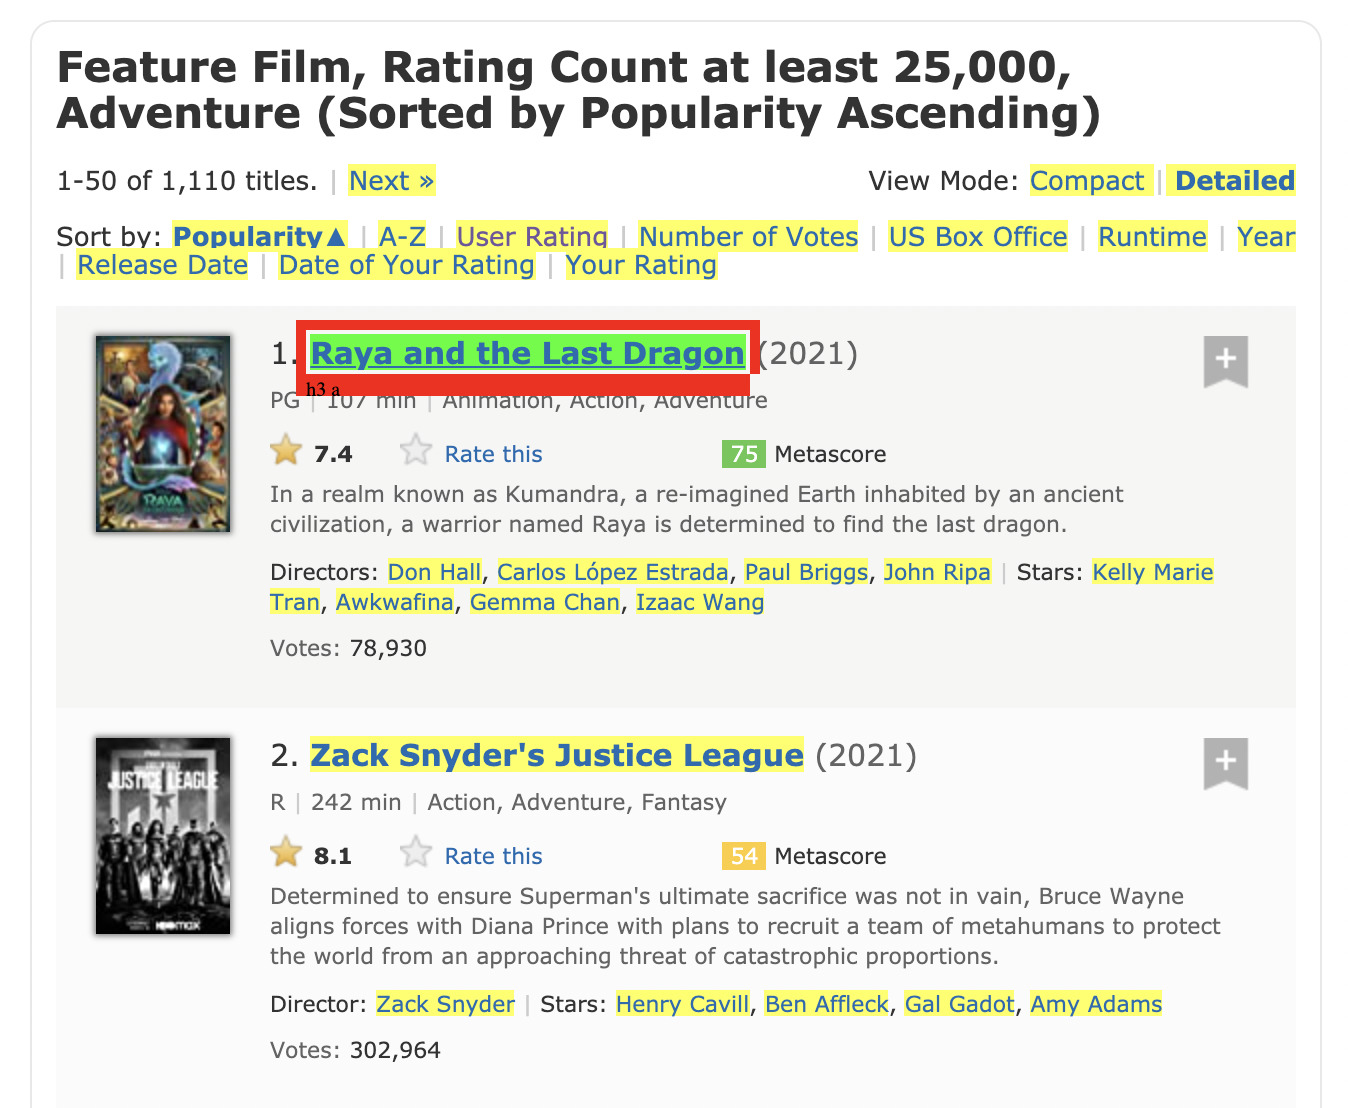
This happened because the selector is picking the a tag as the selector. Which a lot of other elements are also wrapped in.

To fix this, let’s click on the menu links at the top of the page.
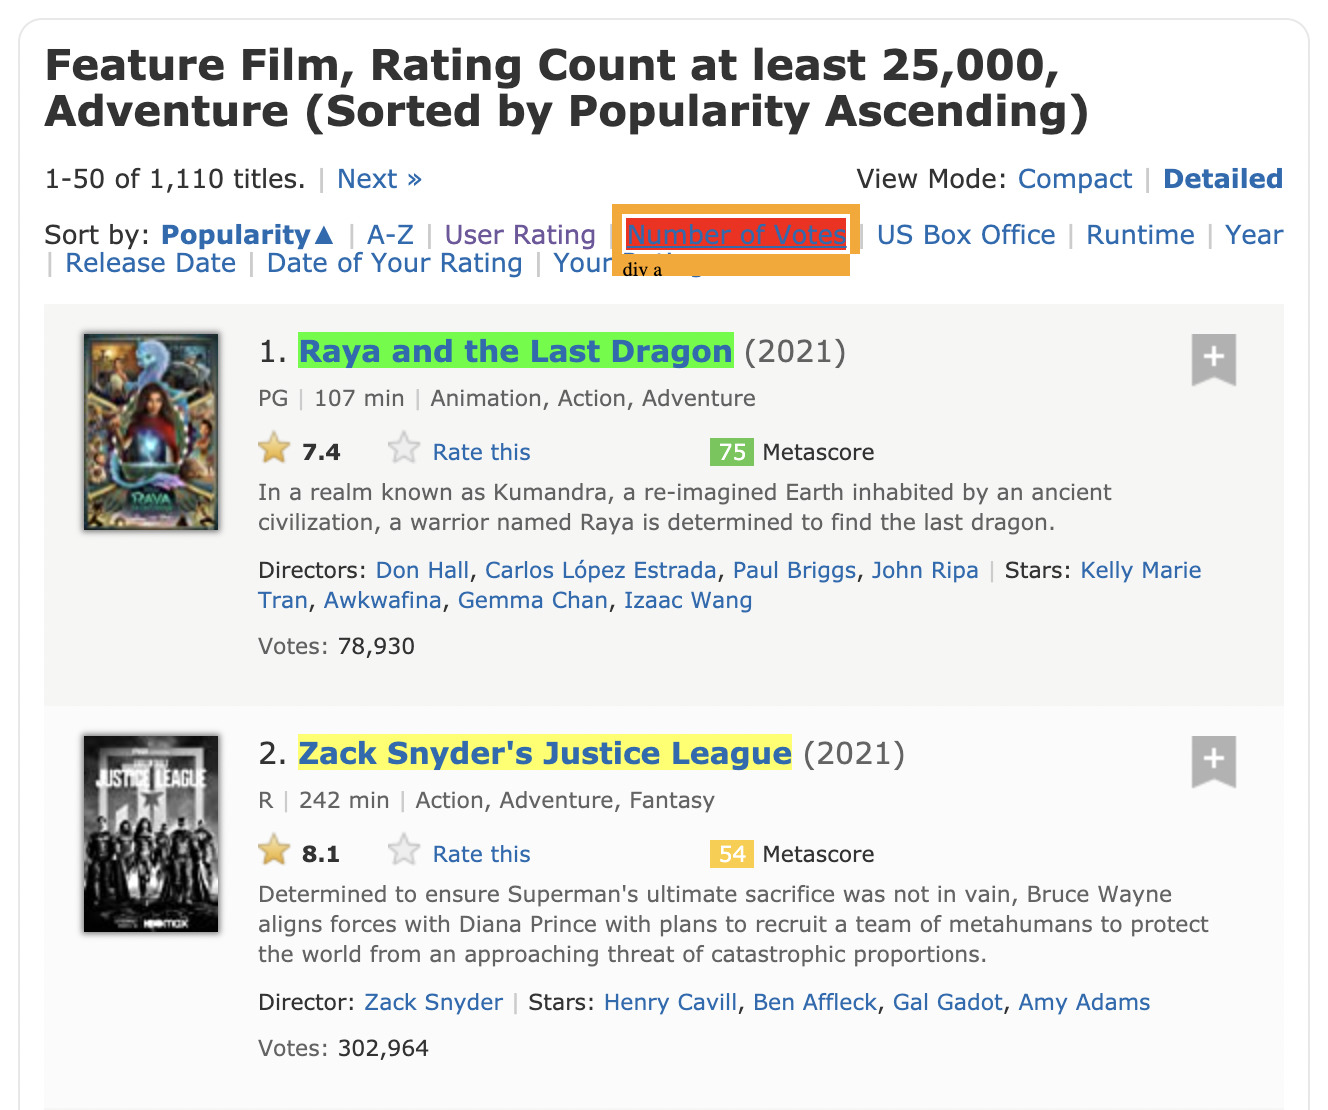
That did the trick. If we check our current selector, it says “.lister-item-header a” which is the class for every title in the list. It also says it detected 50 elements, which is the number of movies per page.
Note: You can do the same by inspecting the page and finding the class or ID of every element by yourself. In some cases, the SelectorGadget won’t be able to find a class or tag that makes sense for all the elements you want to scrape – not all sites are as clean as IMDb. Make sure to learn more about HTML, so you don’t get stuck on more complex projects.
Moving on, type into your R script the following code:
titles = page > html_nodes(".lister-item-header a") > html_text()
What we’re doing here is using the pipe operator (>) to take whatever value is on the left, compute it, and pass the result as the first argument to the function that is after the pipe.
In this case, the data stored in page is the downloaded HTML. Next, we pass it to the html_nodes() command, which uses a CSS selector to grab all elements with that class – in CSS, the dot ‘.’ means class.
Finally, we call html_text() to extract only the text inside the element.
If we omit that last step, our scraper will bring back every element with the class, including all the tags.
4. Test Your R Script
If you only run part of the script, it will return an error message. So make sure that you are running everything, starting with the library(rvest).

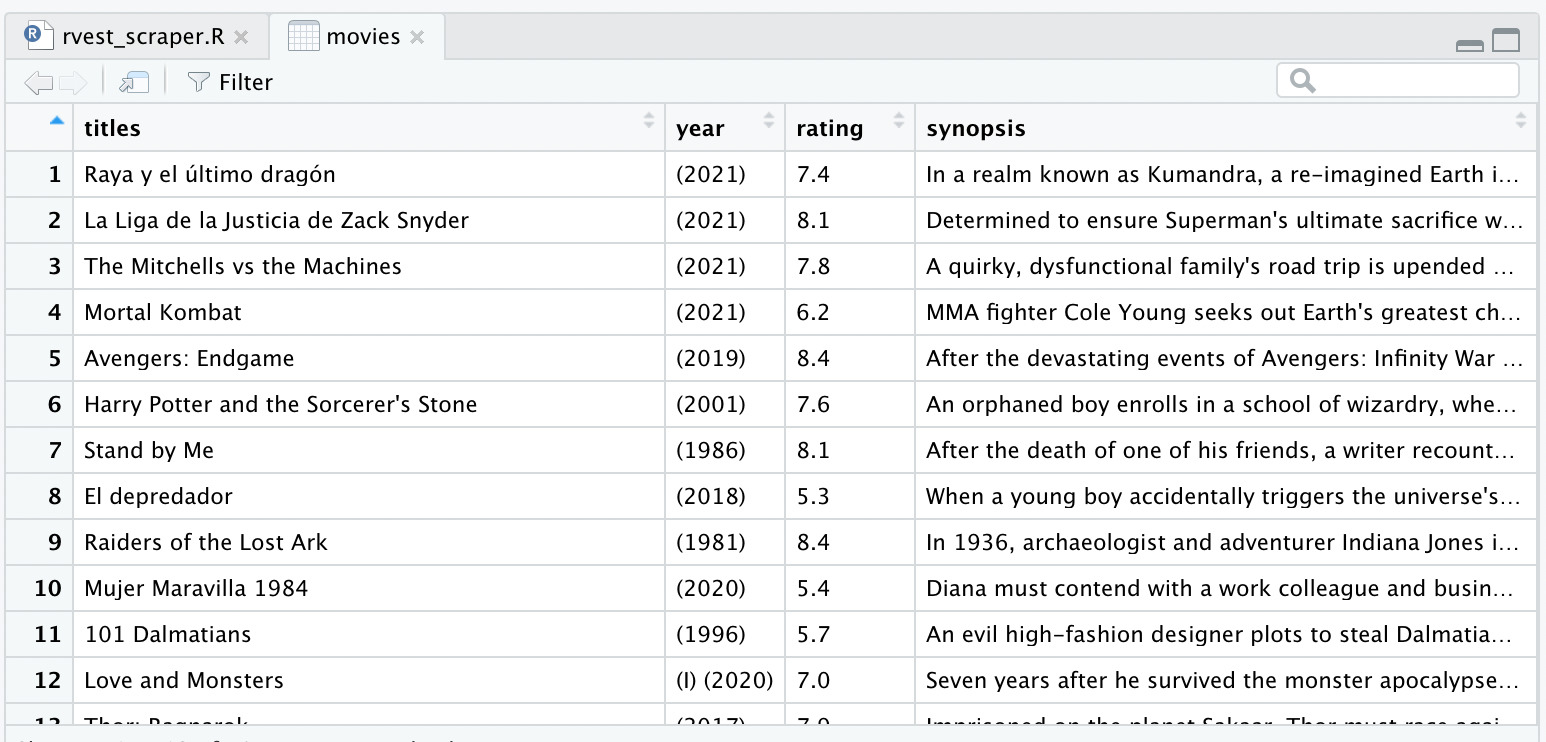
To check if it returned the result we were expecting, type ‘titles’ in the terminal.
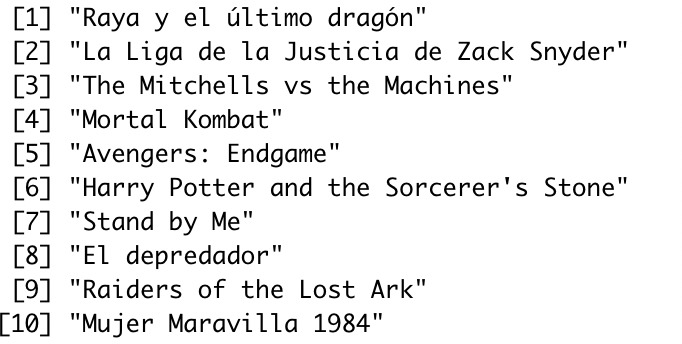
If it’s working correctly, it will return the titles of the movies like in the image above, from 1 to 50.
5. Grab the Rest of the Elements Using the > Operator and CSS Selectors
Now we’ll use the same logic to grab the rest of the elements we want from the page:
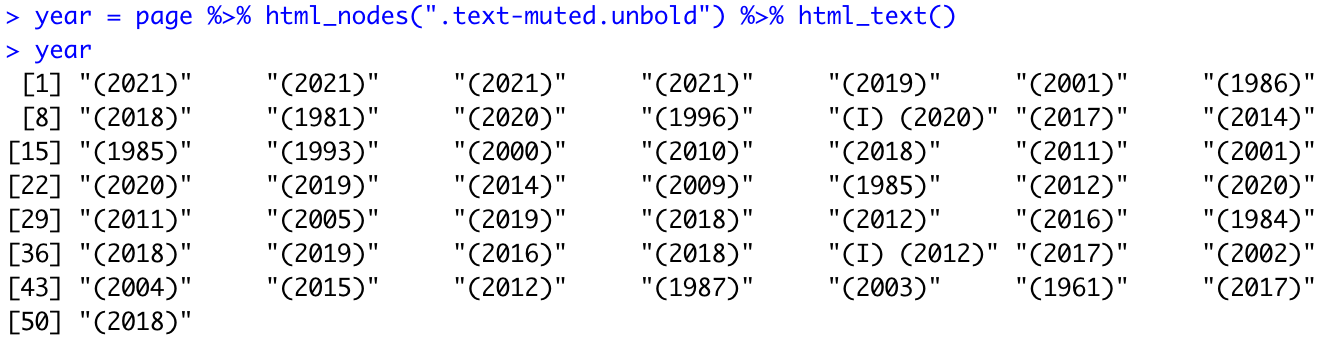
- For the year of the movies, we’ll use:
.text-muted.unbold
- For the ratings, we’ll use:
.ratings-imdb-rating strong
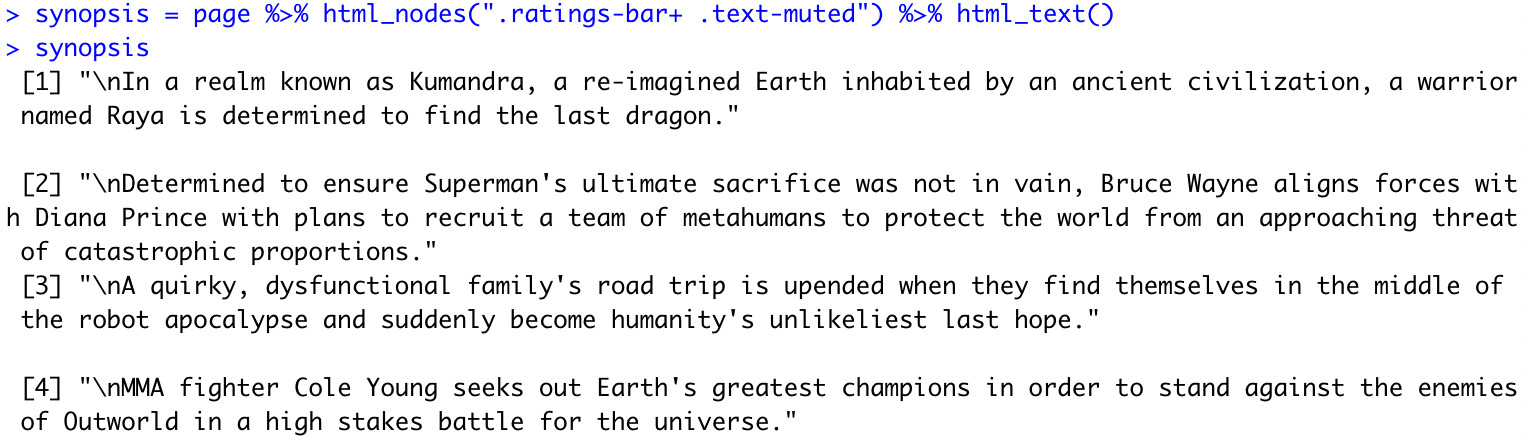
- For the synopsis of the movies we’ll use:
.ratings-bar+ .text-muted

Everything looks good so far.
6. Create a Data Frame for Your Data
Next, we’ll create a data frame using our variables as a column by calling the Rvest data.frame() function.
movies = data.frame(titles, year, rating, synopsis, stringsAsFactors = FALSE)
Run the code and type view(movies) on your console to visualize the data frame we just created.
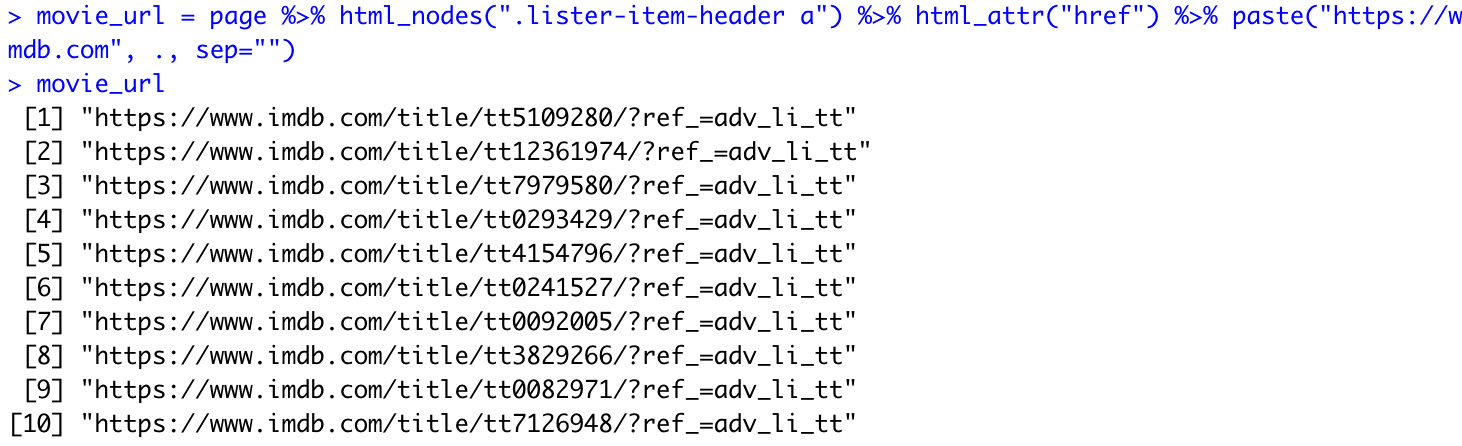
7. Extract Attributes Using Rvest
In most web scraping projects, you’ll want to extract the link within the href attribute. This can come in handy to make your scraper follow links, keep the source of the data, and much more.
Rvest and Dplyr make this process super easy. Instead of using html_text(), we’ll call html_attr(“href”) to select said attribute from within the element.
movie_url = page > html_nodes(".lister-item-header a") > html_attr("href")
However, if we inspect the page, we’ll notice that the link inside the href is incomplete.
So if we run the code as-is, we’ll get an unusable string.
We can fix it though.
By going through the first link and checking the URL, we can see that the only part missing from the link inside the href tag is https://www.imdb.com/.
Alright, so all we need to do is tell our scraper to add the missing part of the link before returning it. To do so, we’ll use the paste() function to concatenate our strings together.
movie_url = page > html_nodes(".lister-item-header a") > html_attr("href") > paste("https://www.imdb.com", ., sep="")
As you know, the > operator passes the result of the previous operation as the first argument. However, by adding a comma and a dot after the string we want in front of the line, we’re telling our operator to pass the value as the second argument.
Also, paste() will add a space between our concatenated strings, which would defeat the purpose of our function, so we add sep=”” to eliminate the space.
If we run the code now, we can verify that it’s working as expected.
8. Scrape Multiple Pages in R
The first thing we want to do is understand how the URL of the page is changing.
When we click on the ‘next’ button at the bottom of the page, the URL changes from:
https://www.imdb.com/search/title/?title_type=feature&num_votes=25000&genres=adventure
to
Each time we click on the ‘next’ button, it changes using the same logic: by increasing the start number by 50.
Lucky for us, we can trick the URL into showing us the results we’re looking for by setting start=1. We can then use it to write a for loop that increases the number by 50 and accesses all the pages we want to scrape.
https://www.imdb.com/search/title/?title_type=feature&num_votes=25000&genres=adventure&start=1&ref_=adv_nxt
To begin, we’re going to delete our link variable to create our for loop. Then we’ll create a variable called page_result and add a sequence to it, so it increases from 1 to 101 by 50 every time.
Note: You can go all the way to the last page of the pagination, but for this exercise, we’re just scraping the first three pages.
Then, we’ll add our variable inside the new URL structure, so the URL changes every time.
For this, we’re bringing back our link variable but adding a paste0() function to it – the 0 will delete all spaces by default.
After that’s ready, we’ll cut and paste the rest of our code and place it inside the for loop.
If you update your code correctly, it will look like the following:
for (page_result in seq(from = 1, to = 101, by = 50)) {
    link = paste0("https://www.imdb.com/search/title/?title_type=feature&num_votes=25000&genres=adventure&start=", page_result, "&ref_=adv_nxt")
    page = read_html(link)

    titles = page > html_nodes(".lister-item-header a") > html_text()
    movie_url = page > html_nodes(".lister-item-header a") > html_attr("href") > paste("https://www.imdb.com", ., sep)
    year = page > html_nodes(".text-muted.unbold") > html_text()
    rating = page > html_nodes(".ratings-imdb-rating strong") > html_text()
    synopsis = page > html_nodes(".ratings-bar+ .text-muted") > html_text()

    movies = data.frame(titles, movie_url, year, rating, synopsis, stringsAsFactors = FALSE)
}
There’s only one problem.
Because our data.frame is inside the for loop, it will reset itself on every run instead of accumulating the data.
To fix this, we’ll create an empty data frame outside our loop and change our current movies = data.frame() into a rbind() function, which will use our new data frame as its first argument.
It’s easier to understand visually:
movies = rbind(movies, data.frame(titles, movie_url, year, rating, synopsis, stringsAsFactors = FALSE))
What is going to happen is that the rbind function will take whatever is inside the movie’s data frame and add the new rows into it on every run instead of resetting our data.
Let’s run our code one more time and View(movies) in our console to verify that our scraper brought back all the expected results.
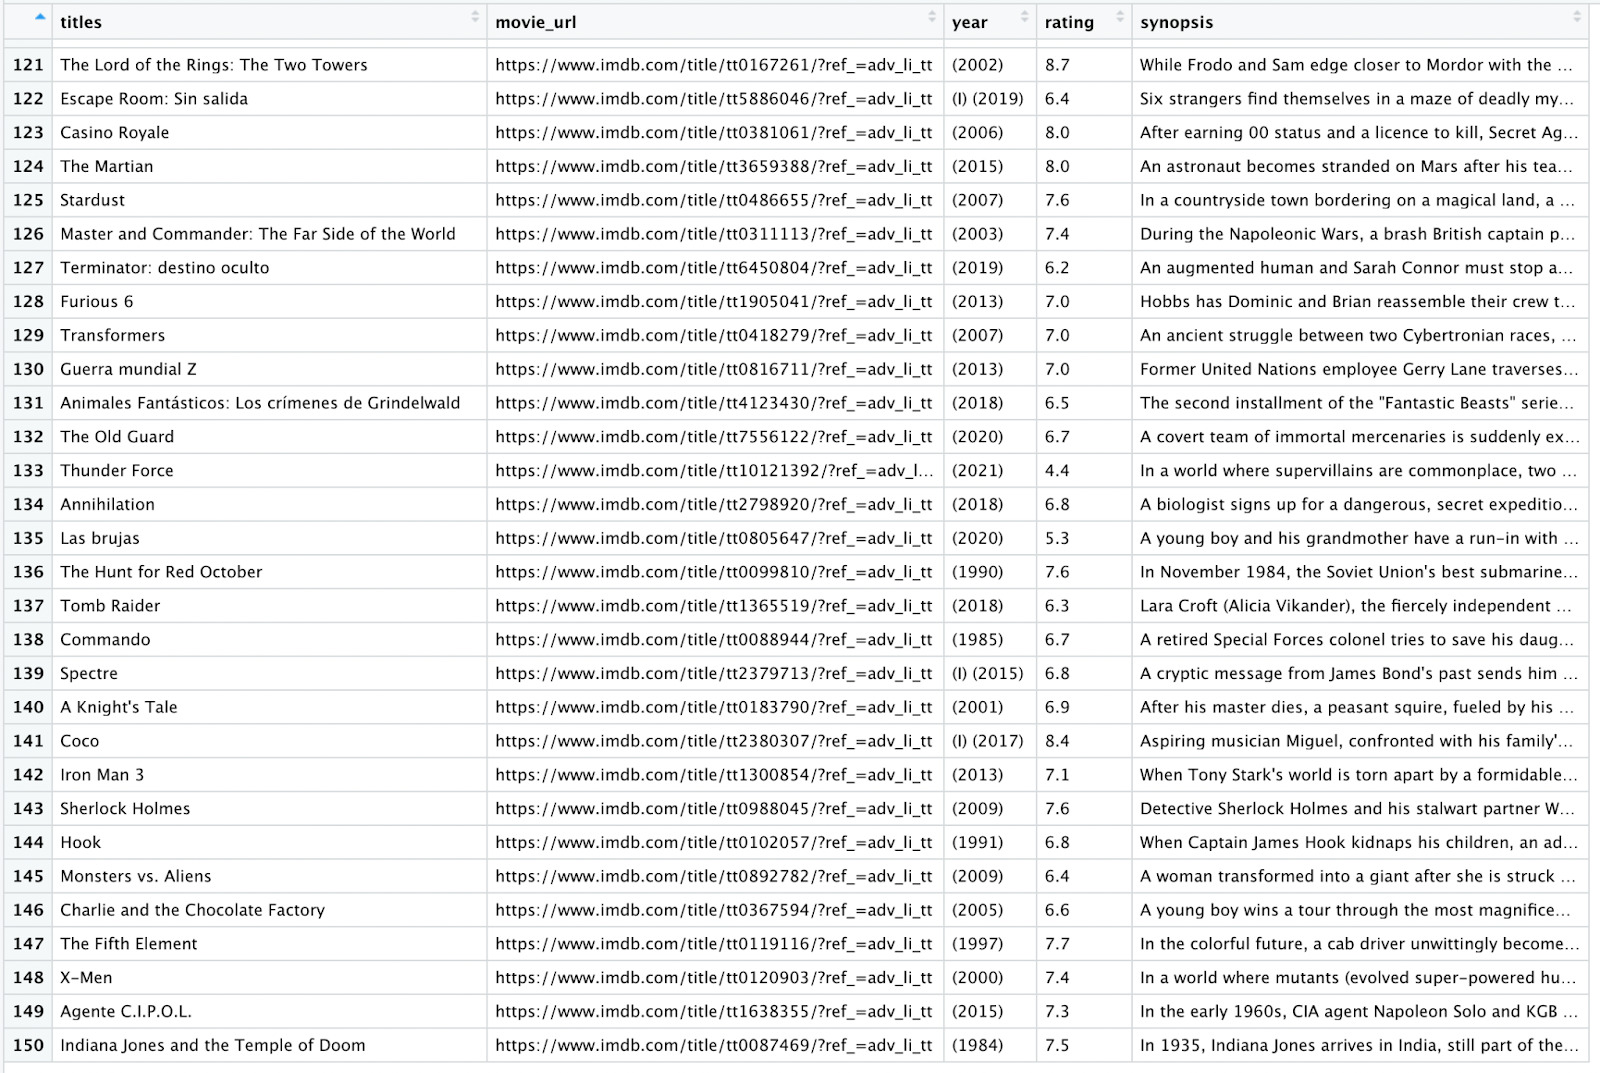
Awesome! Our R scraper is going into each new link and extracting the data. What’s more, every new row is added to the data frame instead of overwriting it.
Integrating R and Rvest Scraper with ScraperAPI
Congratulations! You just scraped three pages, getting 150 rows of data. But, of course, you could easily change the seq in the for loop and scrape way more than that, so you can imagine how powerful your new web scraper built in R using Rvest and Dplyr can be.
Scraping three pages is one thing, but what if you want to scale your project and scrape hundreds or thousands of pages using your script?
The reality is that when you do web scraping at scale, you’ll find many roadblocks in your way.
A few common web scraping scenarios you may run into:
- Because our scraper is sending a lot of requests to the server, the website owner could have put in place mechanisms to ban our IP address, preventing us from accessing the site at all. This ban/block may only be for a few hours, but in some cases can be permanent. That would make our script virtually unusable.
- Another common issue, specifically for modern sites, is having to execute JavaScript. When you send a request using Rvest, it will return the HTML it finds in the target URL. However, it will not run any JS, so if the site relies on a JS script to add content to the page, it will return an empty (or partially loaded) HTML file that won’t work at all.
- Some websites present different data depending on your geolocation (like Amazon). In those cases, if we want to scrape data specifically from one region while we’re in another, we’ll have to figure out a way to change the geolocation of our IP.
- Something that is becoming increasingly common is the use of CAPTCHAs. Unfortunately, our scraper won’t pass this test and will get blocked by the server.
All of these challenges can break our scrapers in seconds.
That’s where ScraperAPI comes in.
ScraperAPI is a robust solution that automatically handles these roadblocks by adding just a few lines of code into our scraper.
It uses machine learning, years of statistical data, 3rd party proxies, and huge browser farms to ensure you never get blocked by anti-scraping techniques.
Let’s integrate ScraperAPI endpoint into our R scraper:
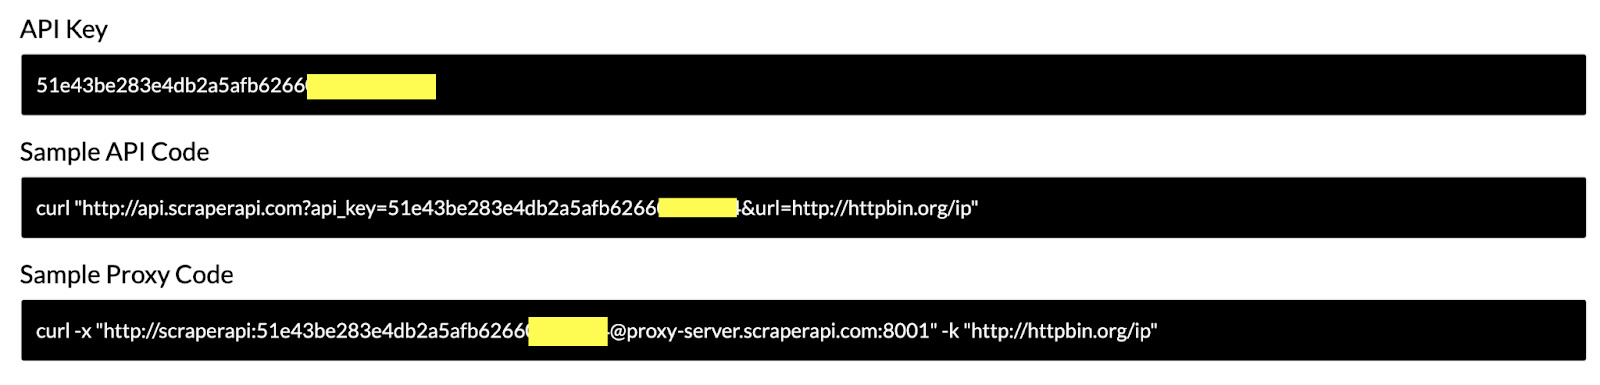
1. Signup for a Free ScraperAPI Account and Get Your API Key
You can create a ScraperAPI account using your Gmail or GitHub, or just by creating an account from scratch.
Once you’re signed up, you’ll have access to all of ScraperAPI’s functionalities for a month, and 1000 free API credits every month. This will be more than enough to test every feature that our API offers.
Inside your dashboard, you’ll find your API key and example code you can copy and paste.
2. Send the Target URL to ScraperAPI’s Servers for Processing
There are several ways to use ScraperAPI – you can learn more by checking out our documentation – but we’ll use the simplest one because it makes sense for our simple scraper.
As you see in the example code, we can send the request to ScraperAPI by specifying the URL as a parameter.
curl "https://api.scraperapi.com?api_key=Your_API_Key&url=https://httpbin.org/ip"
This is perfect for us because of the way we are using the for loop, and the only that’ll change is the start= parameter.
All we must do is update the URL inside our link variable like this:
link =
paste0(
"https://api.scraperapi.com?api_key=51e43be283e4db2a5afb6266xxxxxxxx&url=https://www.imdb.com/search/title/?title_type=feature&num_votes=25000&genres=adventure&start=", page_result, "&ref_=adv_nxt"
)
ScraperAPI will automatically rotate your IP address and use the most effective header for every request to ensure that it is successful.
It will also handle every CAPTCHA your scraper encounters, so you can focus on the data and not on clearing bottlenecks.
If your request fails, ScraperAPI will keep trying with a different proxy/header for 60 seconds. If it can’t access the site after that time, it will return a 500 status code.
Before moving to using parameters to increase our scraper functionalities, let’s do one last change to the structure of our URL.
Did you notice that every parameter is separated by a & mark? Yes?
But did you notice our target URL uses it as well? This can become a problem as ScraperAPI won’t be able to understand which ones belong to the URL and which ones are intended for it to use.
To solve this, we’ll replace the & marks in the URL for &. So the finished URL structure we’ll be using for our scraper should look like this:
link =
paste0(
"https://api.scraperapi.com?api_key=51e43be283e4db2a5afb6266xxxxxxxx&url=https://www.imdb.com/search/title/?title_type=feature&num_votes=25000,&genres=adventure&start=", page_result, "&ref_=adv_nxt"
)
3. Scrape Dynamic Pages Using ScraperAPI
As we said above, our scraper can’t run any JavaScript code on its own. But with the help of ScraperAPI, it will.
Scraping dynamic pages with ScraperAPI is as simple as adding render=true as a parameter at the end of our URL.
..."&ref_=adv_nxt&render=true")
This parameter will tell ScraperAPI that it needs to execute the JavaScript of the site, wait for it to load, and then bring back the response.
In our current example, we don’t really need to render any JS to load content in IMDb, so don’t add the parameter when running your script as it uses more resources and will make it slower for no real reason.
Note: To efficiently use ScraperAPI, check our article on web scraping best practices. In addition, you’ll find a ScraperAPI cheat sheet to help you set your API endpoint correctly.
4. Send Your Request for a Specific Location
Finally, we’ll use another parameter to tell ScraperAPI where we want our request to come from, so we can scrape geo-specific data.
..."&ref_=adv_nxt&country_code=uk")
You can find a complete list of available country codes in our documentation.
[Bonus] Understanding Web Page Structure: HTML and CSS
In essence, web scraping is the process of downloading, parsing, and extracting data presented in an HTML file and then converting it into a structured format that allows us to analyze it.
To scrape a website, we need to read an HTML structure to find tags, IDs, and/or classes we can use to identify said pieces of information.
If you’re not familiar with HyperText Markup Language (HTML), you’ll find it really hard to do any web scraping efficiently. So let’s explore our homepage as an example.
Inside our homepage, right-click and hit inspect to open the Chrome Dev Tools.
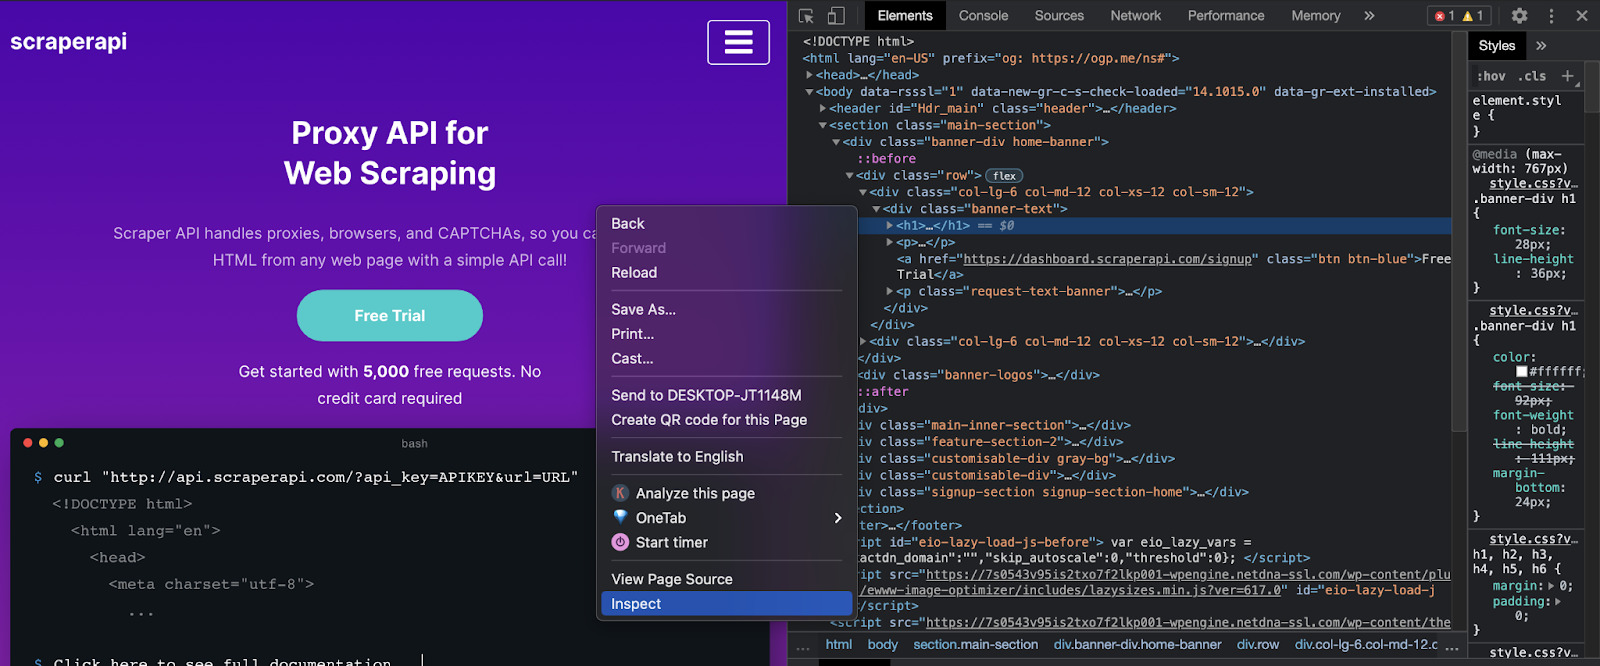
What you see on the right is the HTML code of the page. Each line of code tells the browser how to show every element in your display by assigning tags to each component within the body tag.
It also contains all the metadata inside the head tag. This is where things like meta descriptions, scripts, links to external files (e.g., The CSS and JavaScript files), and more information about the page can be found.
For web scraping in R, we’ll only need to understand the document’s body tag as that’s where the content we want to scrape resides.
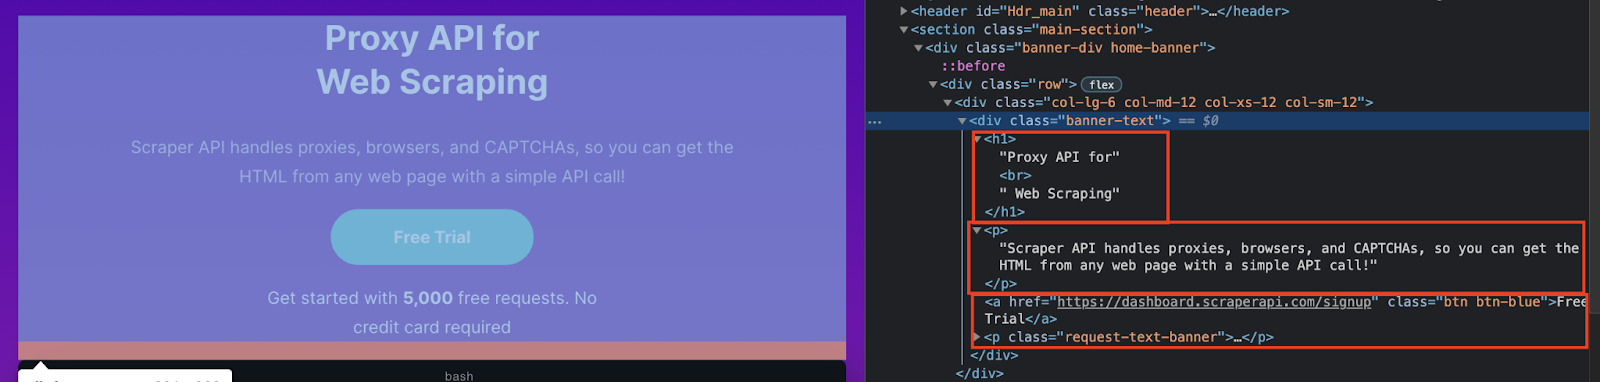
By taking a look at the header of the page, we can see that all the elements in this section are wrapped between a div with class=”banner-text”, and we can quickly identify each element:
- The title is between h1 tags without any class
- The first paragraph is between p tags without any class
- And the text of the button is wrapped between a tags with
class="btn btn-blue"
This is the exact process we’ll be following to identify the elements from our target website and tell our scraper which information to extract.
Notice that tags can also have IDs and classes. We can use these to implement CSS selectors in our code.

Imagine you write a web scraper and tell it to fetch all titles using h2s within a page. The problem with this approach is that menu links and other text elements can use the same tag, but a different CSS selector to give it its style.
The end result would be a lot of noise in your data that you’ll have to clean later on, wasting time and resources. If you’re scraping at scale, it could be even impossible to clean the data sets because of the amount of information scraped.
Note: If you want to learn more about HTML and CSS beyond just web scraping, check the responsive web design certification by FreeCodeCamp.
To make our job a little easier, we’ll be using the SelectorGadget extension. Basically, it will provide you the correct selector of the elements you click on.

We’ll see how it works in a real-case scenario later in this tutorial.
[Bonus] R vs. Python: Which is Better for Web Scraping?
If you’re looking to analyze and manipulate large datasets and create comprehensive data visualizations, R may be a better choice over Python. In short, web scraping in R can be a better choice than Python in cases when you want to analyze and manipulate large sets of data and create comprehensive data visualizations. For example, if you’re going to do sentiment analysis or customer behavior analysis then a web scraper built in R might be a good choice.
Python and R are two of the most popular programming languages for data scientists. They both have active, supportive communities, several packages to make web scraping and data manipulation more effortless, and new tools and libraries are being developed constantly.
However, Python is a more versatile and easy-to-learn language than R. Its english-like syntax makes it easy to understand for beginners and professionals. With libraries like Scrapy and Beautiful Soup, you can build complex web scrapers with a few lines of code.
On the other hand, R is more complex for beginners and is more focused on statistical analysis. Moreover, compared to Python, it has a larger ecosystem of stats models and in-built data analysis tools. Thus, making R more suited for statistical learning, data exploration, and data experimentation, with the added advantage of being able to create beautiful data visualizations like charts and plots.
A lot of teams actually use both languages, using R for early-stage data analysis and exploration and then using Python to ship data products.
Block-Free Web Scraping Using R with ScraperAPI
We hope you enjoyed this web scraping tutorial, and that you learned a thing or two on how to use R and Rvest for web data aggregation.
There’s still a lot to learn, so stay tuned for more tutorials and guides.
In the meantime, why don’t you check out our step-by-step guide to building a Node.js web scraper? It is full of code examples and a real-case eCommerce web scraping scenario.
Until next time, happy scraping!
