

MCP servers extend an LLM’s reach by connecting it to external tools and data sources. In practice, an LLM is only as capable as the quality of external tools behind it. ScraperAPI is a powerful scraping tool that can extract data from heavily protected, JavaScript-heavy websites that many scraping providers can’t access.
In this guide, you’ll learn how to connect ScraperAPI’s MCP server to Claude Desktop App and scrape web data in real-time.
How does it work?
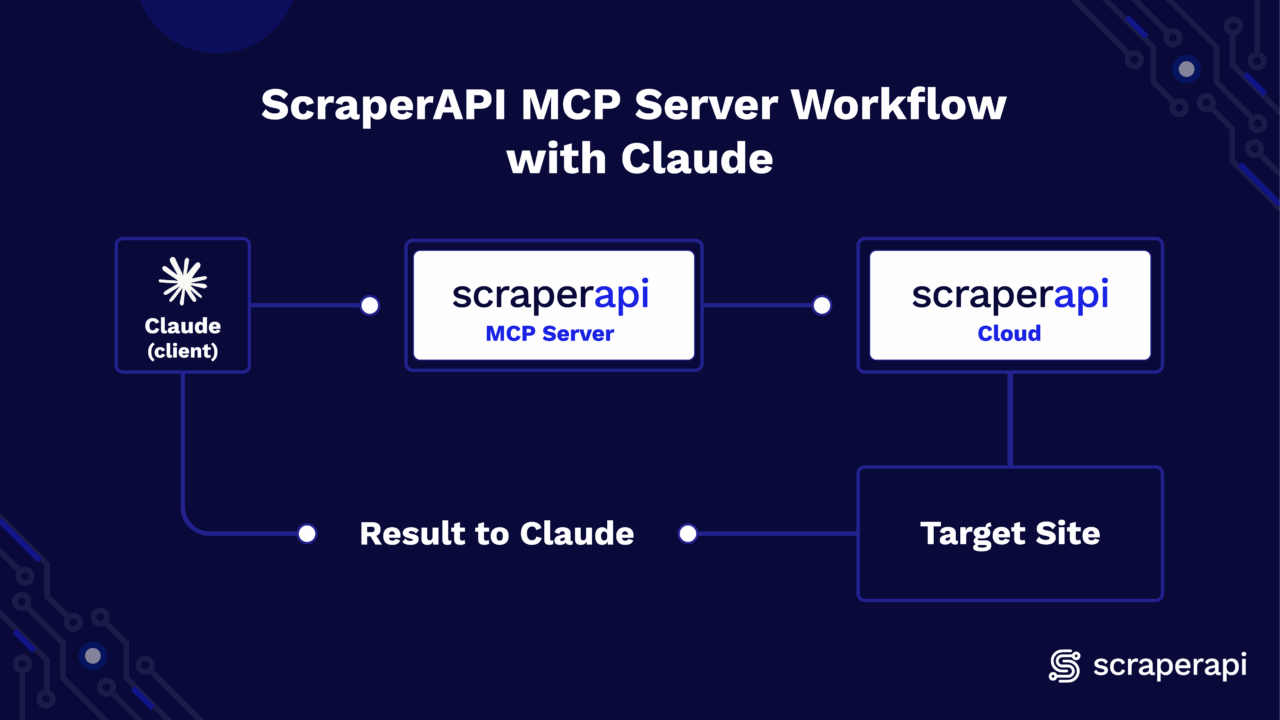
When you start your prompts with “scrape …,” Claude automatically launches the local ScraperAPI MCP Server and invokes its scrape tool. It then forwards your parameters; ScraperAPI handles proxies, rendering, and anti-bot, then returns the response (HTML, JSON, etc.) directly in the same conversation for parsing, summarizing, or extraction. There are no webhooks or polling, just a config file and a prompt.
Getting Started
Setting up the ScraperAPI MCP server on Claude is easy and straightforward. Just follow the steps below:
1. Prerequisites
- Python 3.11+
- A Claude account (Desktop app used in this guide)
- A ScraperAPI account and API key
2. Installation & Setup
Open your IDE terminal and install the scraperapi-mcp-server using pip. If you don’t have an account yet, create one on scraperapi.com and copy your API key from the Dashboard.
pip install scraperapi-mcp-server
3. Configure Claude (Desktop)
- Download and open Claude Desktop on your computer.
- Toggle the sidebar at the top-left corner
- Click on your profile icon at the bottom
- Go to Settings
- Click on Developer
- Select Edit Config
- Open the
claude_desktop_config.jsonfile and paste one of the following JSON blocks below (next section) - Quit and reopen Claude Desktop
4. Paste JSON Block to Client
The JSON block below registers and launches the ScraperAPI MCP Server via Claude.
{
  "mcpServers": {
    "ScraperAPI": {
      "command": "python",
      "args": ["-m", "scraperapi_mcp_server"],
      "env": {
        "API_KEY": "<YOUR_SCRAPERAPI_API_KEY>"
      }
    }
  }
}
Please note: If you are using an environment, make sure to point Claude to its Python library in your JSON config: "command": "/Users/you/scraperapi-mcp/.venv/bin/python" |
That’s it, the MCP Server is fully configured. Include the keyword scrape in a prompt, and the LLM will automatically use ScraperAPI to retrieve the data you need.
Developer Workflows
If you want to run the MCP server locally, the steps below cover setup, debugging, and advanced customization:
1. Local setup
1. Clone the repository:
git clone https://github.com/scraperapi/scraperapi-mcp
cd scraperapi-mcp
2. Install dependencies and run the package locally
# Create virtual environment and activate it
python -m venv .venv
source .venv/bin/activate # MacOS/Linux
# OR
.venv/Scripts/activate # Windows

# Install the local package in editable mode
pip install -e .
2. Run the server
export API_KEY=<YOUR_SCRAPERAPI_API_KEY> # Export your API key to the environment
python -m scraperapi_mcp_server
3. Debug
python3 -m scraperapi_mcp_server --debug
4. Testing
In this project, we will use pytest for testing.
- Install
pytest
# Install pytest and pytest-mock plugin
pip install pytest
pip install pytest-mock
- Install Test Dependencies
# Install the package with test dependencies
pip install -e ".[test]"
- Running Tests
# Run All Tests
pytest

# Run Specific Test
pytest <TEST_FILE_PATH>
Using the MCP Server
ScraperAPI’s MCP server exposes access to the following parameters when you call the scrape function:
Parameters:
url(string, required): The target URL to scrape.render(boolean, optional): Enables JavaScript rendering for dynamic pages.country_code(string, optional): ISO-2 code for geo-targeting (e.g., “us” for the United States and “gb” for Great Britain).premium(boolean, optional): Activate Premium residential/mobile IPs.ultra_premium(boolean, optional): Enhanced anti-blocking; cannot be combined withpremium.device_type(string, optional): Set request to use “mobile” or “desktop” user agents.
Prompt Templates
As a reference, here are some prompt templates you can try out and tweak with your own URLs:
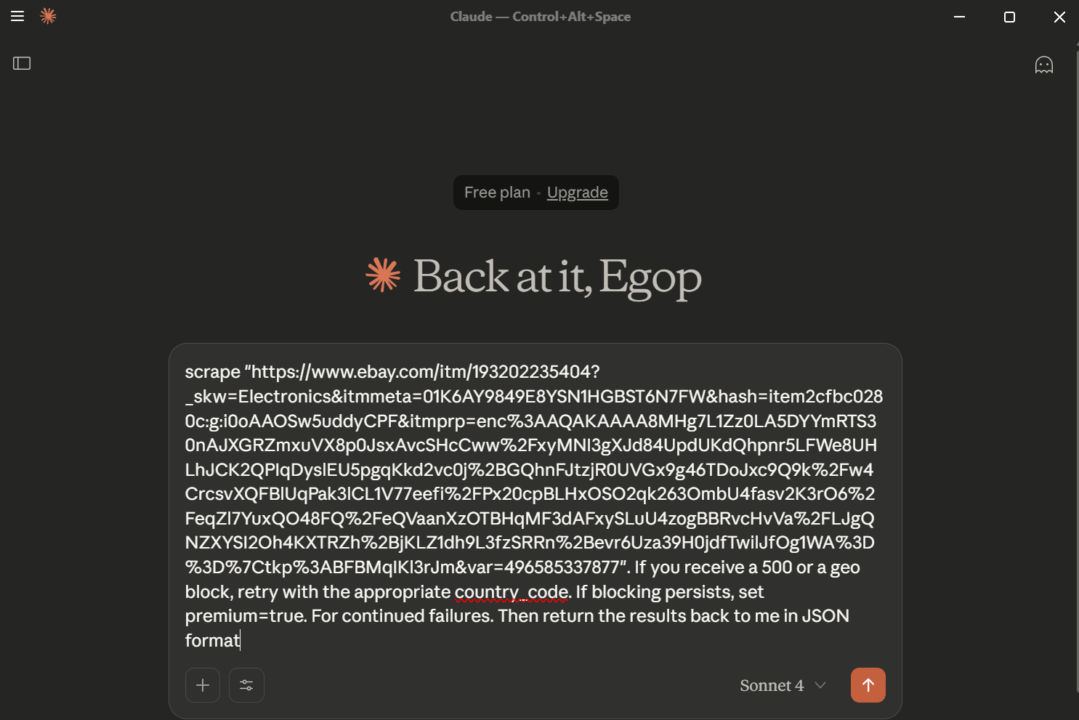
- “scrape
<URL>. If you receive a 500 or a geo-block, retry with the appropriatecountry_code. If blocking persists, setpremium=true. For continued failures, escalate toultra_premium=true. Return the final result in JSON.” - “Scrape
<URL>and extract<SPECIFIC_DATA>. If the data is missing or incomplete, re-run withrender=trueto enable JavaScript rendering.”
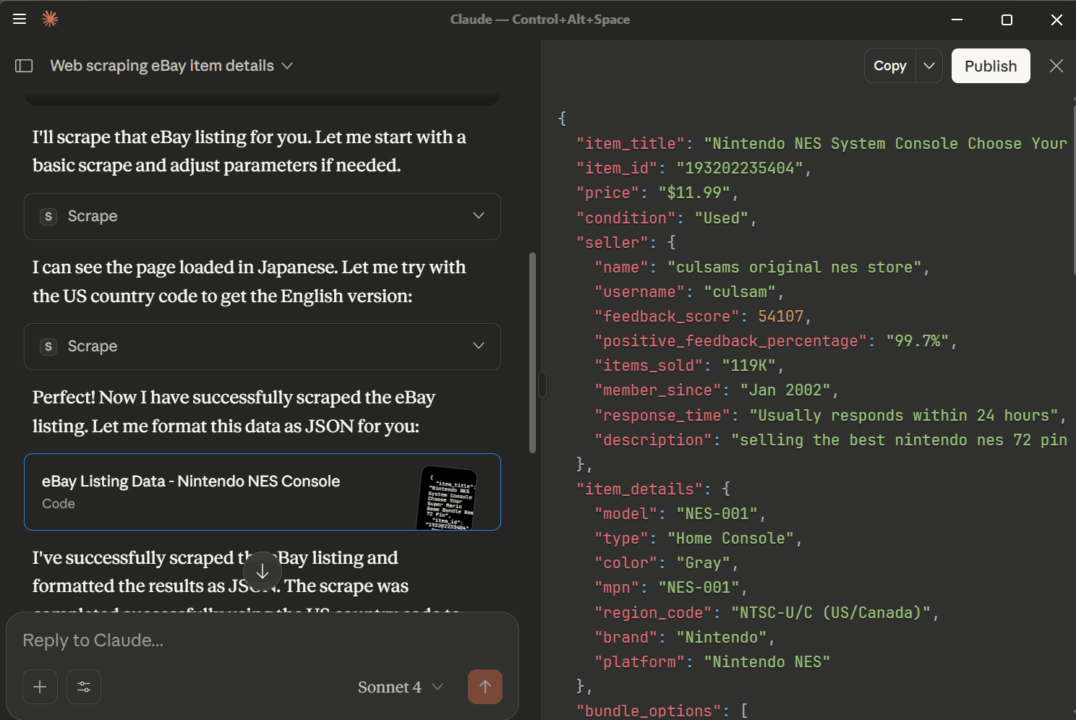
Here’s a visual of the results of the first prompt tested on an actual eBay URL:
Conclusion
With the MCP server installed and Claude configured, you’re just a prompt away from scraping websites directly in Claude. Start simple with scrape <URL>, then add parameters like country_code, render, or premium options if the page requires them.

