
Build a custom scraper TikTok influencer scouting tool that lets you filter creators by country, follower count, and more while supporting follow up queries, using the ScraperAPI LangChain agent for data extraction, Qwen3’s LLM for contextually relevant insights, and Streamlit for free app hosting.

Influencer marketing is rapidly eclipsing traditional ads, especially among younger audiences who value authenticity and relatability. Micro-influencers, with their tight-knit and highly engaged communities, inspire far more trust and loyalty than a generic banner ever could.
Yet, follower counts and engagement metrics alone won’t guarantee success. What truly moves the needle is partnering with creators whose unique voice, values, and vision mirror your brand, who spark real action rather than empty clicks.
We are building a solution that can increase lead generation and targeted marketing thanks to its highly customizable approach, and help you find the right influencer to really boost your brand.
You will learn how to build a TikTok influencer scouting tool that utilizes the LangChain-ScraperAPI agent for scraping raw data and finding niche creators through natural-language queries.
We will use Qwen3 as our large language model to deepen the tool’s contextual understanding and Streamlit to deploy and host the finished app for free in the cloud.
Let’s get started.
Understanding AI Agents in LangChain
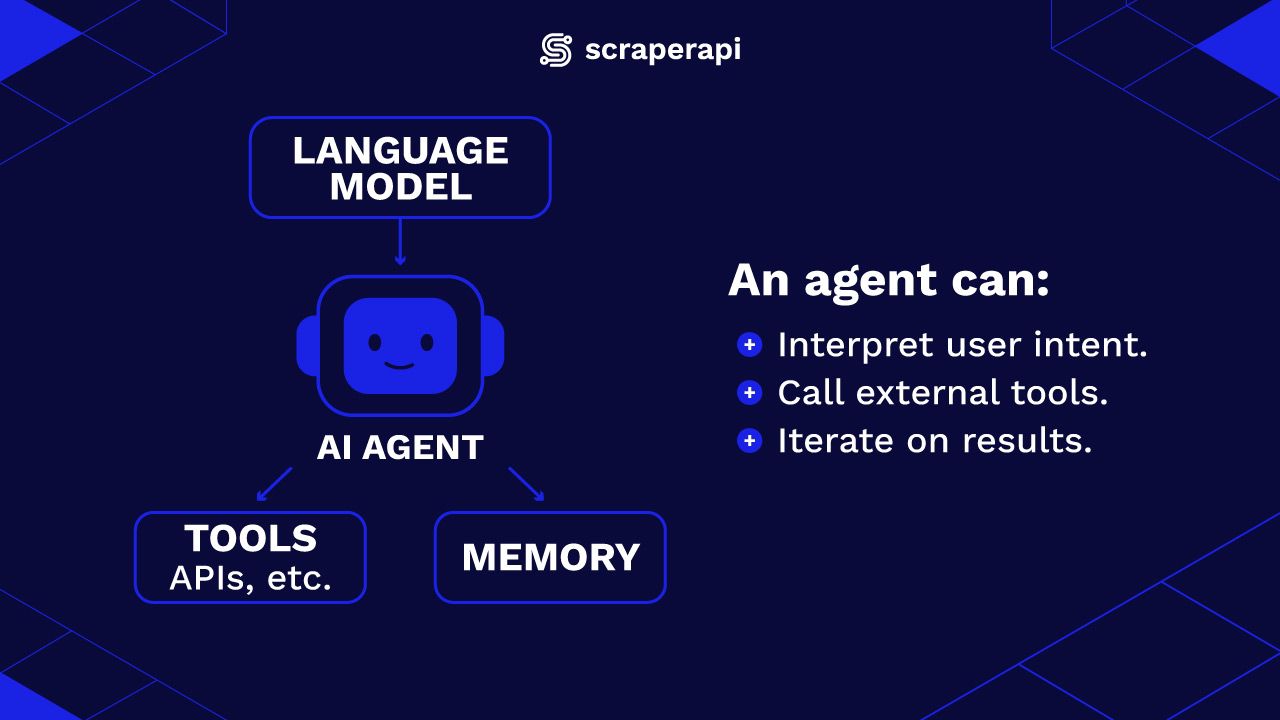
Fundamentally, an AI agent is a program that combines a large language model (LLM) with tools and memory to perform tasks autonomously. Rather than responding to one-off prompts, an agent can:
- Interpret and execute user intent by breaking down high-level queries into actionable steps.
- Call external tools like APIs, web scrapers, databases, etc., to gather or process information.
- Continue reasoning and iterating on results until it meets the user’s requirements.
What sets agents apart from standard LLM applications is the capacity to make informed decisions about what actions to take next based on intermediate results. Agents are not only reactive—they are active participants in solving a task.
For example, instead of answering “What’s the weather like in Paris?”, a LangChain agent can respond to a complex, multi-part query:
“Plan a weekend getaway in Paris. I need weather forecasts, hotel prices under $200 per night, and suggestions for indoor activities if it rains.”
The agent breaks this down, uses tools like the ScraperAPI Google Search Tool and a general-purpose web scraper, to gather each piece of information, like weather data, hotel listings, and local attractions, and then combines everything into a complete response.
LangChain provides a flexible framework to assemble these components. You define a set of functions, APIs, or scrapers, wrap them with simple adapters, and then wire them into an agent that uses the LLM to decide when and how to call each resource.
How Does Autonomous Scraping with the LangChain–ScraperAPI Integration Work?
The LangChain-ScraperAPI integration is a Python package that allows AI agents to scrape the web using ScraperAPI. The package contains three different components, each corresponding to an official ScraperAPI endpoint:
- ScraperAPITool: Allows the AI agent to scrape any website and retrieve data
- ScraperAPIGoogleSearchTool: Specifically enables the agent to scrape Google Search results and rankings.
- ScraperAPIAmazonSearchTool: Scrape Amazon search results and rankings exclusively.
All you need to do to use this package in Python is to install it with pip, then import the components:
pip install -U langchain-scraperapi
from langchain_scraperapi.tools import (
   ScraperAPITool,
   ScraperAPIGoogleSearchTool,
   ScraperAPIAmazonSearchTool
)
If you don’t have it already, create a ScraperAPI account and get your API key, then set it as an environment variable. In your terminal, run:
export SCRAPERAPI_API_KEY="your API key"
Once the tools are installed, you can create an instance of any of them and provide parameters such as the URL to scrape, the output format you want, and any additional options you need. Here’s an example:
from langchain_scraperapi.tools import ScraperAPITool
tool = ScraperAPITool()
print(tool.invoke(input={"url": "walmart.com", "output_format": "markdown"}))
The code above initializes one of the package’s components, ScraperAPITool, ascribes it as a variable, and then uses the invoke method to scrape “walmart.com”, requesting the output in markdown format. The scraped content is then printed.
The great thing about agents is that you can instruct them in natural language to do complex tasks. For instance, we can give the ScraperAPI-LangChain agent a query to search and return results and even images of teddy bears for sale on Amazon, and it will do just that. Below is a sample of the code:
from langchain_scraperapi.tools import ScraperAPIAmazonSearchTool
tool = ScraperAPIAmazonSearchTool()
print(tool.invoke(input={"query": "show me pink teddy bears for sale on Amazon"}))
Using the regular ScraperAPI Amazon Endpoint will also return the same results, but you’d have to find and input an actual Amazon URL with pink teddy bears on display and then attempt to scrape the web page. Using the ScraperAPI-LangChain agent makes it easier and to retrieve complex data instantly with minimal coding and resources.
How to Obtain Qwen3 from OpenRouter
As we’re making use of a large language model from OpenRouter, we’ll need to set up an account and get out API key, before we can start making requests..
What sets Qwen models apart is their efficiency and scalability, particularly when it comes to those built on the Mixture of Experts (MoE) architecture. Unlike traditional large language models where all parameters are activated for every query, MoE models contain multiple ‘expert’ sub-networks.
This means that, as they process information, MoE models activate only a small subset of specialized sub-networks (“experts”) based on learned routing decisions, allowing them to interpret, understand, and respond to a query without engaging the full model. This selective activation enables MoE models to maintain high performance while significantly reducing computational overhead and costs.
As a result, Qwen3 consistently delivers responses that are highly contextual, informative, and relevant.
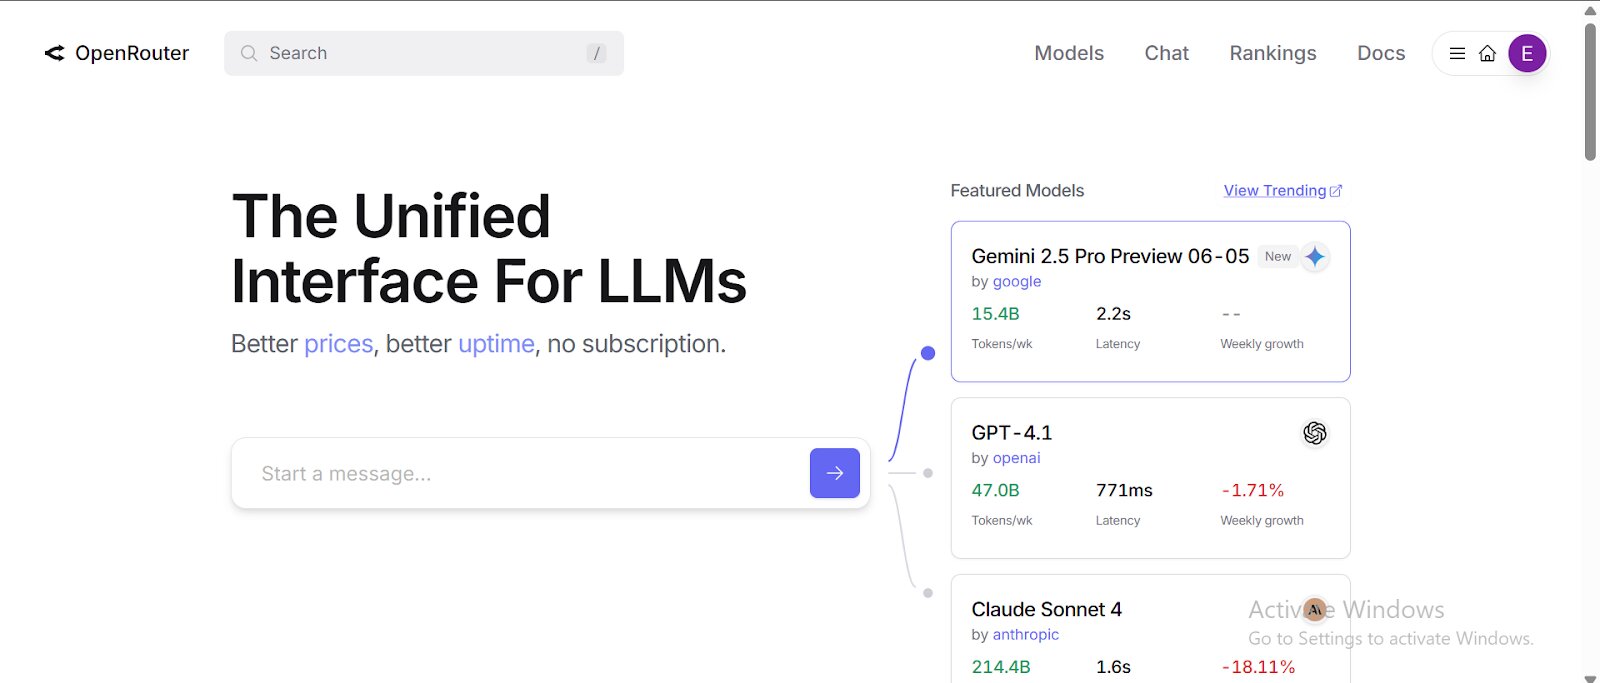
Here’s a guide on how to access a model from OpenRouter:
- Login to OpenRouter, sign up, and create a free account:
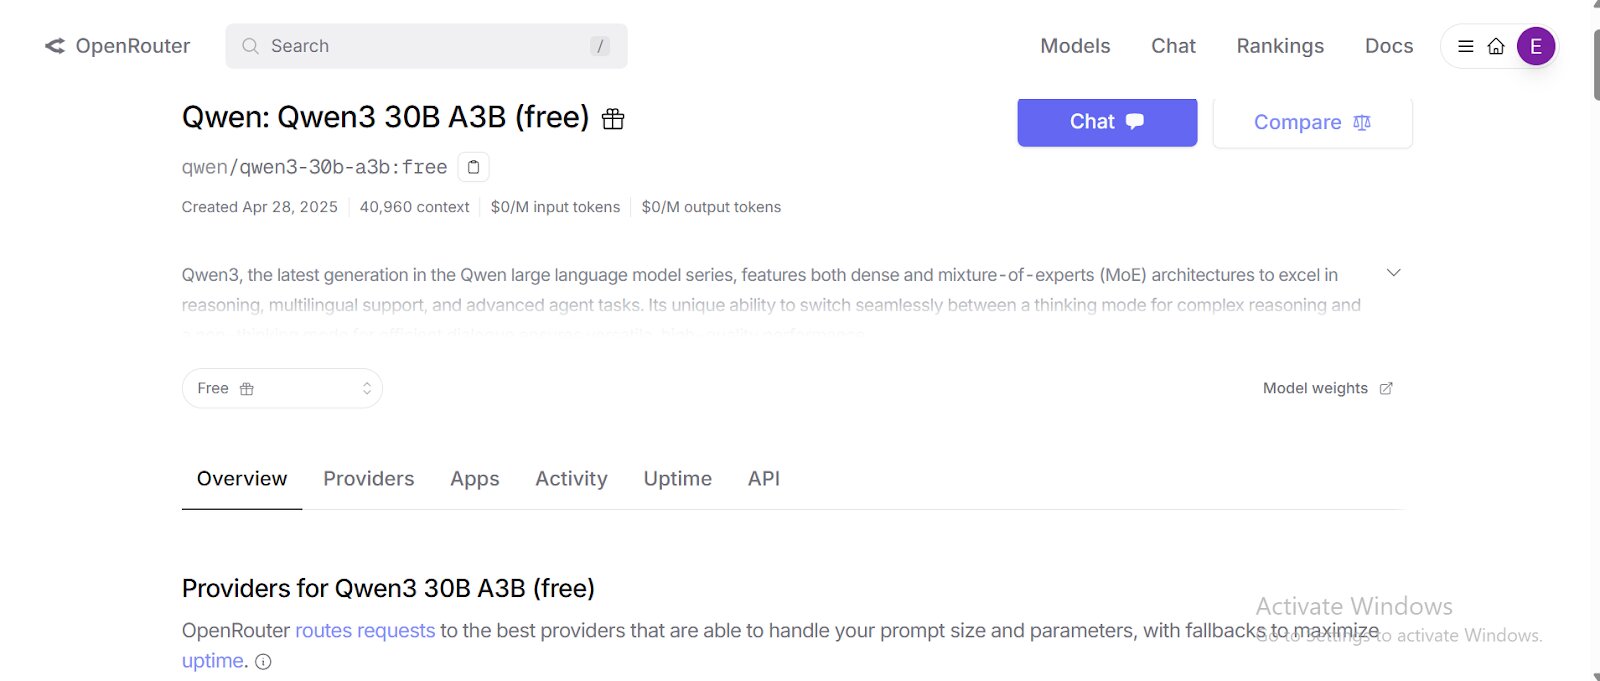
- After verifying your email, log in and search for Qwen3 models (or any other LLM of our choice) in the search bar:
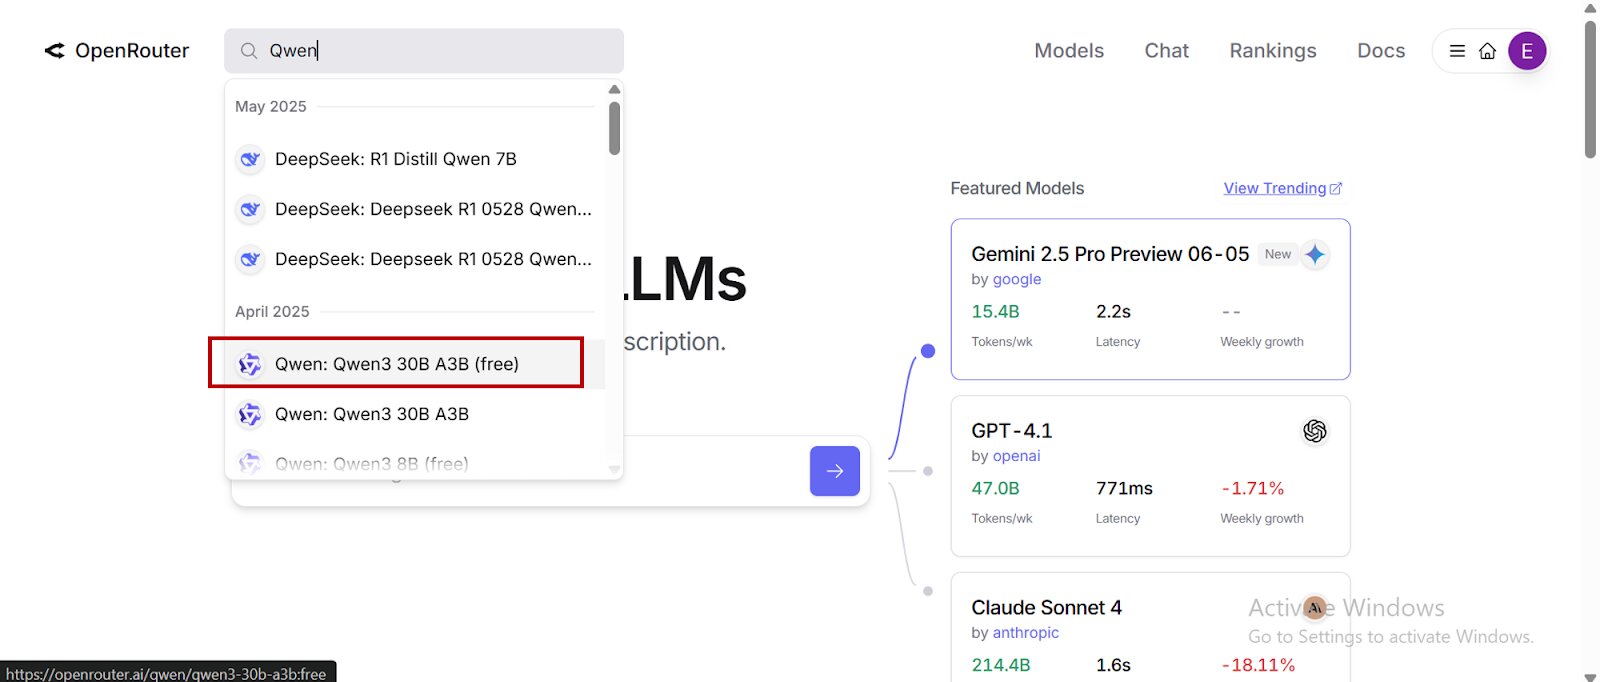
- Go to the Qwen3 model of your choice:
- Click on “API” to create a personal API access key for your model.
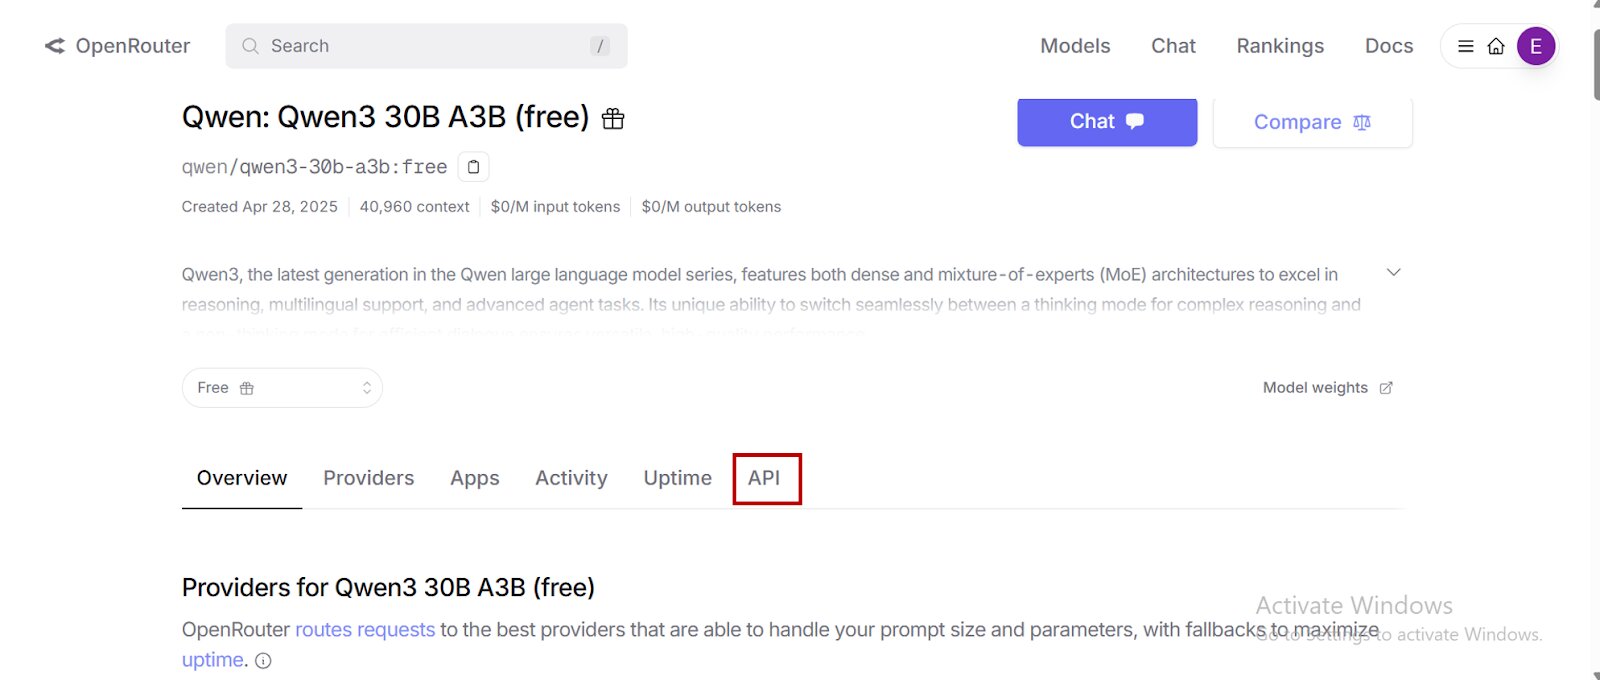
- Select “Create API Key” and then copy and save your newly created API key.

- Do not share your API key publicly.
Getting Started with ScraperAPI
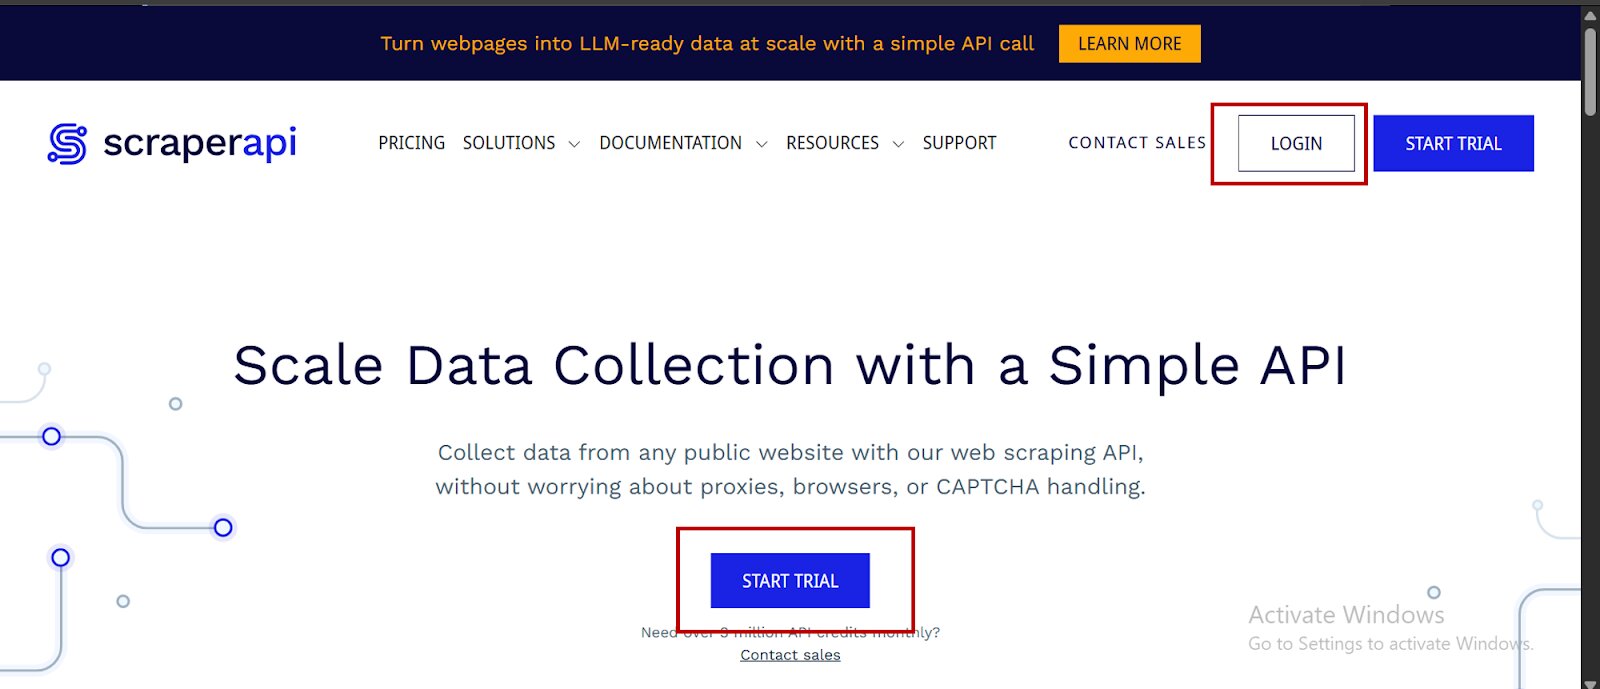
- To begin, go to ScraperAPI’s dashboard. If you don’t have an account yet, click on “Start Trial” to create one:
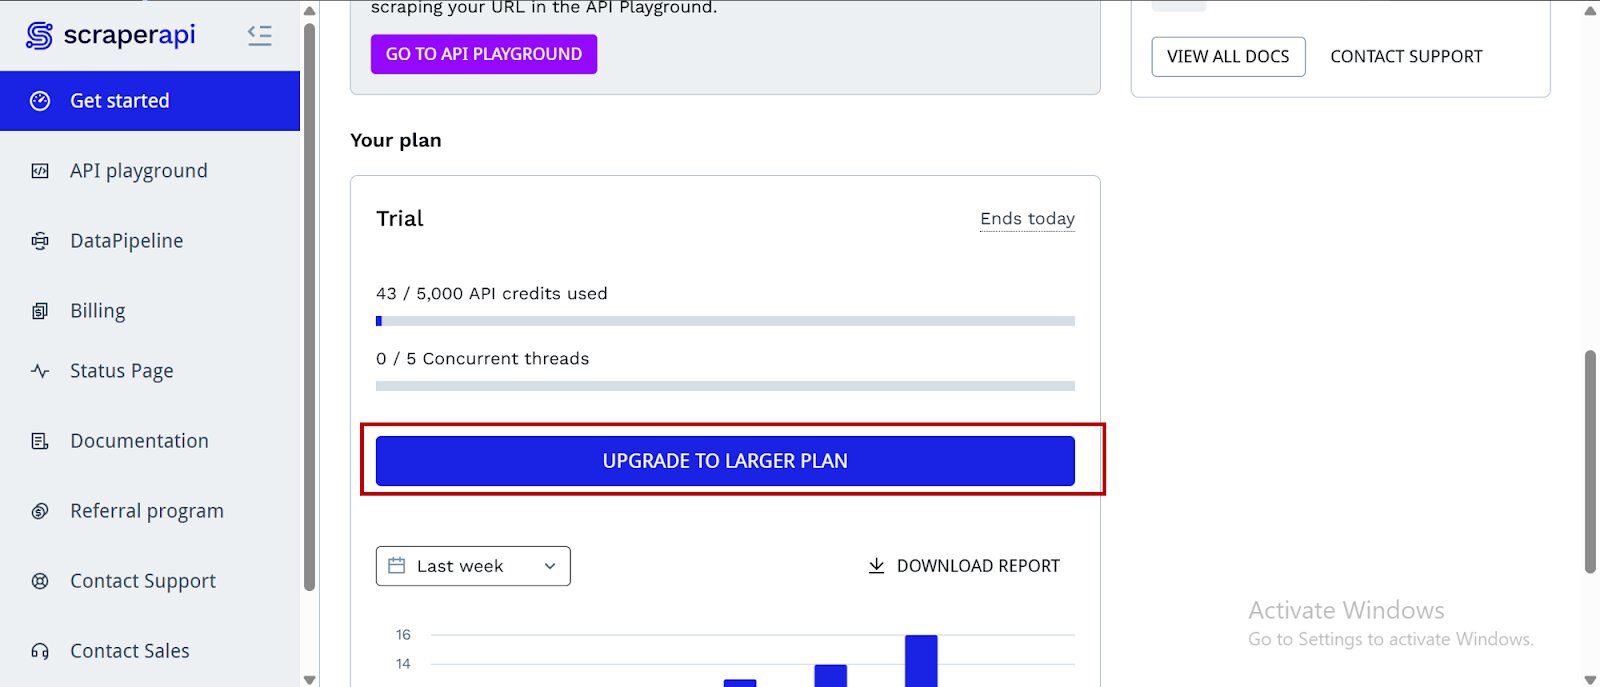
- After creating your account, you’ll have access to a dashboard providing you with an API key, access to 5000 API credits (7-day limited trial period), and information on how to get started scraping.
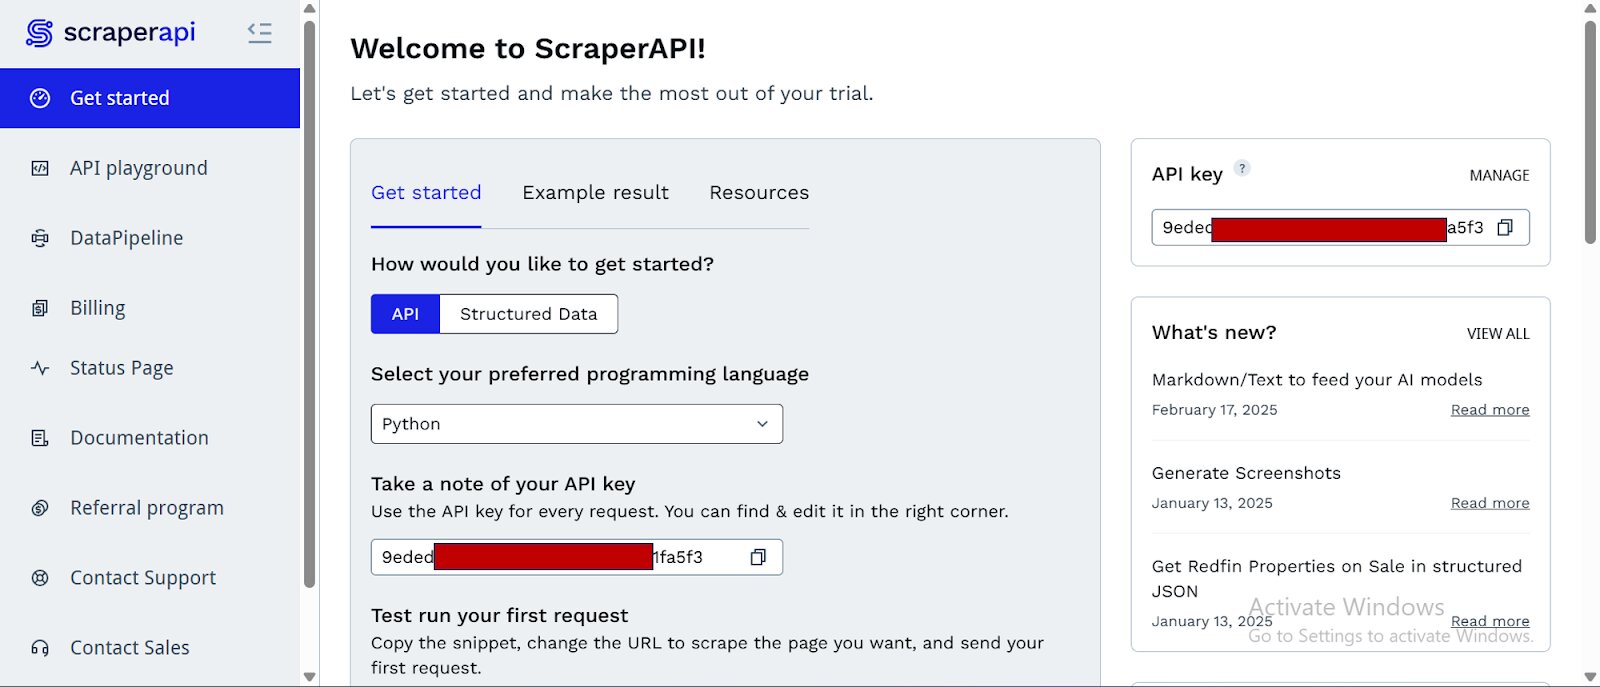
- To access more credits and advanced features, scroll down and click “Upgrade to Larger Plan.”
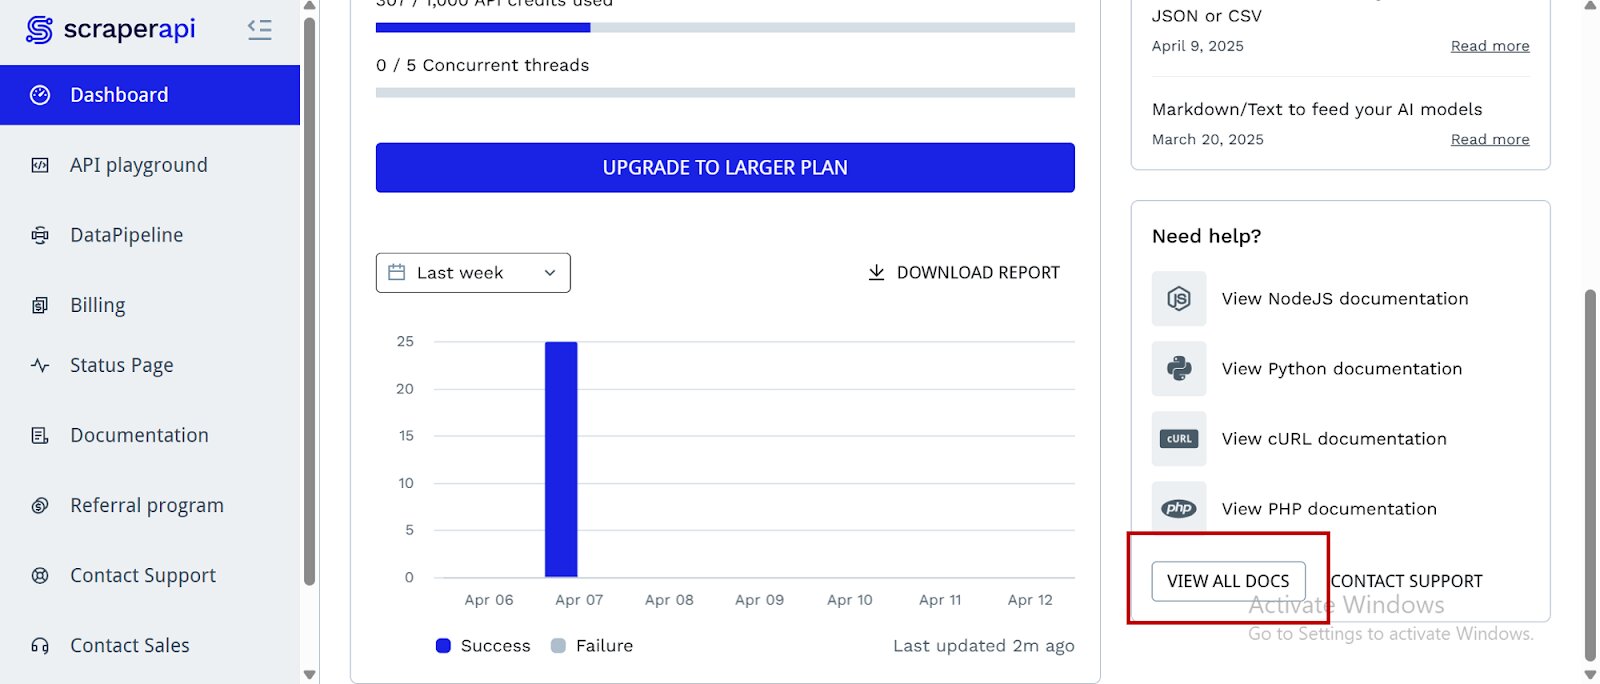
- ScraperAPI provides documentation for various programming languages and frameworks—such as PHP, Java, and Node.js—that interact with its endpoints. You can find these resources by scrolling down on the dashboard page and clicking “View All Docs”:
Now we’re all set, let’s start building our tool.
Building the TikTok Brand-Influencer Scouting Tool
Step 1: Setting Up the Project
Create a new project folder, a virtual environment, and install the necessary dependencies.
mkdir tiktok_influencer_project  # Creates the project folder
cd tiktok_influencer_project # Moves you inside the project folder
python -m venv your-env-name # Creates a new envirobment
Activate the environment:
- Windows:
your-env-name\Scripts\activate
- macOS/Linux:
source your-env-name/bin/activate
And now you can install the dependencies we’ll need:
pip install streamlit tiktoken langchain-openai langchain-scraperapi
The key dependencies and their functions are:
streamlit: We need this to build the app’s user interface, so users can directly input their niche and other filters, while seeing results in real-time.tiktoken: This library is from OpenAI and is used for tokenizing text and estimating token counts. In our project, we use it to estimate the length of the queries sent to the language model, so we don’t exceed API limits.langchain-openai: This is a separate package that provides the integration with OpenAI-compatible Large Language Models (LLMs). Therefore, we use it to connect Qwen via OpenRouter, for our application to send prompts and receive AI-generated responses.langchain-scraperapi: This is the package that integrates ScraperAPI and LangChain’s abilities in the form of an agent that can perform web scraping and Google searches autonomously.
Step 2: Integrating the Langchain-Scraperapi Package
Remember at the beginning when we set our ScraperAPI key as an environment variable and installed the dependencies we needed? If you are using the same environment, you’re good to go. However, if you are working in a new one, you won’t have the packages you need yet. Install Langchain-ScraperAPI:
pip install -U langchain-scraperapi
Previously, we exported our ScraperAPI key as an environment variable. However, this time around, we will be needing our OpenRouter API key as well. We could export both, but exporting keys to the environment is a temporary solution (the credentials are only saved locally for a limited time). To make sure we have both our key safely stowed away in our env and ready to go at any moment, we’re going to need to use python-dotenv.
pip install python-dotenv
Create a new .env file and add your API keys:
SCRAPERAPI_API_KEY="your-scraperapi-key"
OPENROUTER_API_KEY="your-openrouter-key"
Step 3: Importing Libraries and Setting Up API Keys
The next step is importing all the necessary libraries and securely loading the API keys required to interact with external services like ScraperAPI and OpenRouter (for the LLM).
import os
import streamlit as st
import tiktoken

from langchain_openai import ChatOpenAI
from langchain.agents import initialize_agent, Tool
from langchain.agents.agent_types import AgentType
from langchain_scraperapi.tools import (
    ScraperAPITool,
    ScraperAPIGoogleSearchTool,
    ScraperAPIAmazonSearchTool
)
from dotenv import load_dotenv
load_dotenv()

# Loading API Keys

scraperapi_key = os.environ.get("SCRAPERAPI_API_KEY")
openrouter_api_key = os.environ.get("OPENROUTER_API_KEY")

# Let’s include API Key checks as a safety net and for easier debugging
if not scraperapi_key:
    st.warning("ScraperAPI key might not be correctly set. Using the provided default or placeholder.")
    if scraperapi_key == "YOUR_SCRAPERAPI_API_KEY":
        st.error("Please replace 'YOUR_SCRAPERAPI_API_KEY' with your actual key in the script.")
        st.stop()

if not openrouter_api_key:
    st.error("OPENROUTER_API_KEY not found or is still the placeholder. Please set it in the script.")
    st.stop()
The code above achieves the following:
Imports:
os: Used to interact with the operating system, specifically for setting and getting environment variables.streamlit as st: The core library for building the web app’s user interface.tiktoken: For estimating the number of tokens within prompts sent to the LLM.langchain_openai.ChatOpenAI: Imports the class to interact with OpenAI-compatible chat models (like the Qwen model via OpenRouter in this case).langchain.agents.initialize_agent, Tool: Key components from LangChain to create and manage the AI agent and the tools it can use.langchain.agents.agent_types.AgentType: Specifies different types of LangChain agents.langchain_scraperapi.tools: Imports specific tools designed to work with ScraperAPI for web scraping and search.
API Keys Setup:
load_dotenv(): Loads the keys from.envscraperapi_key = os.environ.get("SCRAPERAPI_API_KEY"): Retrieves the value of theSCRAPERAPI_API_KEYenvironment variable.openrouter_api_key = os.environ.get("OPENROUTER_API_KEY"): Retrieves the value of theOPENROUTER_API_KEYenvironment variable.
API Key Checks:
- The
if not scraperapi_key:andif not openrouter_api_key:blocks provide basic validation. They check if the API keys have been set or give a warning if they are missing or still contain the placeholder values. If the keys are not set, the Streamlit app will stop execution (st.stop()) to prevent errors further down the line.
Step 4: Building the Streamlit UI Layout
Here we will set up the basic layout and texts for the Streamlit web UI.
# Streamlit UI Setup
st.set_page_config(page_title="TikTok Influencer Finder", layout="centered")
st.title("TikTok Influencer Finder 🧑🏼🤝🧑🏿🌐")
st.markdown("""
Welcome! This bot uses ScraperAPI's Langchain AI Agent for web scraping and a **Qwen LLM (via OpenRouter)**
to help you discover TikTok influencers who might be a great fit to promote your brand.
Please provide your brand's niche (e.g., 'sustainable running shoes', 'female luxury bags', 'men's watches').
""")
Here’s what the code above achieves:
st.set_page_config(...): Configures the Streamlit page, setting the browser tab title to “TikTok Influencer Finder” and the layout to “centered.”st.title(...): Displays the main title of the application on the web page.st.markdown(...): Renders a block of Markdown text, serving as a welcome message and a brief explanation of the tool’s purpose and how it works.
Step 5: Initializing LangChain Tools
Now we’ll prepare the tools that the LangChain agent will use to interact with the external web. (specifically, to perform web searches and scrape content) using ScraperAPI.
# Initializing Tools
try:
    scraper_tool = ScraperAPITool(scraperapi_api_key=scraperapi_key)
    google_search_tool = ScraperAPIGoogleSearchTool(scraperapi_api_key=scraperapi_key)
except Exception as e:
    st.error(f"Error initializing ScraperAPI tools: {e}.")
    st.stop()

tools = [
    Tool(
        name="Google Search",
        func=google_search_tool.run,
        description="Useful for finding general information online, including articles, blogs, and lists of TikTok influencers."
    ),
    Tool(
        name="General Web Scraper",
        func=scraper_tool.run,
        description="Useful for scraping content from specific URLs after search."
    )
]
Below is a further breakdown of what the code above does:
Tool Initialization:
scraper_tool = ScraperAPITool(...): Creates an instance of a general web scraping tool provided bylangchain-scraperapi, authenticated with yourscraperapi_key. This tool can scrape content from any given URL.google_search_tool = ScraperAPIGoogleSearchTool(...): Creates an instance of a Google search tool, also powered by ScraperAPI. This tool allows the agent to perform Google searches.- The
try-exceptblock handles potential errors during the initialization of these tools, displaying an error message in Streamlit and stopping the app if something goes wrong.
Tools List for LangChain Agent:
tools = [...]: Defines a list ofToolobjects. EachToolis a wrapper that makes an external function available to the LangChain agent.- “Google Search” Tool: Named “Google Search,” its function (
func) is set togoogle_search_tool.run, meaning when the agent “uses” this tool, it will execute a Google search. Thedescriptiontells the LLM what this tool is useful for. - “General Web Scraper” Tool: Named “General Web Scraper,” its function is
scraper_tool.run. Its description indicates it’s for scraping specific URLs, typically after a search.
Step 6: Initializing the Large Language Model (LLM)
It is now time to initialize the Large Language Model (LLM) that will serve as the “brain” of the agent, enabling it to understand prompts and decide on actions.
QWEN_MODEL_NAME = "qwen/qwen3-30b-a3b:free"

llm = None
try:
    llm = ChatOpenAI(
        model_name=QWEN_MODEL_NAME,
        temperature=0.1,
        openai_api_key=openrouter_api_key,
        base_url="https://openrouter.ai/api/v1"
    )
    st.success(f"Successfully initialized Qwen model: {QWEN_MODEL_NAME}")
except Exception as e:
    st.error(f"Error initializing Qwen LLM: {e}")
    st.stop()

# Initialize agent here!
agent = initialize_agent(
    tools,
    llm,
    agent=AgentType.ZERO_SHOT_REACT_DESCRIPTION,
    verbose=True,
    max_iterations=3
)
Here is what we can understand from the code above:
QWEN_MODEL_NAME: Defines the specific Qwen model we are using from OpenRouter.llm = ChatOpenAI(...): Initializes theChatOpenAIobject.model_name=QWEN_MODEL_NAME: Specifies which LLM to use.temperature=0.1: Controls the creativity of the LLM’s responses. A lower value (like 0.1) makes the output more deterministic and focused.openai_api_key=openrouter_api_key: Provides the API key for authentication with OpenRouter.base_url="https://openrouter.ai/api/v1": Specifies the API endpoint for OpenRouter, as OpenRouter provides an OpenAI-compatible API.- The
try-exceptblock catches any errors during the LLM initialization, displays them in Streamlit, and stops the application if the LLM cannot be set up. agent = initialize_agent(...): Allows your button callback to useagent.run(query)properly.
Step 7: Initializing the LangChain Agent
This crucial step brings together the LLM and the tools to create an intelligent agent capable of reasoning and taking action based on user requests.
# Initializing Agent
agent = None
if llm is not None:
    try:
        agent = initialize_agent(
            tools=tools,
            llm=llm,
            agent=AgentType.ZERO_SHOT_REACT_DESCRIPTION,
            verbose=True,
            handle_parsing_errors=True,
            max_iterations=15
        )
    except Exception as e:
        st.error(f"Error initializing LangChain agent: {e}")
        st.stop()
else:
    st.error("LLM not initialized. Agent setup failed.")
    st.stop()
The code achieves the following:
ifllm is not None:: Ensures that the LLM initializes successfully before attempting to create the agent.agent = initialize_agent(...): This is the core LangChain function to set up an agent.tools=tools: Provides the list ofToolobjects (Google Search and General Web Scraper) that the agent can utilize.llm=llm: Connects the initialized LLM to the agent, giving it its reasoning capabilities.agent=AgentType.ZERO_SHOT_REACT_DESCRIPTION: Specifies the type of agent. This agent type uses the LLM to decide which tool to use and how to use it in a single “thought” step, based on a description of the tools and the current task.verbose=True: When True, the agent’s internal thought process and tool usage will be printed to the console, which is very helpful for debugging.handle_parsing_errors=True: Allows the agent to attempt to recover from parsing errors in its internal reasoning.max_iterations=15: Sets a limit on how many steps (tool uses, thoughts) the agent can take before giving up, preventing infinite loops.- The
try-exceptblock handles errors during agent initialization, displaying them and stopping the app if the agent cannot be set up.
Step 8: Building the User Input Interface
Here we will define the interactive elements in the app’s UI where the user can provide details for their search.
# Inputting UI elements
user_niche = st.text_input(
    "Enter your brand's niche:",
    key="brand_niche_input",
    placeholder="Type niche here..."
)

# --- Additional Filters ---
st.subheader("Optional Filters")
country_filter = st.text_input(
    "Filter by Country (optional):",
    key="country_filter",
    placeholder="e.g., United States, UK, China"
)

min_followers = st.number_input(
    "Minimum Follower Count (e.g., 500000 for 500K)",
    min_value=0,
    value=0,
    step=10000,
    key="min_followers"
)
Below is a summary of what the code above achieves:
st.text_input(...): Creates a text input field for the user to enter their brand’s niche.st.subheader("Optional Filters"): Displays a smaller heading for the optional filters section.country_filter = st.text_input(...): Creates another text input for an optional country filter.min_followers = st.number_input(...): Creates a numerical input field for the minimum follower count.
Step 9: Token Estimation Function
The function below helps to manage the length of prompts sent to the LLM, which usually have token limits.
# Token Estimation function
def estimate_tokens(text):
    try:
        encoding = tiktoken.encoding_for_model("gpt-4")
    except:
        encoding = tiktoken.get_encoding("cl100k_base")
    return len(encoding.encode(text))
Here’s what the code achieves:
- Function Definition: Defines
estimate_tokens(text), which takes a string text as input. - Tokenization: It attempts to get the token encoder for the “gpt-4” model,. If that fails, it falls back to a common base encoding (
cl100k_base).encoding.encode(text)converts the input text into a list of token integers, whilelen(...)returns the count of these tokens.
Step 10: Main Search Logic (Finding Influencers)
This is the core functional part of the application. It triggers when the user clicks the “Find TikTok Influencers” button. The code is used to construct the defining prompt query, run the agent, and display the results.
# Main Search Logic
if st.button("Find TikTok Influencers ✨"):
    if not user_niche:
        st.warning("Please enter your niche.")
    elif agent is None:
        st.error("Agent not initialized.")
    else:
        query = f"""
        Find a list of at least 5 TikTok influencers highly relevant to the niche: '{user_niche}'.
        Apply these filters:
        - Country: {country_filter or 'Any'}
        - Minimum Follower Count: {min_followers}
        For each influencer, provide:
        1. TikTok Username
        2. Full Name (if known)
        3. Approximate Follower Count
        4. Niche
        5. TikTok profile or verified link
        Format as Markdown list.
        """

        token_count = estimate_tokens(query)
        if token_count > 20000:
            st.error(f"Query too long ({token_count} tokens). Try reducing text.")
            st.stop()

        st.info("🚀 Searching influencers...")
        with st.spinner("Running agent..."):
            try:
                response = agent.run(query)
                st.session_state["last_influencer_data"] = response

                st.subheader("💡 Influencers Found:")
                st.markdown(response)
            except Exception as e:
                st.error(f"Agent failed: {e}")
Here’s further information on precisely how the code works:
if st.button("Find TikTok Influencers ✨"):: This block executes when a user clicks the button.
Input Validation:
if not user_niche:: Checks if the niche input is empty and displays a warning.elif agent is None:: Checks if the LangChain agent was successfully initialized earlier and displays an error if not.
Query Construction:
- To receive our results in a tidy and presentable format, we have to manually input the
querythat will be sent to the LangChain agent. This query instructs the agent on what to find (TikTok influencers), what criteria to use (niche, country, minimum followers), what information to extract for each, and the desired output format (Markdown list). {country_filter or 'Any'}: Is a neat Python trick that usescountry_filterif it has a value, otherwise defaults to the string ‘Any’.
Token Count Check:
token_count = estimate_tokens(query): Calls the previously defined function to get an estimate of the query’s token length.if token_count > 20000:: Prevents sending overly long queries to the LLM, which could exceed API limits.
Running the Agent:
st.info("🚀 Searching influencers..."): Displays an informational message to the user.- with
st.spinner("Running agent..."):: Shows a spinning animation in the UI, indicating that the application is running. response = agent.run(query): This is where the magic happens. The LangChain agent takes the query, uses its LLM to reason about the task, and decides which of itstools(Google Search, Web Scraper) to use, potentially in multiple steps, to fulfill the request. The final answer from the agent is stored inresponse.st.session_state["last_influencer_data"] = response: Stores the agent’s response in Streamlit’s session state, making the data persistently available across reruns of the script within the same user session, which is crucial for the follow-up Q&A.
Displaying Results:
st.subheader("💡 Influencers Found:"): Displays a subheader.st.markdown(response): Renders the agent’s response (which is formatted as Markdown) directly into the Streamlit UI.
Error Handling: The try-except block catches any exceptions that occur during the agent’s execution and displays an error message.
Step 11: Follow-up Q&A Logic
To enable users ask further questions about the influencers they find, we will add a follow-up logic that links the LLM directly with the previously obtained data as context.
# Follow-up Q&A code
st.markdown("---")
st.subheader("Ask a follow-up question about the influencers ✍️")
follow_up_question = st.text_input("Your question:", key="followup_question")

if follow_up_question and "last_influencer_data" in st.session_state:
    context = st.session_state["last_influencer_data"]
    qna_prompt = f"""
    Based on the following influencer data:
    {context}

    Answer the following question:
    {follow_up_question}
    """
    token_count = estimate_tokens(qna_prompt)
    if token_count > 20000:
        st.error(f"Follow-up too long ({token_count} tokens). Try shortening your question or data.")
    else:
        try:
            st.info("🧠 Thinking...")
            follow_up_response = llm.invoke(qna_prompt)
            st.markdown(follow_up_response)
        except Exception as e:
            st.error(f"LLM follow-up failed: {e}")
The code achieves the following:
st.markdown("---"): Adds a horizontal rule for visual separation.st.subheader(...)andst.text_input(...): Create a section for the user to input a follow-up question.context = st.session_state["last_influencer_data"]: Retrieves the previously found influencer data to provide context for the LLM.qna_prompt = f"""...""": Constructs a new prompt for the LLM. This prompt includes the context (the influencer data) and thefollow_up_question, instructing the LLM to answer based on that information.- Token Count Check: Similar to the main search, it checks the token length of the follow-up prompt to prevent errors.
- Invoking the LLM Directly:
follow_up_response = llm.invoke(qna_prompt), unlikeagent.run(),llm.invoke(), sends the prompt directly to the LLM without involving the agent’s tool-use reasoning. The LLM then processes the prompt (context + question) and generates an answer.follow_up_response.contentextracts the actual text of the response whilest.markdown(follow_up_response.content)displays the LLM’s answer in Markdown format.
Step 12: Footer
Why not add a simple footer to give credit to the technologies we used? This is good practice especially if you’re building this project to include within your personal portfolio; this way, recruiters can easily spot at a glance, the tools you used in developing your app.
# --- Footer ---
st.markdown("---")
st.markdown("<p style='text-align: center; color: grey;'>Powered by ScraperAPI, Langchain and OpenRouter (Qwen)</p>", unsafe_allow_html=True)
Here’s the explanation for the code above:
st.markdown("---"): Adds another horizontal rule.st.markdown("<p style='text-align: center; color: grey;'>...</p>", unsafe_allow_html=True): Displays a small, centered, grey-colored text at the bottom of the page, crediting the technologies used.unsafe_allow_html=Trueis necessary because you’re embedding raw HTML (<p>) within the Markdown.
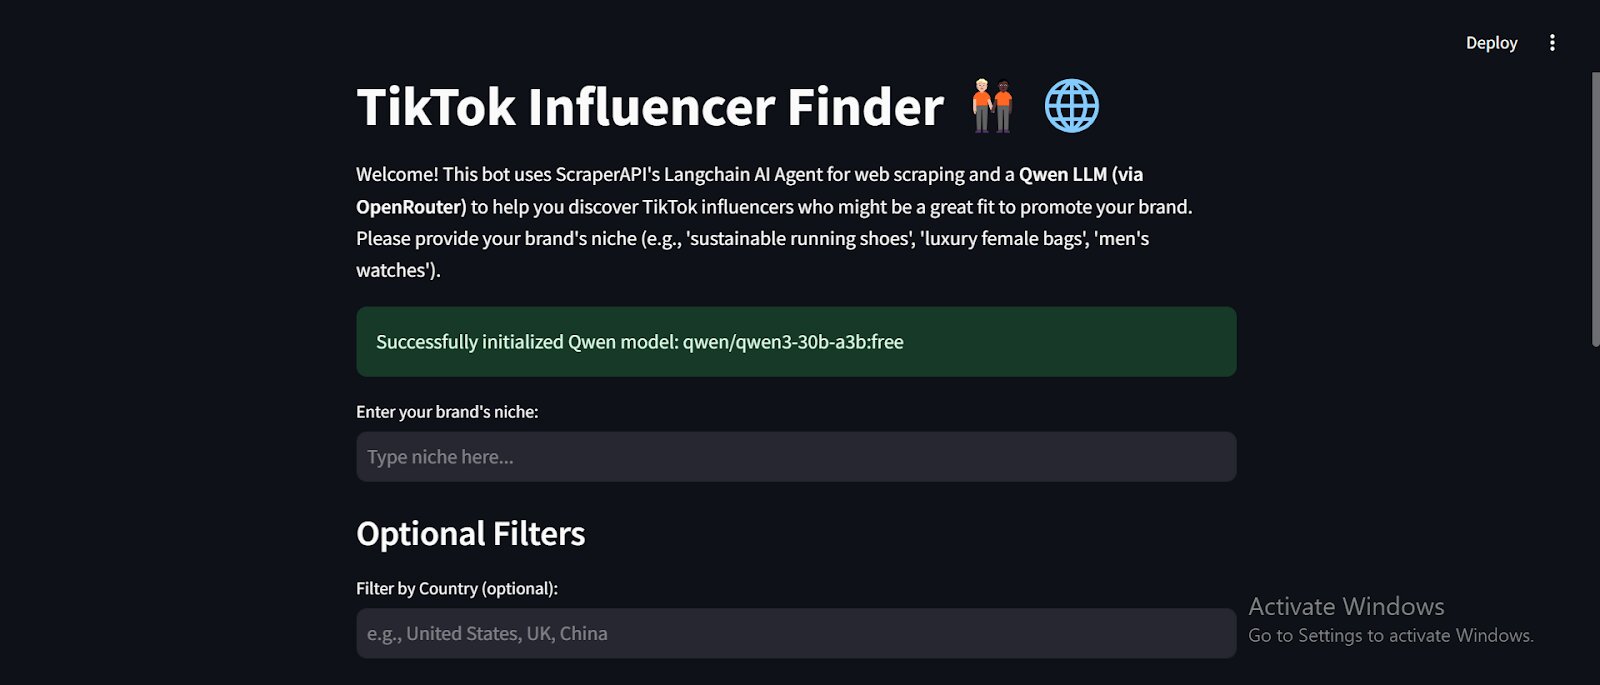
Here’s a snippet of what the tool’s UI looks like:
Step 13: Run your script
Now that all the steps are in place, you can run your code with Streamlit by doing:
streamlit run your_script_name.py
Deploying the TikTok Brand-Influencer Scouting Tool Using Streamlit
Here’s how to deploy our TikTok Brand-Influencer Scouting app on Streamlit for free in just a few steps:
Step 1: Set Up a GitHub Repository
Streamlit requires your project to be hosted on GitHub.
1. Create a New Repository on GitHub
Create a new repository on GitHub and set it as public.
2. Push Your Code to GitHub
Before doing anything else, create a .gitignore file to avoid accidentally uploading sensitive files like. Add the following to it:
.env
__pycache__/
*.pyc
*.pyo
*.pyd
.env.*
.secrets.toml
If you haven’t already set up Git and linked your repository, use the following commands in your terminal from within your project folder:
git init
git add .
git commit -m "Initial commit"
git branch -M main
# With HTTPS
git remote add origin https://github.com/YOUR_USERNAME/your_repo.git
# With SSH
git remote add origin git@github.com:YOUR_USERNAME/your-repo.git

git push -u origin main
If it’s your first time using GitHub from this machine, you might need to set up an SSH connection. Here is how.
Step 2: Define Dependencies and Protect Your Secrets!
Streamlit needs to know what dependencies your app requires.
1. In your project folder, automatically create a requirements file by running:
pip freeze > requirements.txt
2. Commit it to GitHub:
git add requirements.txt
git commit -m "Added dependencies”
git push origin main
3. Do the same for your app file containing all your code:
git add your-script.py
git commit -m "Added app script"
git push origin main
Step 3: Deploy on Streamlit Cloud
1. Go to Streamlit Community Cloud.
2. Click “Sign in with GitHub” and authorize Streamlit.
3. Click “Create App.”
4. Select “Deploy a public app from GitHub repo.”
5. In the repository settings, enter:
- Repository:
YOUR_USERNAME/TikTok-Influencer-Finder - Branch:
main - Main file path:
app.py(or whatever your Streamlit script is named)
6. Click “Deploy” and wait for Streamlit to build the app.
7. Go to your deployed app dashboard, find your app, and find “Secrets” in “Settings”. Add your environment variables (your API keys) just as you have them locally in your .env file.
Step 4: Get Your Streamlit App URL
After deployment, Streamlit will generate a public URL (e.g., https://your-app-name.streamlit.app). You can now share this link to allow others access to your tool!
Conclusion
In this tutorial, you have learned how to build a TikTok Brand-Influencer Scouting Tool that utilizes the ScraperAPI-LangChain agent for smart, autonomous data extraction, Qwen3 for contextual insights and follow-up queries, and Streamlit for building a user-friendly interface to host the app, in the cloud, for free.
This tool aids influencer marketing, enabling brands to identify creators whose niche, voice and vision align perfectly with their own. By including filtering options and follow-up questions, it moves beyond just basic metrics to find influencers who can truly spark authentic engagement and drive targeted marketing efforts.
Ready to build your own?
Start using ScraperAPI today and transform your influencer scouting process into a streamlined, highly effective strategy!