
In this cURL web scraping tutorial, we’ll show you how to use proxies with cURL to scrape data at any scale.
What is cURL?
cURL, an acronym for Client URL, is a command-line tool and library for sending and receiving data with URLs. It allows performing tasks such as making HTTP requests, downloading/uploading data, interacting with APIs, and building automation scripts.
cURL supports various network protocols, including HTTP, HTTPS, FTP, FTPS, SCP, SFTP, LDAP, TELNET, IMAP, POP3, SMTP, etc…
It also supports many authentication methods, such as Basic, Digest, and OAuth, for interacting with protected APIs.
Engineers commonly use it to test APIs by sending requests and inspecting responses directly from the command line, which makes it easy to interact with web services during development and debugging.
Many systems come with cURL installed, but that’s not always the case. To ensure you can follow this guide, let’s start with the fundamental first step: installing cURL.
Installing cURL on Your Machine
Install cURL on Windows
By default, Windows 10 and higher comes with the curl command, but it is an alias for the PowerShell Invoke-WebRequest command. So when you run the command, it will invoke a web request, which is not what we want, as the script we write will not be interoperable.
To use the default cURL, you must install it manually by following these steps:
- Go to the https://curl.se/windows; you will see the latest version on the page (8.6.0) and download the 64-bit version.
- Go to the download folder and locate the zip file downloaded, which is named “curl-8.6.0_2-win64-mingw.zip”; right-click on the file and click on the menu “Extract All”
- A new folder named “curl-8.6.0_2-win64-mingw” is generated; the cURL executable is in the “bin” folder.
- Rename it to “curl” and move it to the C disk; The cURL executable location is now “C:\curl\bin\curl.exe”
- Add the cURL executable path to the system environment variable under the properties “Path” and save the changes.
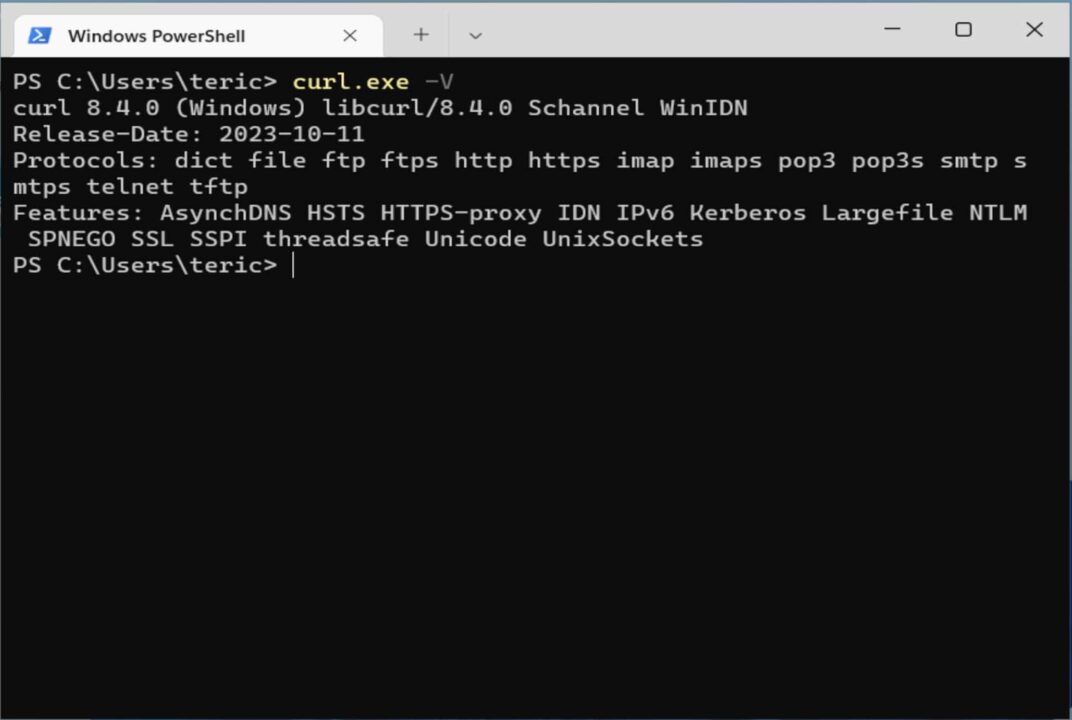
- Open your terminal and type
curl.exe -V
Install cURL on Linux
The installation depends on the distribution you use. On Ubuntu and Fedora, it comes already installed.
On Debian, you must run the command below to install cURL:
	sudo apt update
	sudo apt install curl
On CentOS, you must download the source package and build it manually.
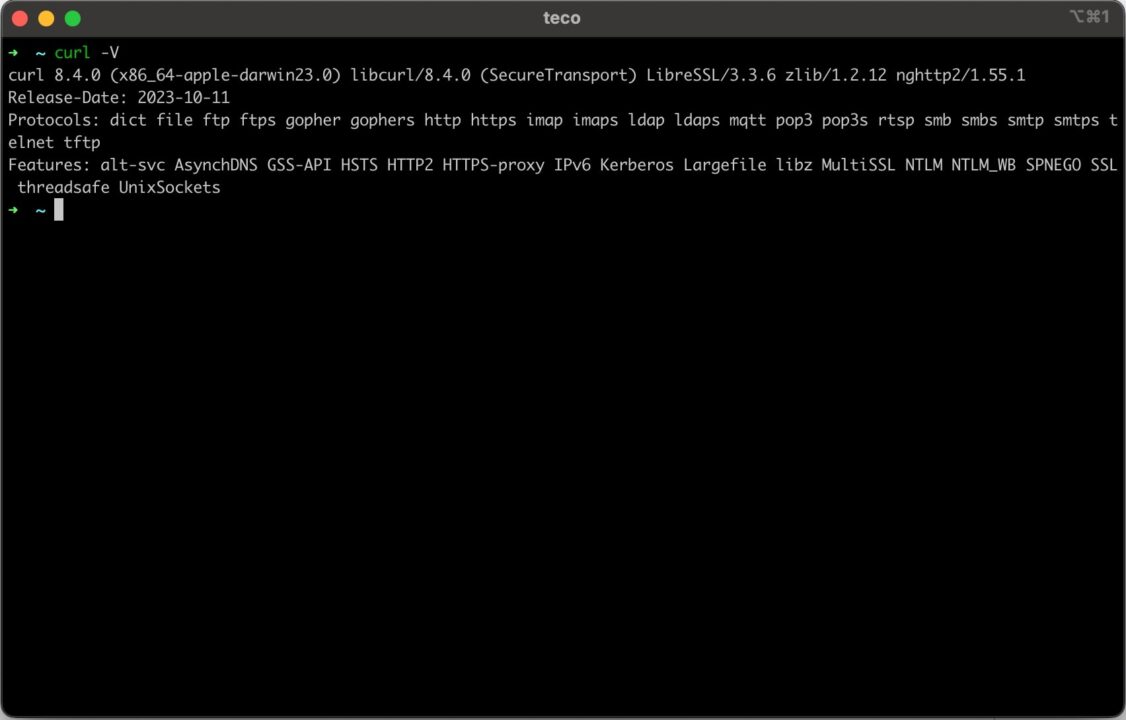
Use the same command, curl -V, to ensure it is installed correctly.
Install cURL on MacOS
You have nothing to do as MacOS comes with cURL already installed. Open your terminal and type curl -V
Now that cURL is installed, let’s make an HTTP call to retrieve our IP address.
On Linux and MacOS, the command is the following.
curl http://httpbin.org/ip
On Windows, the command is the following.
curl.exe http://httpbin.org/ip
As you can see, you must add the extension “.exe” to the curl command on Windows, but the arguments remain the same as on Linux and MacOS.
Understanding cURL’s proxy URL syntax
A proxy is an intermediary between a client sending a request and the destination of a remote server. When the client sends a request, the proxy intercepts it and applies some modifications to the initial request before forwarding it to the destination under a new identity. The remote server cannot be the origin of the client.
Using a proxy is helpful in the following use case:
- Hide the IP address to navigate the internet anonymously
- Access content or discounts that are restricted to your area
- Retrieve data from multiple sources in small intervals
- Bypass anti-web scraping protection related to IP blacklist and rate limiting
- Web scraping and data mining to extract data from websites without being blocked
The syntax of a proxy URL looks like this:
<protocol>://<username>:<password>@<host>:<port></port>
The table below describes each part of the URL:
| Proxy URL Part | Description |
| protocol | The network protocol used to connect to the proxy server. The possible values are HTTP, HTTPS, and SOCKS. |
| username | The user is to authenticate on the proxy server. |
| password | The user’s password is to authenticate on the proxy server. |
| host | The IP address or URL of the proxy servers. |
| port | The port number the proxy server is listening to. |
The following section will show a real use case of sending a request with a proxy using cURL.
Integrating cURL with ScraperAPI Proxy Mode
ScraperAPI makes it easier for developers to Scrape web data at scale without hassle.
Let’s say you want to scrape the top 100 books to read on Amazon – the URL is https://www.amazon.com/gp/browse.html?node=8192263011
As a prerequisite, you must have a ScraperAPI account. Just create a free ScraperAPI account to get access to your API key and 5,000 API credits to test the tool.
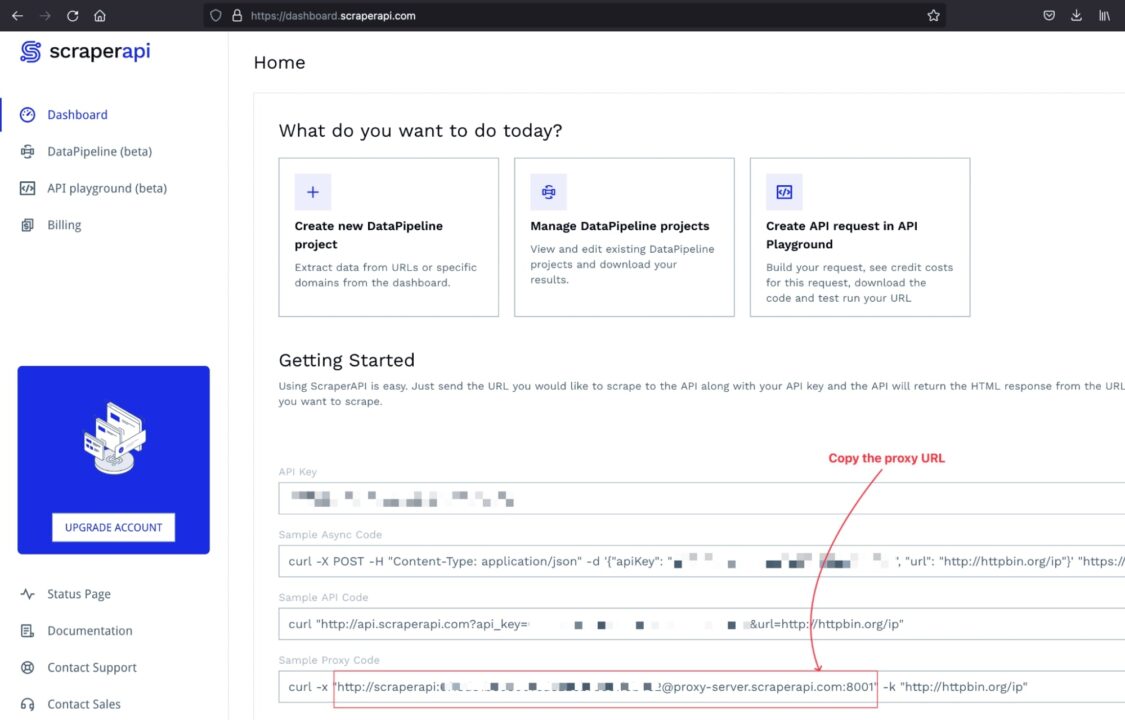
Step 1: Get the ScraperAPI Proxy URL
Log into your account, and you will be redirected to the dashboard, where you can find some sample code to interact with the ScraperAPI’s proxy pool.
Step 2: Send a Proxy Request with cURL
The syntax to send a request through a proxy to scrape a website using cURL is the following:
curl -x <proxy_url> -k <website_target_url>
The <proxy_url> must be replaced by the proxy URL, the ScraperAPI one in our case.
The <website_target_url> must be replaced with the website URL you want to scrape.
Here’s how you would send this request from each system:
cURL Proxy Request On Windows:
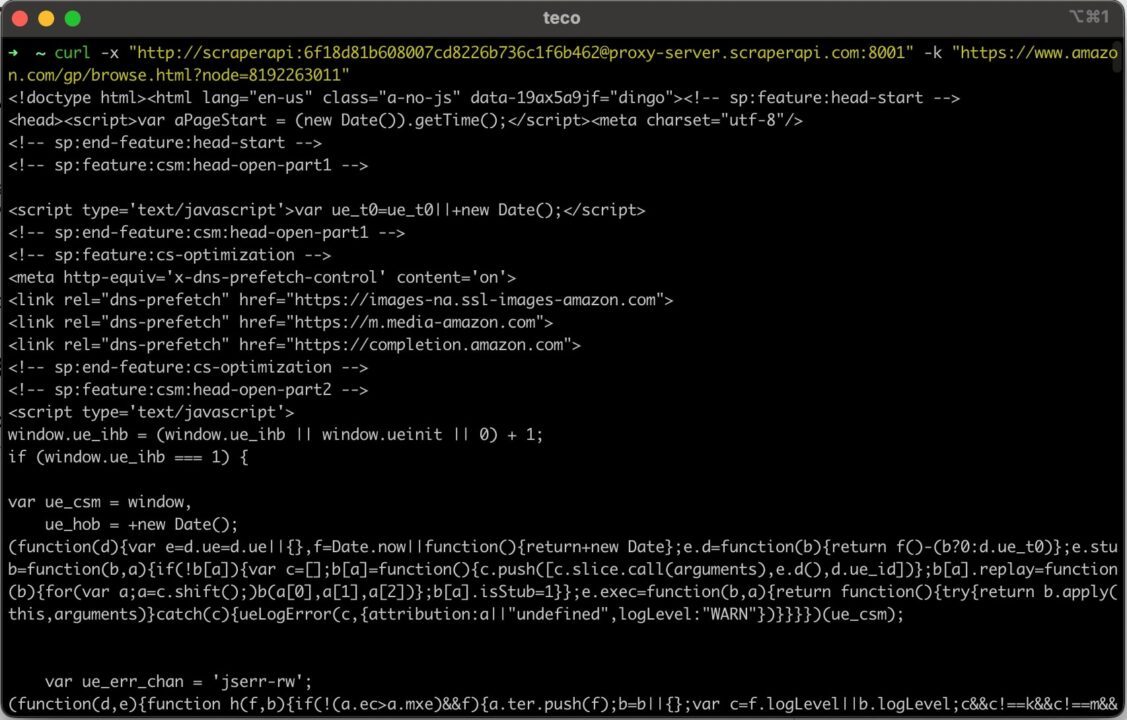
curl.exe -x "http://scraperapi:7g37b82c517116af7335d847d3e7c551@proxy-server.scraperapi.com:8001" -k "https://www.amazon.com/gp/browse.html?node=8192263011"
cURL Proxy Requests On Linux and MacOS
curl -x "http://scraperapi:7g37b82c517116af7335d847d3e7c551@proxy-server.scraperapi.com:8001" -k "https://www.amazon.com/gp/browse.html?node=8192263011"
Note: The API key used here is fake, so replace it with your own to avoid your request failing.
Run this command on the terminal; you get the following output:
Using cURL with Rotating Proxies
Rotating proxies are proxy servers that can automatically change your IP address for each request or at a specific interval. This is helpful for bypassing anti-web scraping protections most data-rich sites use.
When doing intensive web scraping with the same IP address, sending too many requests in a small fraction of the time will cause the server to throttle the request or, worse, blacklist the IP address.
A rotating proxy will pick an IP address in the pool of available IP proxies and assign it to the request. For the target server, every request will be treated as a new one.
Using the Scraping API provided by ScraperAPI, you get this feature instantly with no configuration needed. You provide your request, and ScraperAPI’s proxy server will handle the rest.
Understanding the Scraping API
ScraperAPI provides some options for advanced web scraping techniques, such as rendering JavaScript or accessing websites restricted to some countries.
- To render JavaScript, you must provide the parameter
renderwith the value set totrue. - To access content restricted to a country, you must provide the parameter country with the value set to one of the country codes supported. Check out the complete list.
The syntax to add parameters on the proxy URL is the following:
<protocol>://<username>[.param_key1=param_value1.param_key2=param_value2…]:<password>@<host>:<port>
Send cURL Requests through ScraperAPI
Let’s say you want to scrape the “Smart Home page” of the Home Depot website – here’s the URL: https://www.homedepot.com/b/Smart-Home/N-5yc1vZc1jw.
The website loads JavaScript and is accessible only in the US; to send the request with cURL, we will add the parameter enabling geotargeting to the proxy URL.
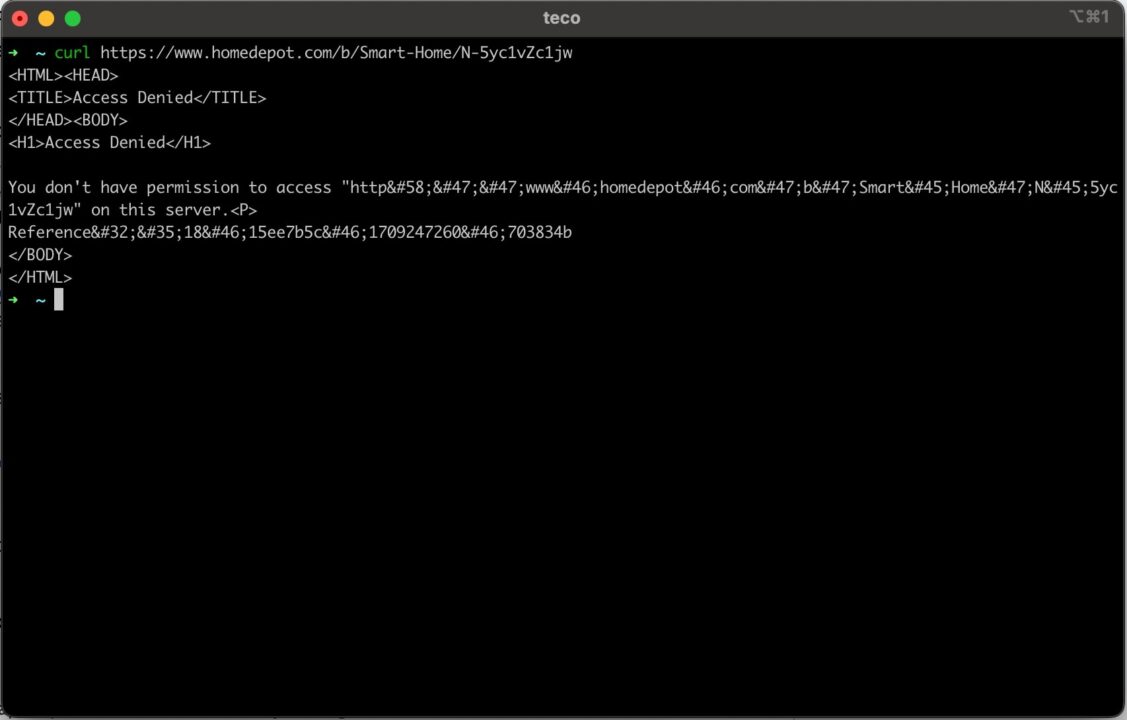
If you send a classic cURL request (with no proxy) to this Home Depot page with the command below:
curl https://www.homedepot.com/b/Smart-Home/N-5yc1vZc1jw
You can see in the picture below that we can’t access the page.
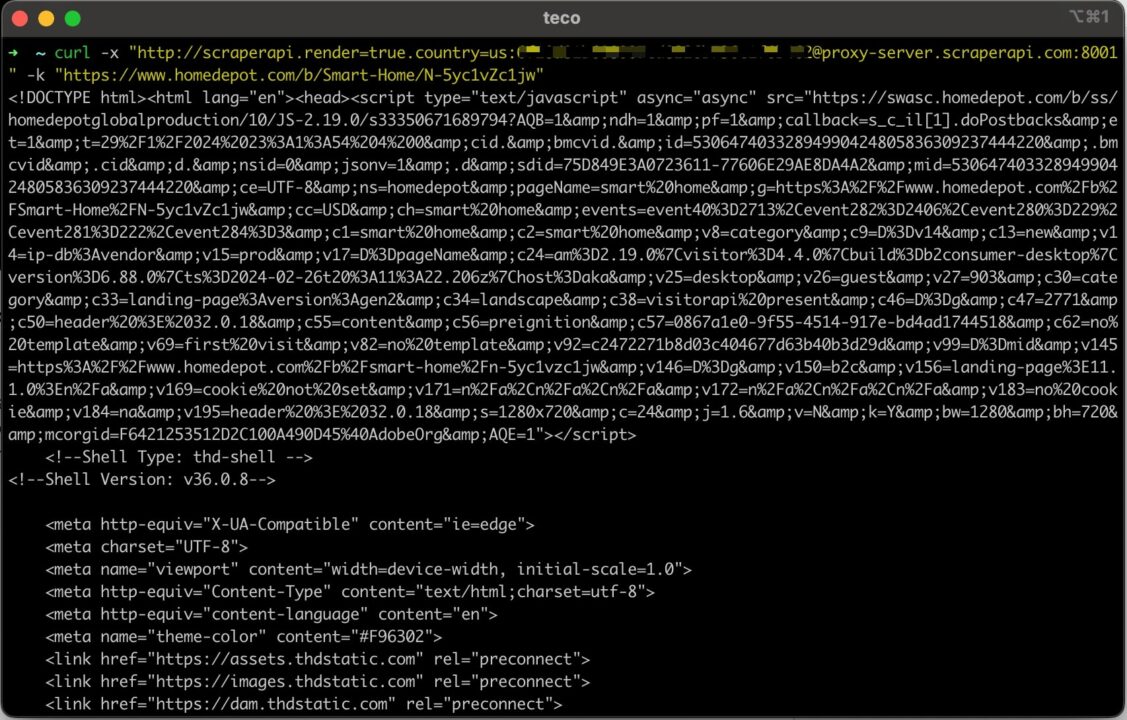
Let’s send a request with cURL and the proxy URL with the advanced parameters defined:
curl -x "http://scraperapi.render=true.country=us:7g37b82c517116af7335d847d3e7c551@proxy-server.scraperapi.com:8001" -k "https://www.homedepot.com/b/Smart-Home/N-5yc1vZc1jw"
Now, we get the HTML content of the page as expected
By following these steps, you can now feel confident you’ll always get the data you want, no matter the site.
Wrapping Up: Web Scraping using cURL with proxies
Sending a request with cURL through a proxy is simple and can be summarized into the following steps:
- Install cURL on your operating system.
- Get a proxy URL; we used the ScraperAPI proxy URL for web scraping.
- Combine the proxy URL and the target website to send a request with cURL.
- Use advanced ScraperAPI proxy parameters to access restricted content.
The Scraping API can do more than just be a proxy pool. We saw that combining it with cURL can help automate the web scraping of thousands of websites without getting blocked by their anti-scraping mechanisms.
Although ScraperAPI’s ML models let it use a healthy mix of proxy types, you can also use the parameter premium set to true to use only residential proxies.
Want to learn more? Check out the ScraperAPI proxy documentation to explore other proxy server protocols, such as SOCKS, or write an automated script to perform web scraping at scale with the ScraperAPI.
Until next time, happy scraping!
Related information about Proxies you might like:
- How to use and rotate proxies in Python
- Best proxies for Amazon web scraping
- Free proxies list
- Advanced web scraping guides