
SEO is a challenging game with a lot of growth potential. Getting to the top for your target keywords can make your business a lot of money and heavily increase brand awareness.
To succeed in SEO, you need data, and there’s nothing better than monitoring your target keywords’ search engine result pages (SERPs) to gather it firsthand.
ScraperAPI lets you collect SERP data from millions of search terms without writing a single line of code!
Especially for niche industries, generic SEO tools won’t provide enough information because they are built to serve as many businesses as possible.
So, in today’s article, we’ll show you how you can monitor SERP data in two easy-to-follow methods:
- The first method requires no coding skills and provides you with clean, structured data
- The second method is for tech-savvy teams that want complete control of every phase of the pipeline
That said, let’s get started!
Method 1: Using ScraperAPI’s DataPipeline
DataPipeline allows you to scrape any website without writing code. You do everything through the Web UI:
- Create scraping jobs/projects
- Use templates to collect structured JSON data
- Schedule jobs to run at a specific time using a visual scheduler or cron jobs syntax
- Connect DataPipeline to your workflow using Webhooks
- Manage your projects through a central dashboard
For this project, we’ll create a job that runs every hour and retrieves the results for the search term “Halloween gift” using DataPipeline’s Google Search structured endpoint.
To follow along, create a free ScraperAPI account – you’ll get access to DataPipeline and 5,000 free API credits to get started.
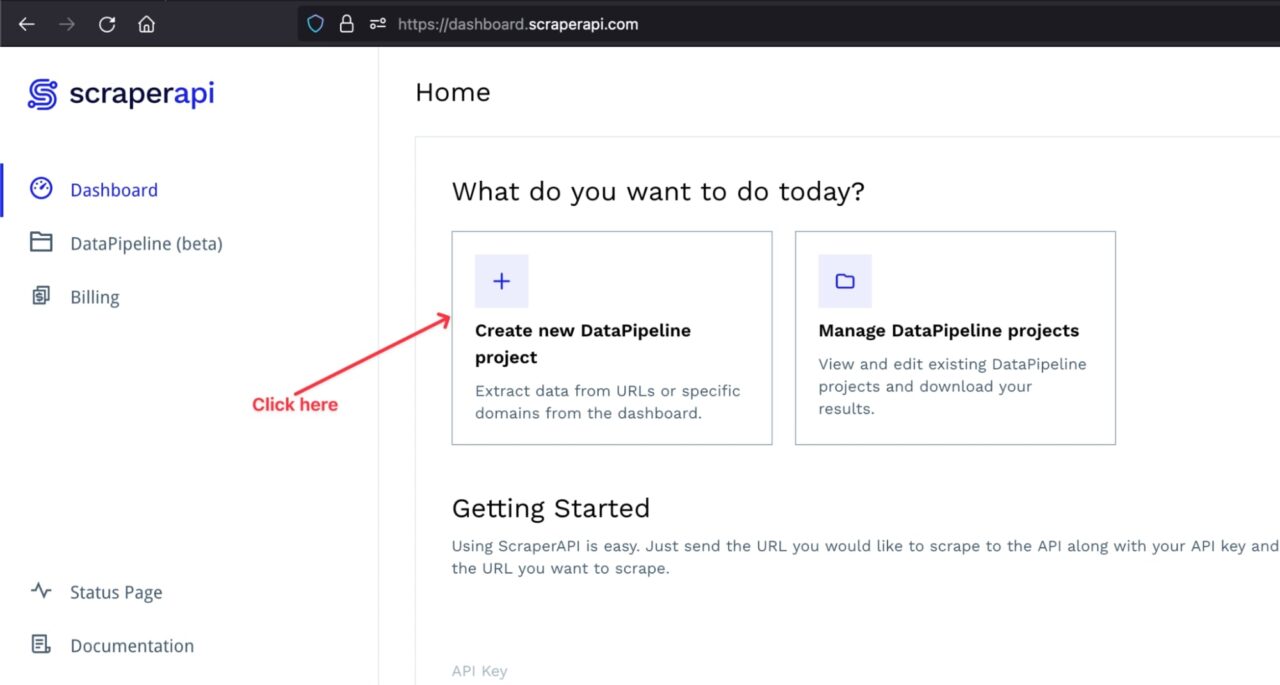
1. Create a New DataPipeline Project
Log into your ScraperAPI account to access your dashboard, and click on Create a new DataPipeline project.
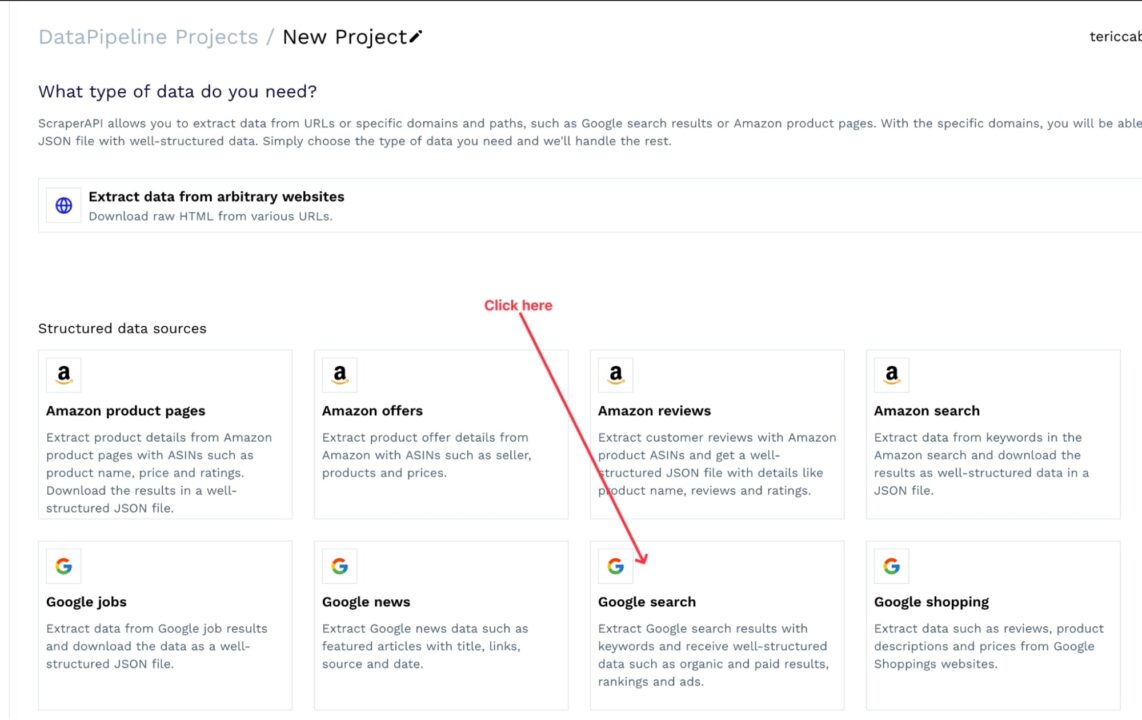
You will be redirected to a page where you can select how you want to retrieve the data. You can choose between using structured data endpoints (Amazon and Google) or defining custom URLs.
Since we are doing our search on Google, let’s choose the structured data for Google search.
2. Configure Your Project
The following page has two main sections: the input settings and output settings. For input settings, you must define the:
- Search term – you can upload a CSV file containing all the keywords you want to target or enter the keywords in the text input
- Country code – you can choose between (e.g., us, it, fr)
- Domain – it represents the Google domain to use to perform the search
- Number of results – the number of items to retrieve on the SERP per keyword; the maximum value is 100
- Additional parameters – Other parameters to add to the search, such as the host language, character encoding, etc.
The picture below summarizes the input settings for our project.
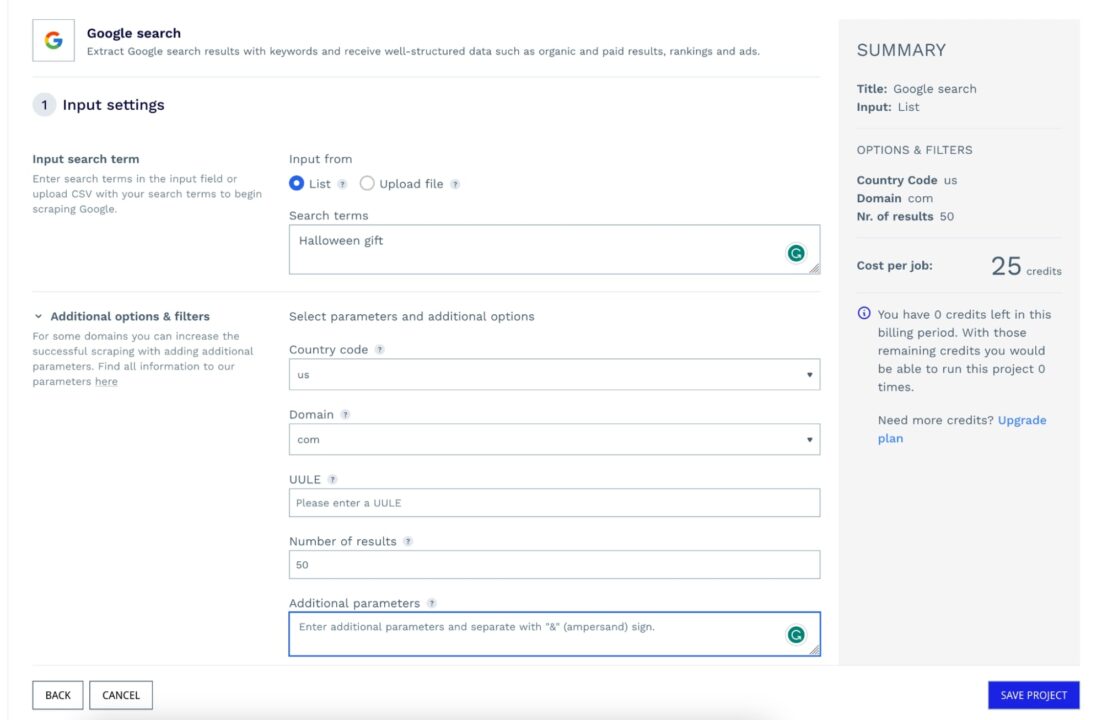
Note: The number of API credits needed to run your project will be calculated on the right to keep pricing transparent.
For the output settings, you must define:
- The way to receive the result – you can choose between downloading the response file in JSON format or specifying a webhook URL to trigger the response in the request body
- Scraping frequency – how often you want the URLs to be scraped
- Notification preferences – when you want to be notified about successful and failed execution
The picture below summarizes the output settings for our project.

Click on the button START SCRAPING to create your project, which will run immediately or at your scheduled time.
The picture below shows that the first job succeeded, and the response has been sent to the webhook URL.
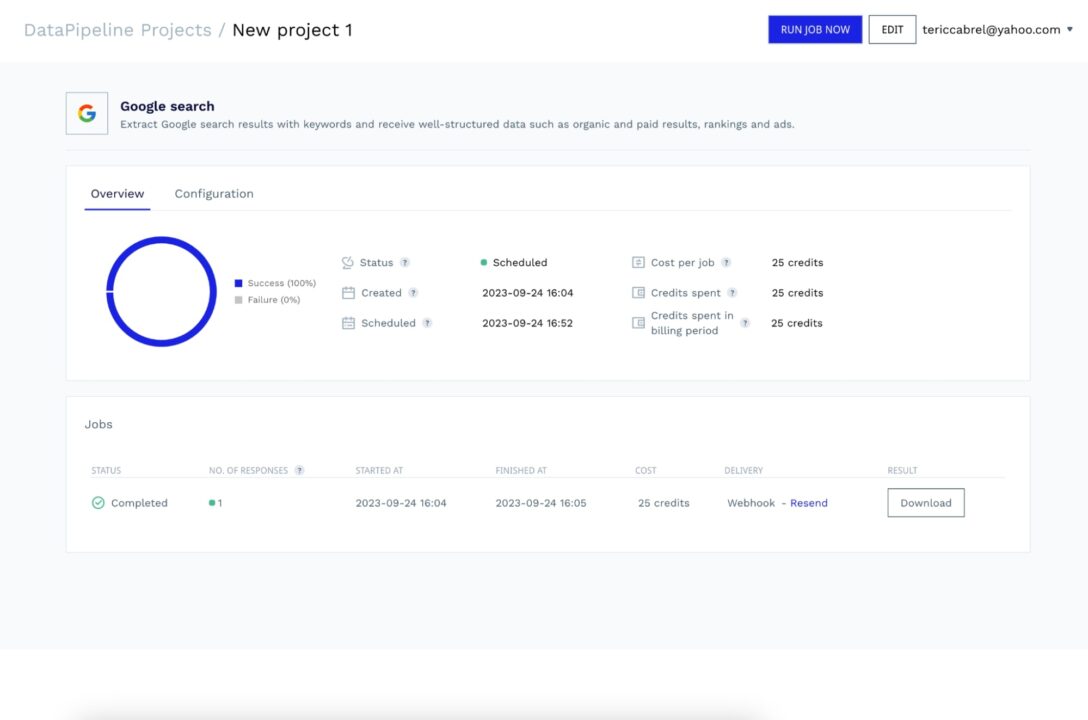
Regarding the webhook URL, we set a URL to an API we own while creating the project, but you can download the data from the dashboard at any time.
Still, using a Webhook is always faster, so let’s build a webhook server and use Ngrok to create a tunnel to the application.
3. Build a Webhook Server (Optional)
Let’s create a folder that will hold the code source of the Webhook service and initialize a Node.js project.
	mkdir serp-monitoring
	cd serp-monitoring
	npm init -y
We need the Express package to create a Web server and easily create API routes, so let’s install it:
npm install express
Create a file webhook-server.js and add the code below:
	const express = require('express');

	const PORT = 5001;

	const app = express();

	app.use(express.urlencoded({ extended: true }));
	app.use(express.json({ limit: "10mb", extended: true }));

	app.post('/scraper-webhook', (req, res) => {
		console.log('New request received!', req.body);

		// TODO do what you want with the data

		return res.json({ message: 'Ok' });
	});

	app.listen(PORT, () => {
		console.log(`Application started on URL http://localhost:${PORT} 🎉`);
	});
Let’s start the Webhook server with the command below:
node webhook-server.js
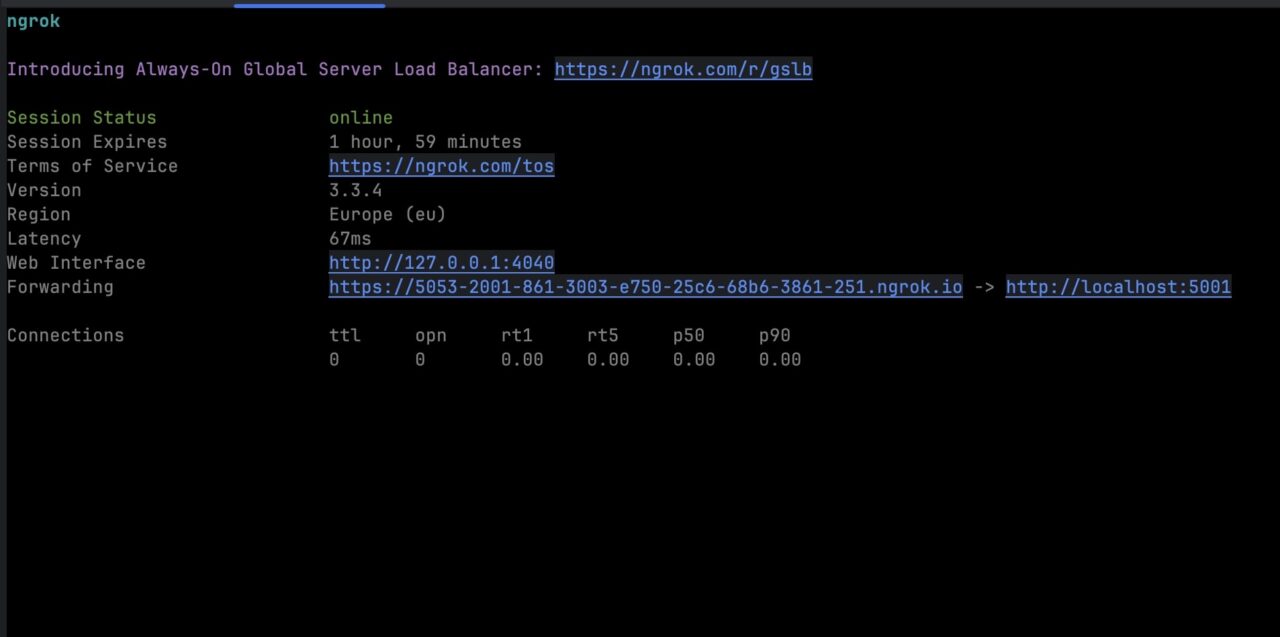
The application will run on port 5001; now we must create the tunnel to our application using Ngrok, so let’s install it globally and create the tunnel:
	npm install -g ngrok

	ngrok http 5001
It will generate a URL that can be used to access your application from the Internet.
To connect it to DataPipeline:
- Copy the URL
- Go to your project configuration
- Update the Webhook URL
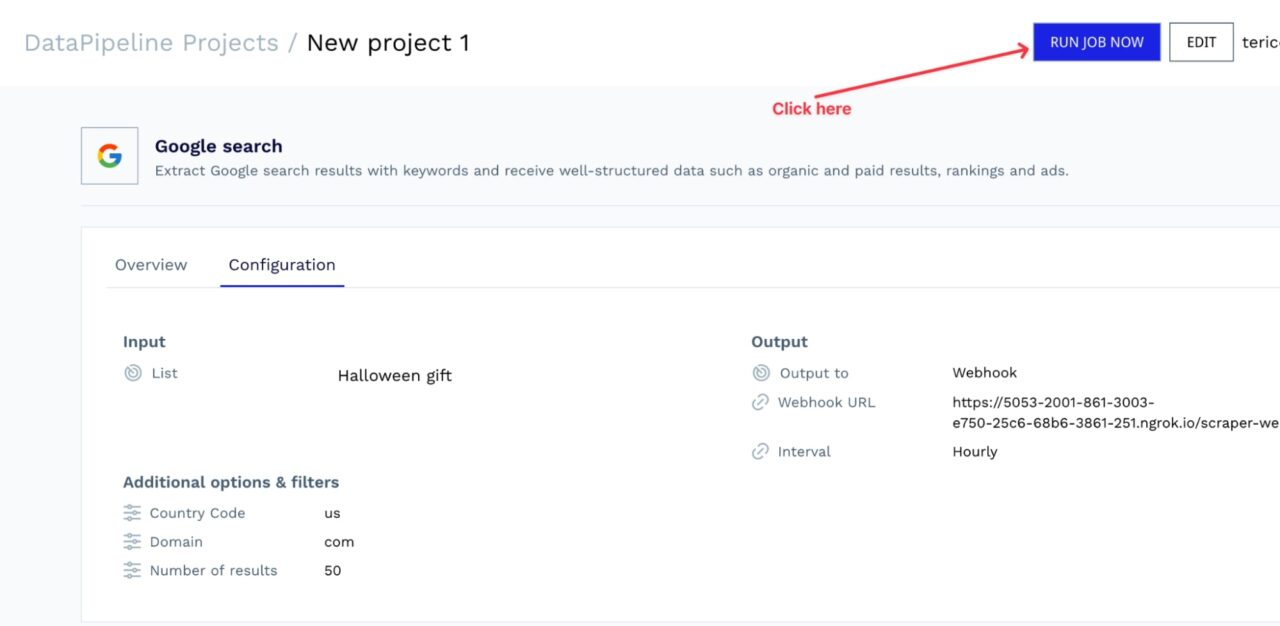
Check out the Webhook server logs in its terminal; you will see a message.
From now on, ScraperAPI will run this job every hour and send the resulting data to your Webhook. Congratulations, you are now successfully monitoring Google SERPs!
Method 2: Using ScraperAPI’s Standard API
For this second approach, we’ll write a script using Node.js, sending our requests through https://api.scraperapi.com/ to bypass Google’s anti-scraping mechanisms.
Prerequisites
To follow this tutorial, ensure the following:
- Node.js 18+ and NPM installed – Download link
- Knowledge of JavaScript and Node.js API
- A ScraperAPI account – create a free ScraperAPI account
Like before, let’s build a scraper to extract the SERP for “halloween gift”.
1. Install the Dependencies
To build our scraper, we need two dependencies:
- Axios – to send our requests
- Cheerio – to parse the response and extract specific data points based on DOM selectors
Inside the same project we created for the webhook server, let’s run the command below to install the required dependencies:
npm install axios cheerio
2. Implement SERPs Monitoring
Create a new file called serp-scraper.js and add the code below:
	const axios = require("axios");
	const cheerio = require("cheerio");

	const URL = 'https://www.google.com/search?q=halloween+gift';
	const API_KEY = 'api_key' // ← Enter your API Key here

	const runScraper = async () => {
		const searchParams = new URLSearchParams({
			api_key: API_KEY,
			  url: URL,
			  render: true,
		});

		try {
			const response = await axios.get(`http://api.scraperapi.com/?${searchParams.toString()}`);

			  const html = response.data;

			const result = extractResultsInfo(html);

			console.log(result);
		} catch (error) {
			console.error('Error: ', error);
		}
	};
Here’s a simple breakdown of what’s happening:
- The script sends a request through ScraperAPI to the target Google search URL
- The server responds with the page’s HTML
- Then, the script passes it to our
extractResultsInfo()function – which is not defined yet, but we will do it in the next step
Note: Remember to add your API key. You can find it in your ScraperAPI dashboard.
3. Identify the Information to Extract from Google Search Results
To get specific data points, we must find the DOM selector associated with each piece of information.
The picture below shows the location of the result’s title and other information in the DOM.
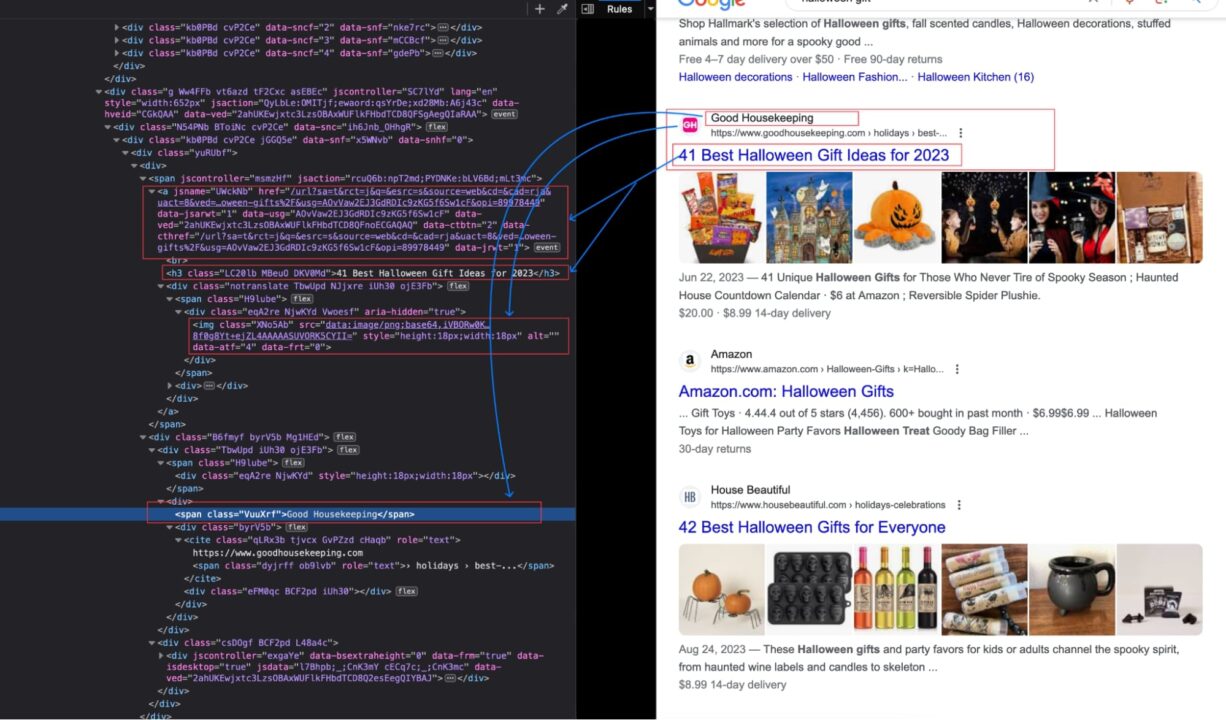
We can use Cheerio to parse the HTML content of the page and extract the data.
Here is the code of the extractResultsInfo() function:
	const extractResultsInfo = (html) => {
		const $ = cheerio.load(html);

		const result = [];

		$('.Ww4FFb').each((_, el) => {
			   const title = $(el).find('.LC20lb').text();
			   const sellerName = $(el).find('.VuuXrf').first().text();
			   const link = $(el).find('.yuRUbf span a').attr('href');

			   if (!title) {
				 return;
			   }

			   result.push({
				 title,
				 link,
				 price: null,
				 sellerName
			   });
		});

		return result;
	}
The remaining task is to run the code every hour, which can be achieved by wrapping the function runScraper() into a setInterval() function.
Here is the final code:
	const axios = require("axios");
	const cheerio = require("cheerio");

	const URL = 'https://www.google.com/search?q=halloween+gift';
	const API_KEY = 'api_key' // ← Enter your API Key here

	const extractResultsInfo = (html) => {
		const $ = cheerio.load(html);
		const result = [];

		$('.Ww4FFb').each((_, el) => {
		   const title = $(el).find('.LC20lb').text();
		   const sellerName = $(el).find('.VuuXrf').first().text();
		   const link = $(el).find('.yuRUbf span a').attr('href');

		   if (!title) {
			   return;
		   }

		   result.push({
			   title,
			   link,
			   price: null,
			   sellerName
		   });
		});

		return result;
	}

	const runScraper = async () => {
		const searchParams = new URLSearchParams({
				api_key: API_KEY,
				url: URL,
				render: true,
		});

		try {
				const response = await axios.get(`http://api.scraperapi.com/?${searchParams.toString()}`);

				const html = response.data;

				const result = extractResultsInfo(html);

				console.log(result);
		} catch (error) {
				console.error('Error: ', error);
		}
	};

	(async () => {
		await runScraper();

		setInterval(async () => {
			   await runScraper();
		}, 3600000);
	})();
The value 3600000 is equal to 1 hour in milliseconds.
Run the code with the command below:
node serp-scraper.js
You will see the output like this:

Find the source code of this article on this GitHub repository.
Wrapping up
Monitoring search results can help you build a solid SEO strategy, keep an eye on competitors, and create in-house tools designed specifically for your use case, empowering your SEO and marketing teams to make data-based decisions.
ScraperAPI allows you to build highly efficient data pipelines without building complex infrastructures, letting you focus on analyzing data instead of maintenance work.
Want to learn more? Check out DataPipeline’s documentation for a detailed explanation of the tool, or try it yourself by creating a free ScraperAPI account.
Need to collect data from millions of search queries? Contact sales to get a custom plan with all premium features, premium support, and an account manager.