

Not all website data is in plain text format. Some are presented in tables built with HTML or JavaScript. Scraping tables requires a different approach than extracting text data.
In this web scraping tutorial, we’ll teach you how to create a JavaScript table web scraper using Python. However, before we dive in, let’s explore the differences between HTML and JavaScript tables, why JavaScript tables are more challenging to scrape, and how to overcome these obstacles.
What Are JavaScript Tables?
JavaScript tables, also called dynamic tables or AJAX tables, are a set of rows and columns that are used to display dynamic data in a grid format directly on a web page.
Unlike HTML tables, the data within a JS table is injected into the page after the rendering stage, making it possible to autogenerate as many rows and columns as needed to accommodate the data, auto-populate them with content on-demand and use any JavaScript function on the data to sort, rank, or change the table itself.
HTML Tables vs. JavaScript Tables in Web Scraping
On the front-end, HTML tables, and JavaScript tables look the same, both displaying the data in a grid format. However, HTML tables, as their name suggests, are tables built directly on the HTML file, while dynamic web tables are rendered by the browser – in most cases – by fetching a JSON file containing the information and following directives written on JavaScript to inject the data into the HTML.
But what does it mean for us? HTML tables can be accessed simply by requesting the HTML file of a website and then parsing it for the information we want using CSS classes and IDs.
In the case of JavaScript tables, this approach is useless because the data we need is not in the HTML file. At most, we’ll end up scraping a lot of empty HTML elements.
Instead, our first option is using a headless browser, like Selenium, to access and render the website. Once the data is injected into the browser, we can now access it using XPath and CSS selectors.
Although Selenium is a great tool for automating any kind of browser task – even web scraping – there’s a simpler option that doesn’t require such an overkill solution:
How to Scrape Dynamic Tables in Python with Requests
Yes, we just said that we can’t access a JavaScript table by just requesting the HTML file, but that’s not what we’re going to do.
If you’ve read carefully, you know by know that dynamic tables need to pull the data from somewhere, so if we can imitate the request the browser sends when rendering the page, we can access the exact same data without the need of a headless browser.
For this tutorial, we’ll scrape https://datatables.net/examples/data_sources/ajax.html using Python’s Requests library to extract all employee data displayed on the site.
Note: If this is your first time doing web scraping with Python, we recommend you take a look at our web scraping in Python for beginners tutorial. You’ll learn all the basics you’ll need to scrape almost any HTML data you can find.
Step 1. Finding the Hidden API to Access the JSON Data
We already know the table on this page is dynamically generated. However, if we want to test for it, we can first view the page’s source code and look for a bit of data from the table.

We copied the first name and then CTRL + F to look for the element and nothing. The name doesn’t exist on the unrendered version of the page. This is a clear indication that we’re dealing with a JavaScript-generated table.
Now that’s clear, let’s open Chrome’s DevTools and go to the Network tab > Fetch/XHR.

In this report, we’ll be able to see every fetch request sent by our browser. To populate it, we just need to reload the page with the open tab.
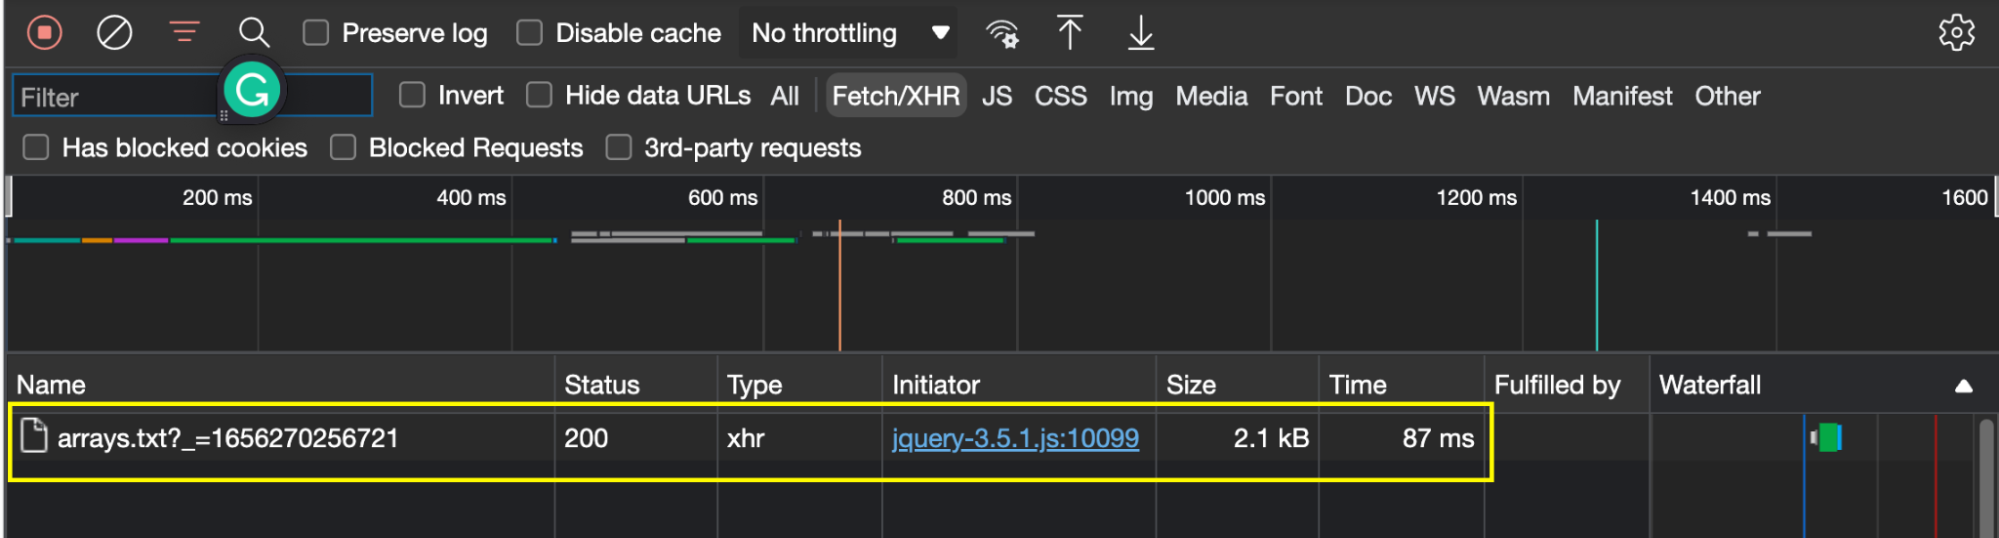
Note: In this scenario, there’s only one file being fetched. In most cases, your target website will send several more requests, making it a little harder to spot the correct one. As a rule of thumb, you can use the file size as a reference. The larger the file, the more data it returns, which is a great indication that it holds the information we want to scrape.
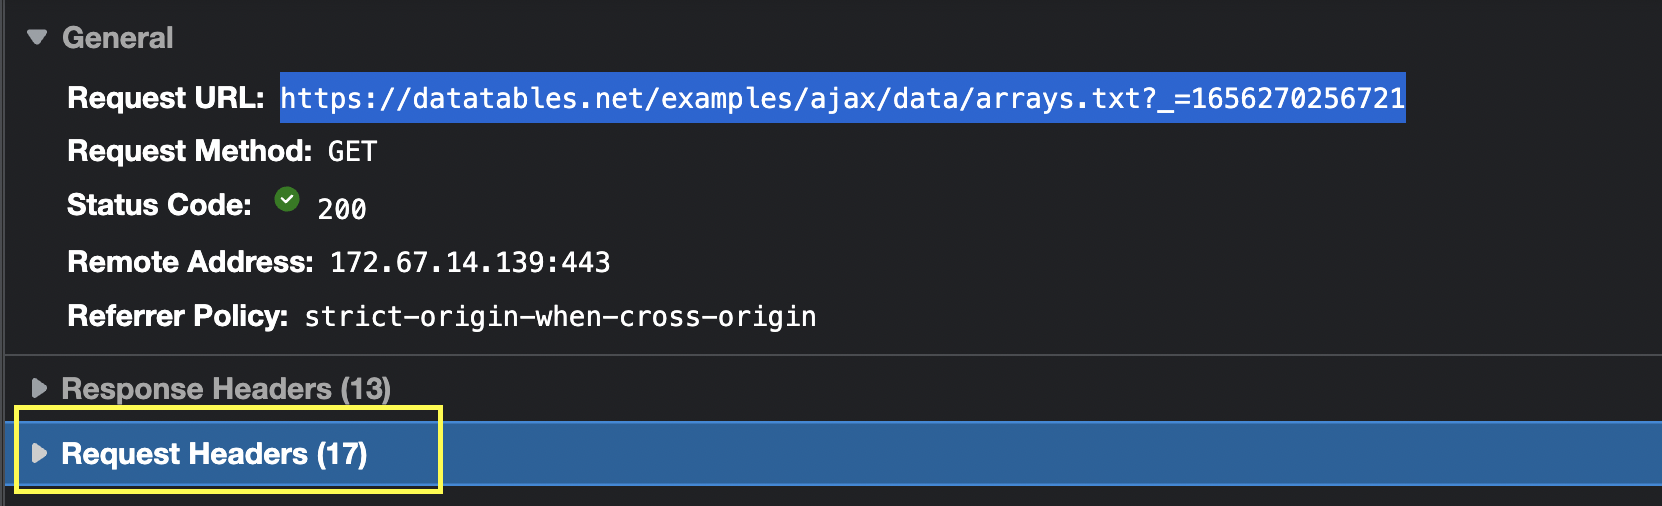
Now that we’ve found our target, we’ll click on it and go to the Response tab to see what’s in this request.
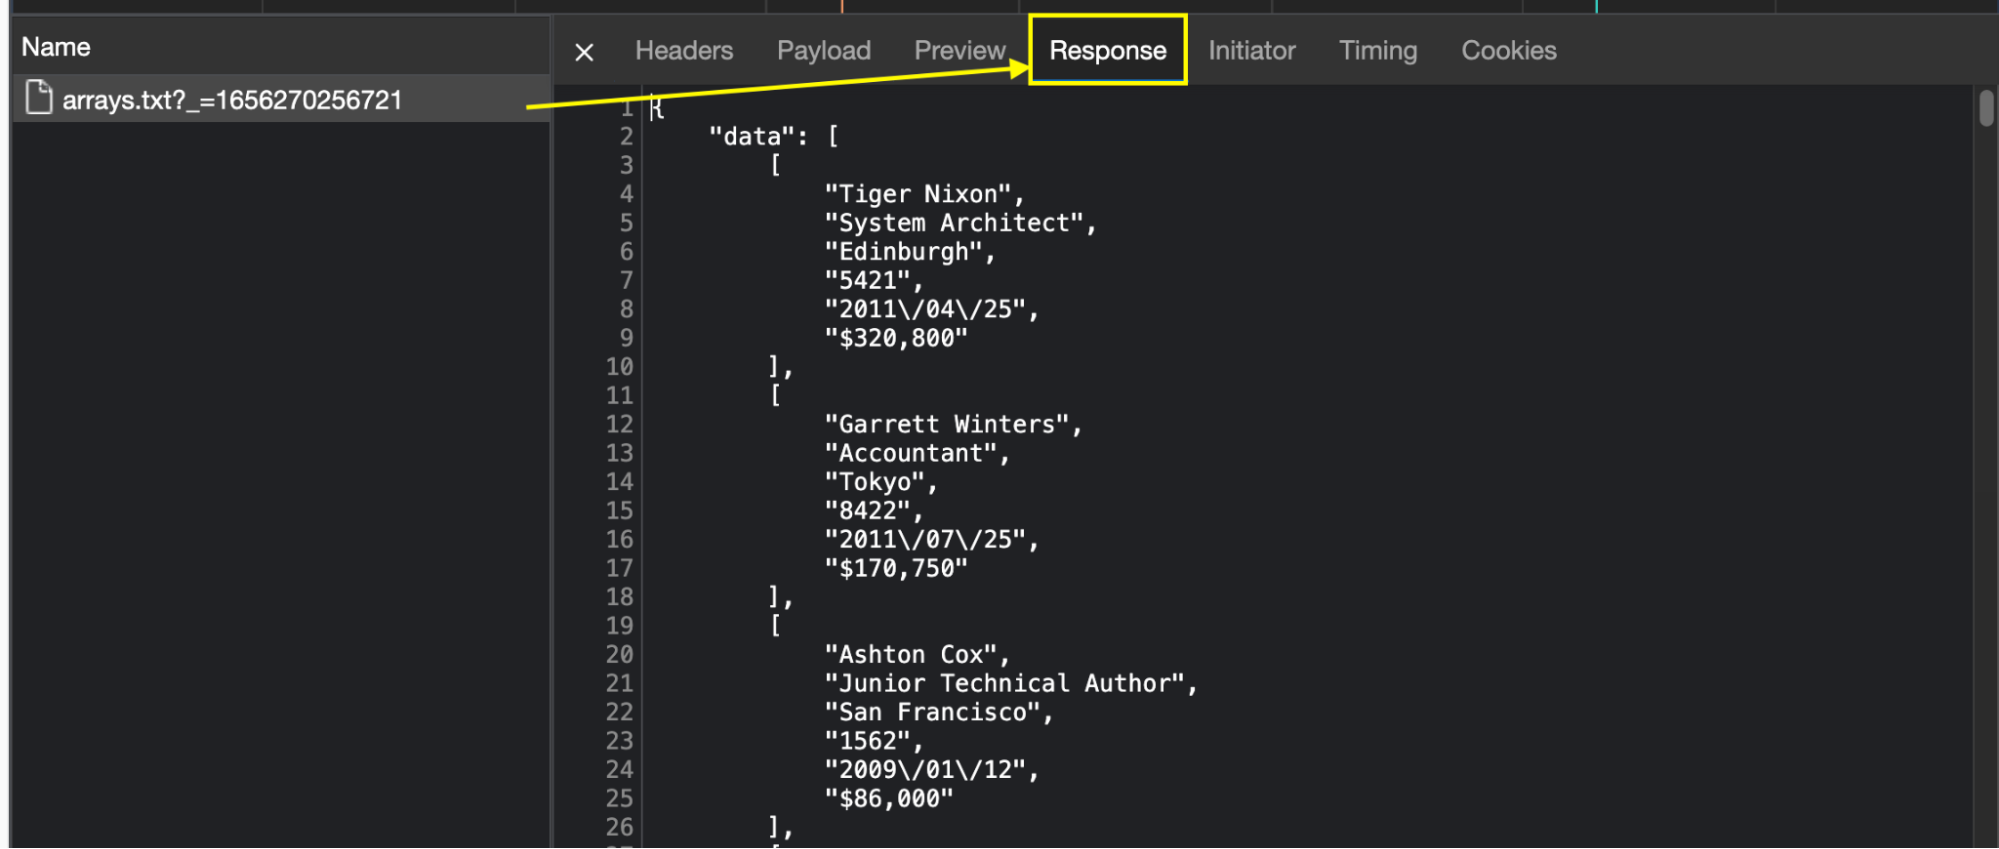
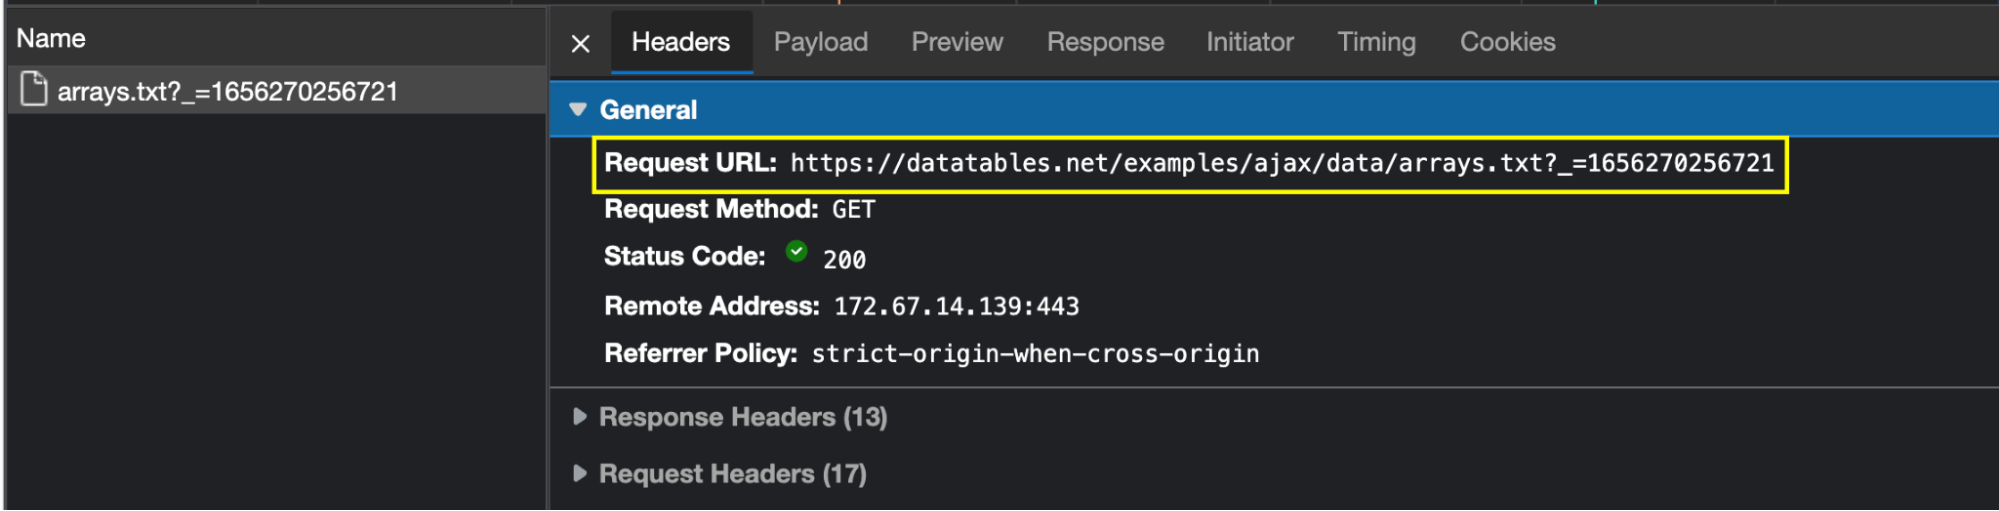
Awesome, there’s on data in JSON format ready for the taking! To access this file from our script, we need to click on the Headers tab to grab the URL of the request and send our HTTP request to said URL.
Step 2. Sending Our Initial HTTP Request
Sending a request to our target URL is as simple as storing the URL into a variable and then using the requests.get(url) method to download the file – which would be enough for this example page.
However, when dealing with more complex websites, you’ll need to add the proper Request Headers to avoid getting banned or blocked. For example, many websites use Cookies to verify that the one sending the request to the data source file is a human user and not a script.
The good news is that we already have all the information we need right in the open Headers tab.
From here, we’ll only take the three most important Headers:
- user-agent
- cookie
- accept
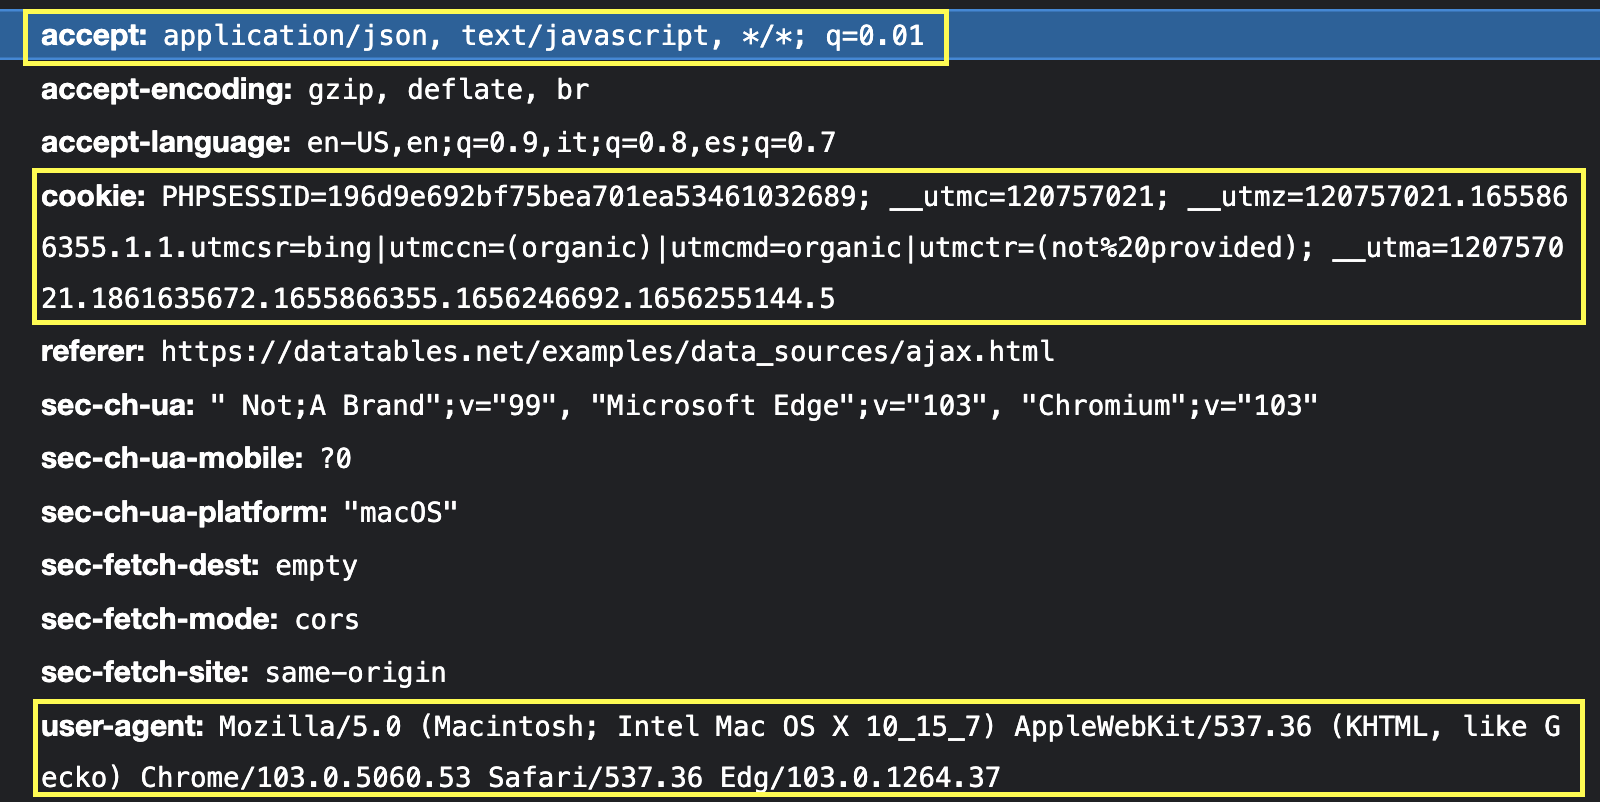
Let’s translate all of this to Python:
import requests</p><p>url = 'https://datatables.net/examples/ajax/data/arrays.txt?_=1656247207356'<br />headers = {<br />'value': 'application/json, text/javascript, */*; q=0.01',<br />'accept': 'application/json, text/javascript, */*; q=0.01',<br />'cookie': 'PHPSESSID=196d9e692bf75bea701ea53461032689; __utmc=120757021; __utmz=120757021.1655866355.1.1.utmcsr=bing|utmccn=(organic)|utmcmd=organic|utmctr=(not provided); __utma=120757021.1861635672.1655866355.1656246692.1656255144.5'<br />}</p><p>page = requests.get(url, headers=headers)<br />We can then print(page) for testing, and it should return a Response 200 – other than that, the request has failed.
Step 3. Reading and Scraping the JSON Data
Unlike elements on a parsed HTML file, our JSON data is formed by JSON objects – each between curly brackets {} – and key-value pairs or properties inside the object – although they can also be empty.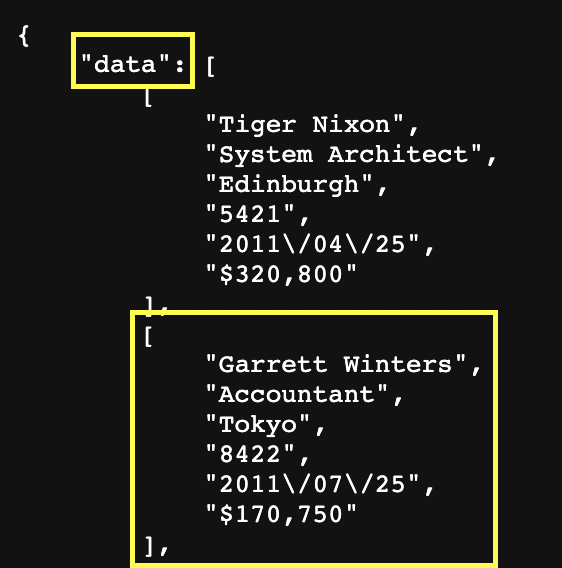
In this example, our JSON object is data, while every set of properties is called a JSON Array. In that sense, if our web scraper picks the JSON object, it’ll return a list of JSON Arrays, while each Array has its own list of properties.
To interrogate our JSON file, we’ll use Python’s built-in .json() method within a variable named data to return our JSON object.
data = page.json()</p><p>print(len(data))
When printing our new variable, it’ll return 1 because there’s only one object being taken.
![]()
We can use several different approaches to extract the information inside the JSON object. Nonetheless, we’ll want to do it in a way that makes it easy to export the data into a CSV file.
For starters, we’ll treat each JSON Array as an item inside a list to access their internal properties using their position within the index – which starts at zero.
Note: This logic can work to pick specific keys without naming (like in this case) or JSON objects with the same name but different values.
Here’s a visual example of what we mean:
<br />data = page.json()</p><p>first_array = data['data'][0]</p><p>print(first_array)
In first_array we’re asking the JSON file stored in data to return the first array in the index within the JSON object. This is what it returns:

We can also test if we’re getting all our elements from the JSON file like this:
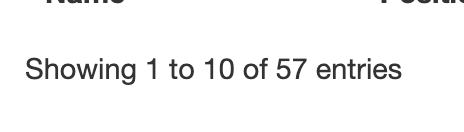
all_arrays = data['data']<br />print(len(all_arrays))

It returns the correct length of rows we want to scrape:
To extract the properties inside the Arrays, we can loop through each JSON Array and extract the elements based on their position in the index as follow:
data = page.json()<br />for item in data['data']:<br />name = item[0]<br />position = item[1]<br />office = item[2]<br />extn = item[3]<br />start_date = item[4]<br />salary = item[5]
You can name each property as you like but we recommend following the same convencion from the original table for clarity.
Step 4. Exporting Our Data to a CSV File
Because our data is already formatted as we want, creating our CSV file is quite simple. After sending our request, we’ll create a new file and add the headings matching the data:
file = open('js-table-data.csv', 'w')<br />writer = csv.writer(file)<br />writer.writerow(['Name', 'Position', 'Office', 'Start Date', 'Extn', 'Salary'])Note: Don’t forget to add import csv at the top of your file. There’s no need for pip install.
We’ll encode each property scraped to our CSV inside our for loop using the .writerow() method.
writer.writerow([<br />name.encode('utf-8'),<br />position.encode('utf-8'),<br />office.encode('utf-8'),<br />extn.encode('utf-8'),<br />start_date.encode('utf-8'),<br />salary.encode('utf-8')])And finally, we close the file outside of the loop and print() CSV created as a visual feedback.
<br />file.close()<br />print('CSV created')Step 5. Running Our Script [Full Code]
Congratulations, you’ve created a simple yet powerful dynamic web table scraper! If you’ve been writing your code alongside us, here’s how your code base should look by now:
<br />import requests<br />import csv</p><p>url = 'https://datatables.net/examples/ajax/data/arrays.txt?_=1656247207356'<br />headers = {<br />'value': 'application/json, text/javascript, */*; q=0.01',<br />'accept': 'application/json, text/javascript, */*; q=0.01',<br />'cookie': 'PHPSESSID=196d9e692bf75bea701ea53461032689; __utmc=120757021; __utmz=120757021.1655866355.1.1.utmcsr=bing|utmccn=(organic)|utmcmd=organic|utmctr=(not provided); __utma=120757021.1861635672.1655866355.1656246692.1656255144.5'<br />}</p><p>page = requests.get(url, headers=headers)</p><p>file = open('js-table-data.csv', 'w')<br />writer = csv.writer(file)<br />writer.writerow(['Name', 'Position', 'Office', 'Start Date', 'Extn', 'Salary'])</p><p>data = page.json()<br />for item in data['data']:<br />name = item[0]<br />position = item[1]<br />office = item[2]<br />extn = item[3]<br />start_date = item[4]<br />salary = item[5]</p><p>writer.writerow([<br />name.encode('utf-8'),<br />position.encode('utf-8'),<br />office.encode('utf-8'),<br />extn.encode('utf-8'),<br />start_date.encode('utf-8'),<br />salary.encode('utf-8')])</p><p>file.close()<br />print('CSV created')<br />From running our script, we’re able to extract all 57 rows of the original JavaScript table without the need to use a headless browser nor worry about the pagination feature displayed on the front end.

This is the end file you should be getting from your script:
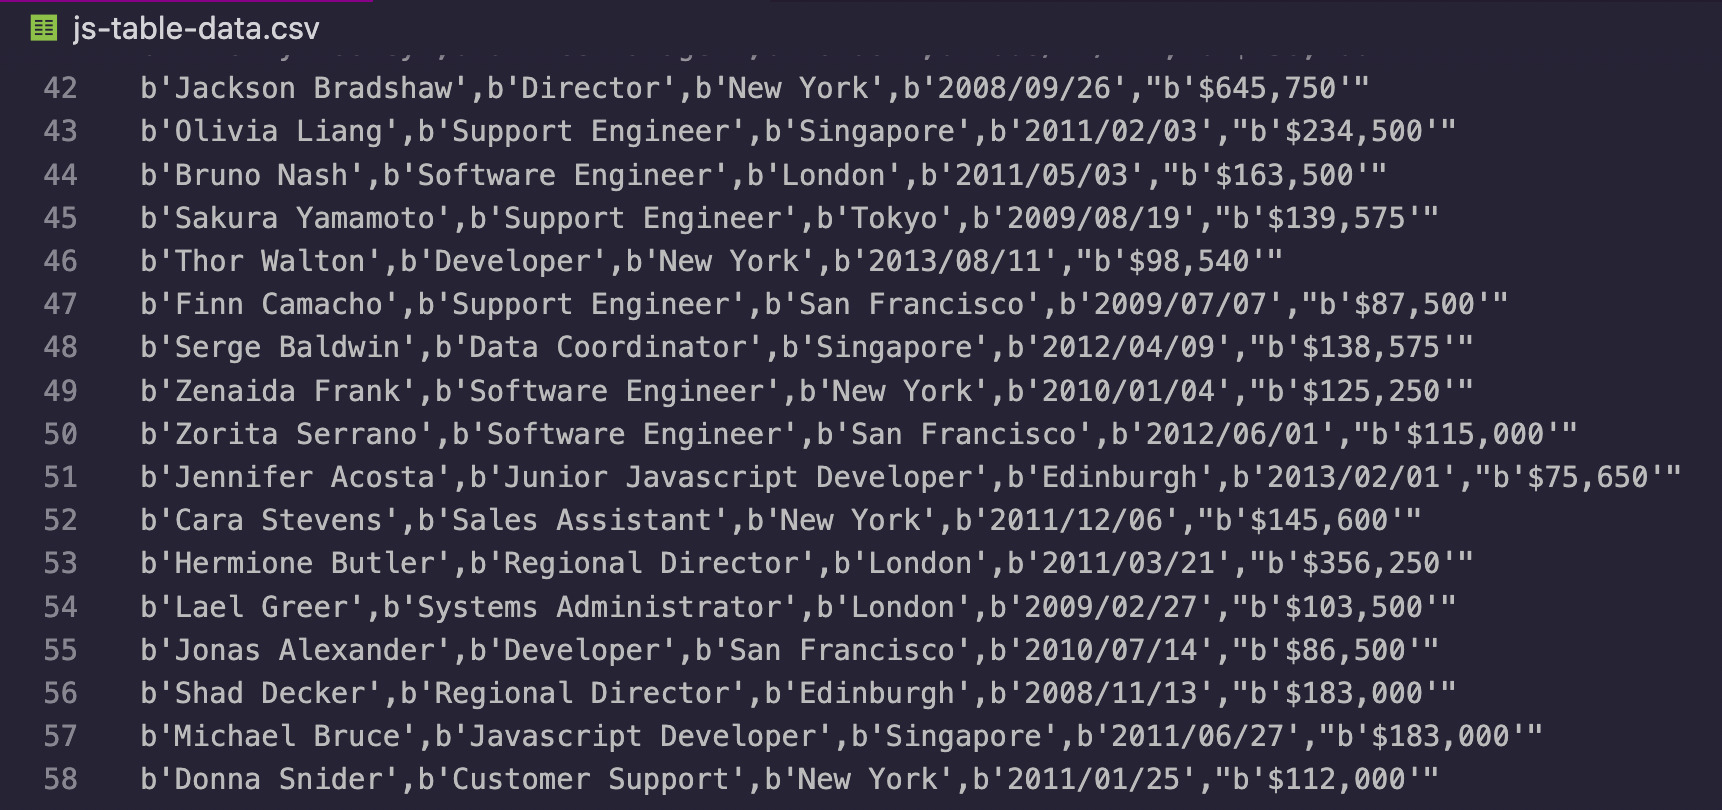
Although this was a dummy employment data set, you can very well adapt this script to scrape almost any dynamically generated table on the web to extract real employment, football, weather or statistics data sets.
Extract JavaScript Table Data with ScraperAPI
Using the right headers can win you a lot of fights, but won’t be enough if you want to scale your projects for business applications or to collect huge amounts of data. In those cases, you’ll need to protect your web scraper much harder by creating functions to handle IP rotation and CAPTCHAs, maintain expensive proxy pools and retry any failed requests.
ScraperAPI is designed to handle all these complexities for you by just adding a string to your initial request.
To integrate our API to your code base, first create a free ScraperAPI account to generate your API key. From your dashboard you’ll be able to copy your key and access the full ScraperAPI’s documentation.
With this new information, we’ll change our original URL following this structure:
<br />url = 'http://api.scraperapi.com?api_key={YOUR_API_KEY}&amp;amp;url={TARGET_URL}'<br />So your final URL will look something like this:
<br />url = 'http://api.scraperapi.com?api_key=51e43be283e4db2a5afb62660xxxxxxx&amp;amp;url=https://datatables.net/examples/ajax/data/arrays.txt?_=1656247207356'<br />
By sending our request through ScraperAPI’s server, the API will use its years of statistical analysis and machine learning to determine which is the best combination of headers and IP addresses for the request to be successful, retry any unsuccessful attempts, handle CAPTCHAs and blocked IPs, and rotate your IP for every request to imitate organic users.
What’s more, you can set render=true in the URL string and ScraperAPI will render the HTML before returning it back. It can be super handy for those moments where there’s no API endpoint to fallback like we did on this tutorial.
Get JavaScript-Based Table Data You Need, Anytime
Extracting data from tables can be challenging. This web scraping tutorial should help you build a block-free web scraper, enabling you to collect any table data seamlessly.
We recommend adopting ScraperAPI to further help you mitigate any risks that can hurt your web scraping project. ScraperAPI handles the browser headings, CAPTCHAs, and other challenges so that you can focus on repurposing the data for your business. Additionally, you can schedule up to 10,000 URLs to be scraped using our DataPipeline solution.
Interested in giving ScraperAPI a go? Sign up today and enjoy a 7-day free trial!
Until next time, happy scraping!
Other JavaScript web scraping tutorials that may interest you: