


Web scraping with Python is one of the easiest and fastest ways to build large datasets, in large part thanks to its English-like syntax and wide range of data tools.
However, learning everything on your own might be tricky – especially for beginners.
To help you in this journey, let us walk you through the basics of Python web scraping, its benefits, and best practices.
Why is Python Good for Web Scraping?
Python is one of the most popular programming languages for web scraping because of its syntax simplicity, wide range of web scraping frameworks (e.g., Scrapy and Beautiful Soup), guides, web scraping tutorials, resources, and communities available to keep improving your craft.
What makes it an even more viable choice is that Python has become the go-to language for data analysis, resulting in a plethora of frameworks and tools for data manipulation that give you more power to process the scraped data.
So, if you’re interested in scraping websites with Python to build huge data sets and then manipulating and analyzing them, this is exactly the guide you’re looking for.
Step By Step Guide to Web Scraping With Python
In this Python web scraping tutorial, we’re going to scrape this Indeed job search page to gather the:
- Job title
- Name of the company hiring
- Location
- URL of the job post
After collecting all job listings, we’ll format them into a CSV file for easy analysis.
Web scraping can be divided into a few steps:
- Request the source code/content of a page to a server
- Download the response (usually HTML)
- Parse the downloaded information to identify and extract the information we need
While our example involves Indeed, you can follow the same steps for almost any web scraping project.
Just remember that every page is different, so the logic can vary slightly from project to project.
With that said, let’s jump into our first step:
Step 1: Understanding Page Structure
All web scrapers, at their core, follow this same logic. In order to begin extracting data from the web with a scraper, it’s first helpful to understand how web pages are typically structured. Before we can begin to code our Python web scraper, let’s first look at the components of a typical page’s structure.
Most modern web pages can be broken down into two main building blocks, HTML and CSS.
HTML for Web Scraping
HyperText Markup Language (HTML) is the foundation of the web. This markup language uses tags to tell the browser how to display the content when we access a URL.
If we go to our homepage and press ctrl/command + shift + c to access the inspector tool, we’ll be able to see the HTML source code of the page.
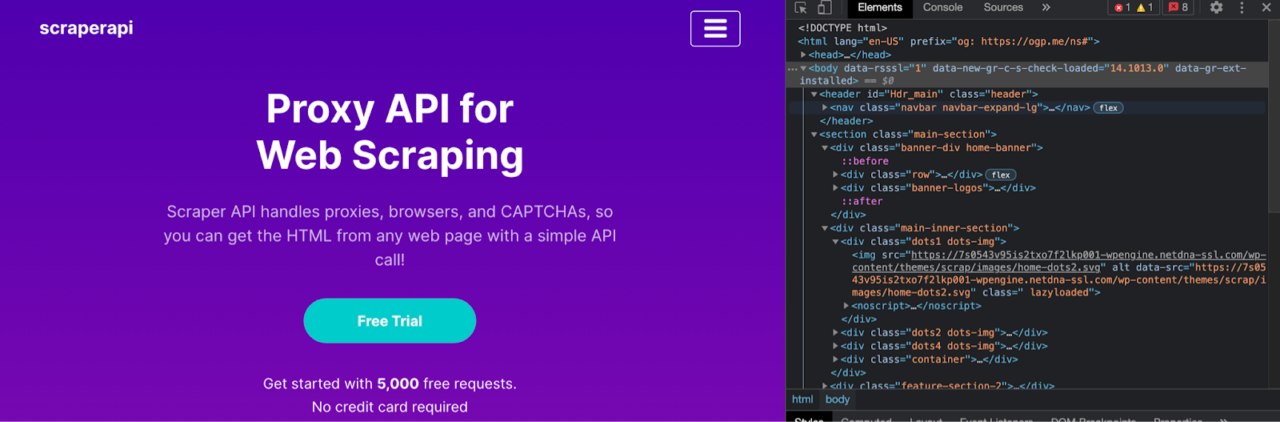
Although the HTML code can look very different from website to website, the basic structure remains the same.
The entire document will begin and end wrapped between <html></html> tags, we’ll find the <head></head> tags with the metadata of the page, and the <body></body> tags where all the content is – thus, making it our main target.
Something else to notice is that all tags are nested inside other tags.

In the image above, we can see that the title text is inside of a <h2> tag which is inside of a div inside a div.
It is important because when scraping a site, we’ll be using its HTML tags to find the bits of information we want to extract.
Here are a few of the most common tags:
- div – it specifies an area or section on a page. Divs are mostly used to organize the page’s content
- h1 to 6 – defines headings.
- p – tells the browser the content is a paragraph.
- a – tells the browser the text or element is a link to another page. This tag is used alongside an href property that contains the target URL of the link
CSS for Web Scraping
Cascading Style Sheets (CSS) is a language used to style HTML elements. In other words, it tells the browser how the content specified in the HTML document should look when rendered.
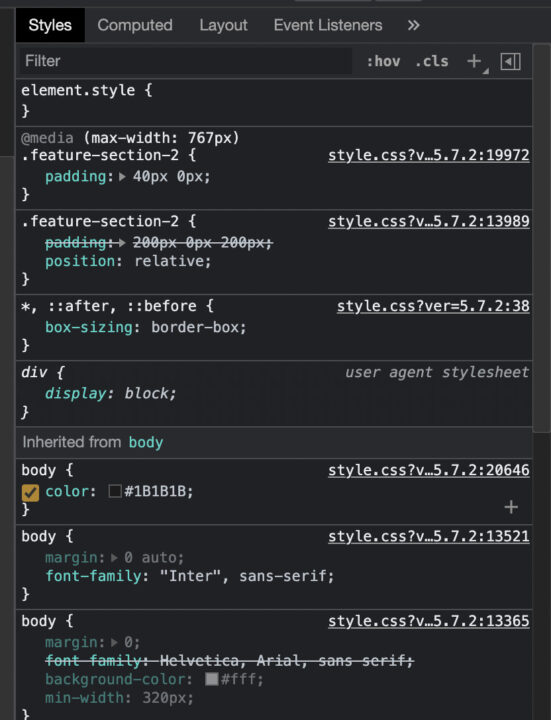
But why do we care about the aesthetics of the site when scraping? Well, we really don’t.
The beauty of CSS is that we can use CSS selectors to help our Python scraper identify elements within a page and extract them for us.
When we write CSS, we add classes and IDs to our HTML elements and then use selectors to style them.

In this example, we used the class=”how-it-section-heading” to style the heading of the section.
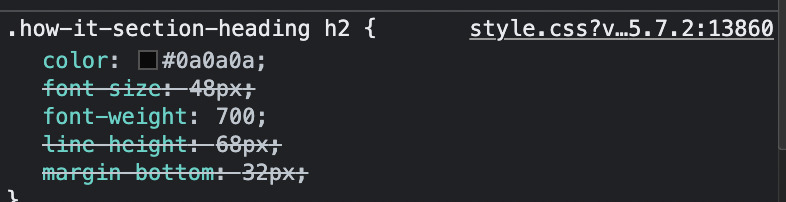
Note: the dot (.) means class. So the code above selects all elements with the class how-it-section-heading.
Step 2: Use Python’s Requests Library to Download the Page
The first thing we want our scraper to do is to download the page we want to scrape.
For this, we’ll use the Requests library to send a get request to the server.
To install the Requests library, go to your terminal and type pip3 install requests.
Now, we can create a new Python file called soup_scraper.py and import the library to it, allowing us to send an HTTP request and return the HTML code as a response, and then store the data in a Python object.
import requests

url = 'https://www.indeed.com/jobs?q=web+developer&l=New+York'

page = requests.get(url)
print(page.content)
The print(page.content) will log into the terminal the response stored in the page variable, which at this point is a huge string of HTML code – but confirming the request worked.
Another way to verify that the URL is working is by using print(page.status_code). If it returns a 200 status, it means the page was downloaded successfully.
Step 3: Inspect Your Target Website Using the Browser’s Dev Tools
Here’s where those minutes of learning about page structure will payout.
Before we can use Beautiful Soup to parse the HTML we just downloaded, we need to make sure we know how to identify each element in it so we can select them appropriately.
Go to indeed’s URL and open the dev tools. The quickest way to do this is to right click on the page and select “inspect.” Now we can start exploring the elements we want to scrape.
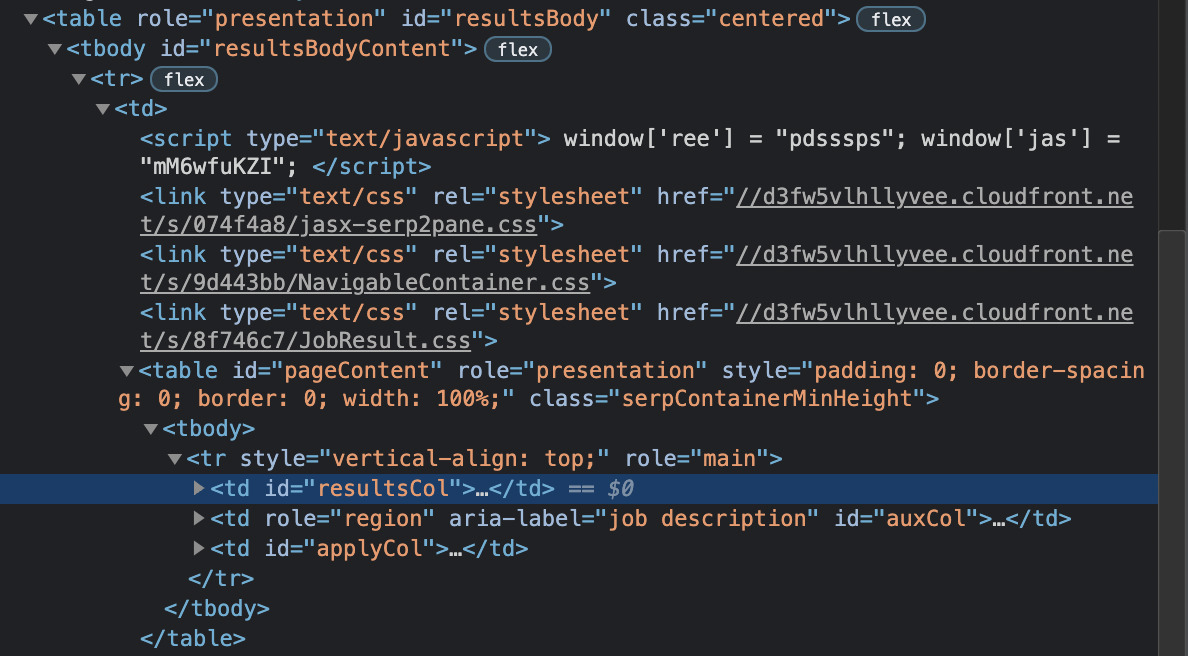
At the time we’re writing this piece, it seems like all the content we want to scrape is wrapped inside a td tag with the class resultsCol.
Note: this page is a little messy in its structure, so if you have trouble finding the elements, don’t be worried. If you hit ctrl+F in the inspection panel, you can search for the elements you’re looking for. Here’s an overview of the HTML of the page so you can find td class=”resultsCol” easier.
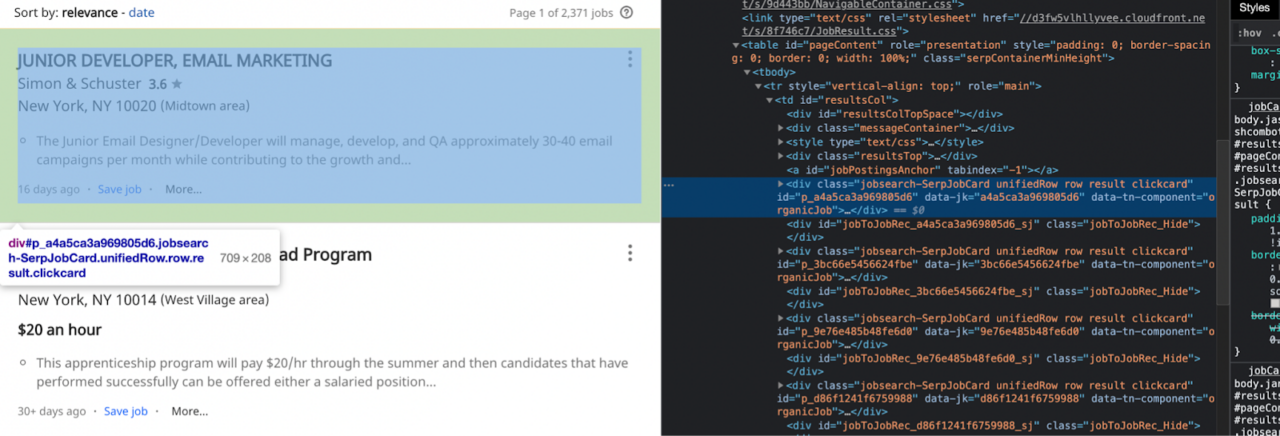
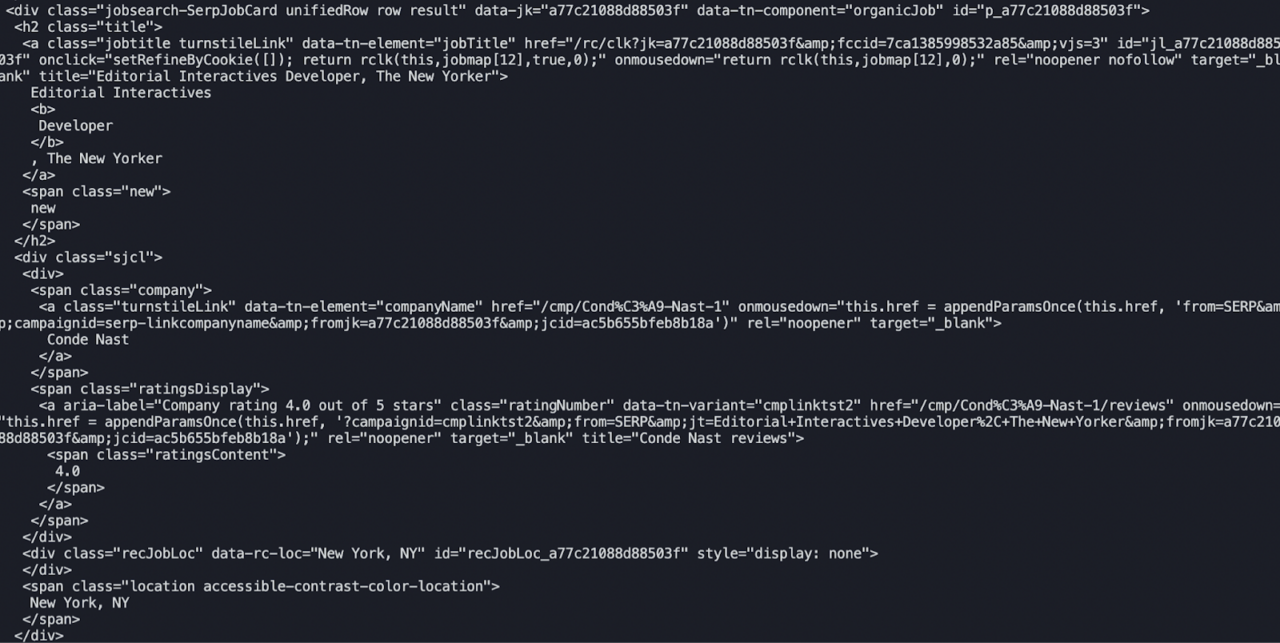
Here it looks like every job result is structured as a card, contained within a div with class=”jobsearch-SerpJobCard unifiedRow row result clickcard”.
We’re getting closer to the information we’re looking for. Let’s inspect these div elements a little closer.

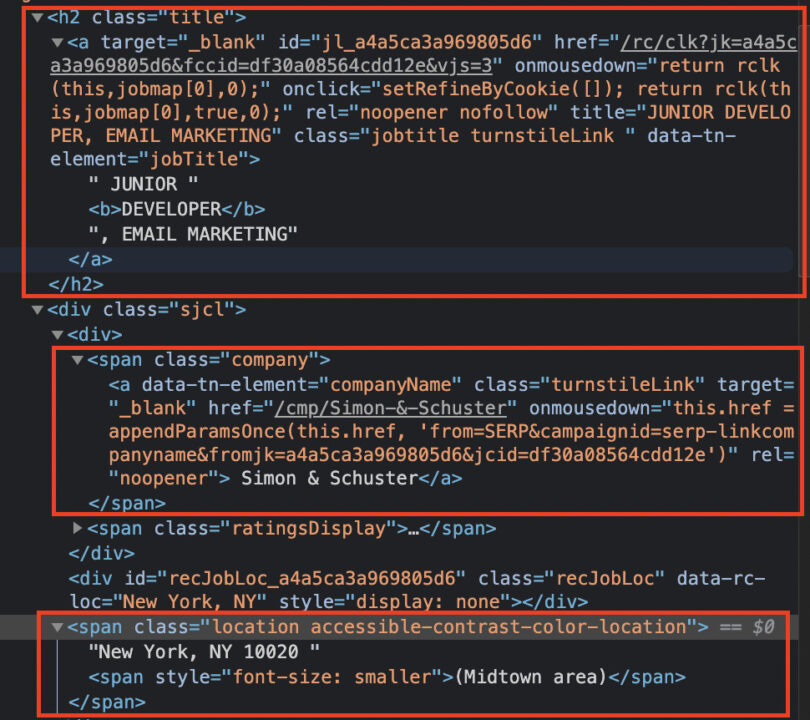
We can find the job title within the <a> tag with class="jobtitle turnstileLink", inside the h2 tag with class=”title”. Plus, there’s the link we’ll be pulling as well.
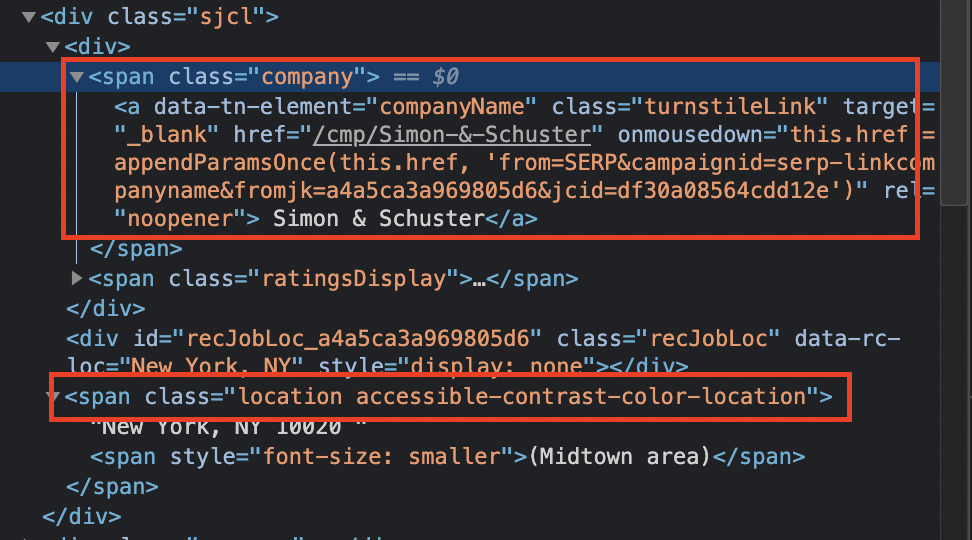
The rest of the elements are enclosed within the same div and using the class=”company” and class=”location accessible-contrast-color-location” respectively.
Step 4: Parse HTML with Beautiful Soup
Let’s go back to our terminal, but to install Beautiful Soup using pip3 install beautifulsoup4. After it’s installed, we can now import it into our project and create a Beautiful Soup object for it to parse.
import requests
from bs4 import BeautifulSoup

url = 'https://www.indeed.com/jobs?q=web+developer&l=New+York'

page = requests.get(url)
soup = BeautifulSoup(page.content, 'html.parser')
If you still remember the id of the HTML tag containing our target elements, you can now find it using results = soup.find(id=’resultsCol’).
To make sure it’s working, we’re going to print the result out but using Prettify so the logged content is easier to read.
import requests
from bs4 import BeautifulSoup

url = 'https://www.indeed.com/jobs?q=web+developer&l=New+York'

page = requests.get(url)
soup = BeautifulSoup(page.content, 'html.parser')

results = soup.find(id='resultsCol')
print(results.prettify())
The result will look something like this:
Definitely easier to read, still very unusable. However, our scraper is working perfectly, so that’s good!
Step 5: Target CSS Classes with Beautiful Soup
So far, we’ve created a new Beautiful Soup object called results that show us all the information inside our main element.
Let’s dig deeper into it by making our Python scraper find the elements we actually want from within the results object.
As we’ve seen before, all job listings are wrapped in a div with the class jobsearch-SerpJobCard unifiedRow row result clickcard, so we’ll call find_all() to select these elements from the rest of the HTML:
indeed_jobs =
results.find_all('div', class_='jobsearch-SerpJobCard unifiedRow row result clickcard')
And after running it… nothing.
Our scraper couldn’t find the div. But why? Well, there could be a plethora of reasons for this, as it happens frequently when building a scraper. Let’s see if we can figure out what’s going on.
When we have an element with spaces in its class, it’s likely that it has several classes assigned to it. Something that has worked in the past for us is adding a dot (.) instead of a space.

Sadly, this didn’t work either.
This experimentation is part of the process, and you’ll find yourself doing several iterations before finding the answer. Here’s what eventually worked for us:
indeed_jobs = results.select('div.jobsearch-SerpJobCard.unifiedRow.row.result')
When using select – instead of find_all() – we can use a different format for the selector where every dot (.) represents “class” – just like in CSS. We also had to delete the last class (clickcard).
Note: if you want to keep using find_all() to pick the element, another solution is to use indeed_jobs = results.find_all(class_='jobsearch-SerpJobCard unifiedRow row result') and it will find any and all elements with that class.
Step 6: Scrape data with Python
We’re close to finishing our scraper. This last step uses everything we’ve learned to extract just the bits of information we care about.
All our elements have a very descriptive class we can use to find them within the div.
We just have to update our code by adding the following snippet:
for indeed_job in indeed_jobs:
   job_title = indeed_job.find('h2', class_='title')
   job_company = indeed_job.find('span', class_='company')
   job_location = indeed_job.find('span', class_='location accessible-contrast-color-location')
And then print() each new variable with .text to extract only the text within the element – if we don’t use .text, we’ll get the entire elements including the HTML tags which would just add noise to our data.
print(job_title.text)
print(job_company.text)
print(job_location.text)
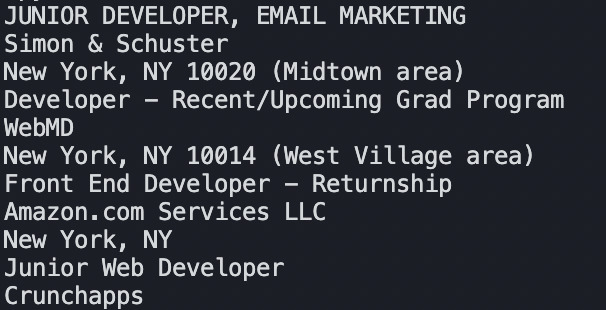
After running our scraper, the results will look like this:
JUNIOR DEVELOPER, EMAIL MARKETING
Simon & Schuster
New York, NY 10020 (Midtown area)
Junior Web Developer
Crunchapps
New York, NY 10014 (West Village area)
Notice that when the response gets printed there’s a lot of white space. To get rid of it, we’ll add one more parameter to the print() function: .strip().
As a result:
Our data looks cleaner, and it will be easier to format in a CSV or JSON file.
Step 7: Scrape URLs in Python
To extract the URL within the href attribute of the <a></a> tag, we write job_url = indeed_job.find('a')['href'] to tell our scraper to look for the specified attribute of our target element.
Note: you can use the same syntax to extract any attribute you need from an element.
Finally, we add the last bit of code to our scraper to print the URL alongside the rest of the data: print(job_url).

Note: Indeed doesn’t add the entire URL in their href attribute, it has the extension. To make the link work, you’ll need to add https://www.indeed.com/ at the beginning of the URL. e.g., https://www.indeed.com/rc/clk?jk=a4a5ca3a969805d6&fccid=df30a08564cdd12e&vjs=3. As homework, we’ll let you figure out how to add it automatically.
Step 8: Export Scraped Data Into a CSV File
Simply having the data logged in your terminal isn’t going to be that useful for processing. That’s why we next need to export the data into a processor of some kind. Although there are several formats we can use (like Pandas or JSON), in this tutorial we’re going to send our data to a CSV file.
To build our CSV, we’ll need to first add import CSV at the top of our file. Then, after finding the divs from where we’re extracting the data, we’ll open a new file and create a writer.
file = open('indeed-jobs.csv', 'w')
writer = csv.writer(file)
Note: This is the method used in Python3. If you’re using Python2 or earlier versions, it won’t work, and you’ll get a TypeError. The same will happen if you use Python2’s method (‘wb’ instead of ‘w’ in the open() function).
To make it easier to read for anyone taking a look at the file, let’s make our writer write a header row for us.
# write header rows
writer.writerow(['Title', 'Company', 'Location', 'Apply'])
We also added a comment, so we’ll know why that’s there in the future.
Lastly, we won’t be printing the results, so we need to make our variables (job_title, job_company, etc) extract the content right away and pass it to our writer to add the information into the file.
If you updated your code correctly, here’s how your Python file should look like:
import csv
import requests
from bs4 import BeautifulSoup

url = 'https://www.indeed.com/jobs?q=web+developer&l=New+York'

page = requests.get(url)
soup = BeautifulSoup(page.content, 'html.parser')

results = soup.find(id='resultsCol')

indeed_jobs = results.select('div.jobsearch-SerpJobCard.unifiedRow.row.result')

file = open('indeed-jobs.csv', 'w')
writer = csv.writer(file)

# write header rows
writer.writerow(['Title', 'Company', 'Location', 'Apply'])

for indeed_job in indeed_jobs:
   job_title = indeed_job.find('h2', class_='title').text.strip()
   job_company = indeed_job.find('span', class_='company').text.strip()
   job_location = indeed_job.find('span', class_='location accessible-contrast-color-location').text.strip()
   job_url = indeed_job.find('a')['href']
   writer.writerow([job_title.encode('utf-8'), job_company.encode('utf-8'), job_location.encode('utf-8'), job_url.encode('utf-8')])

file.close()
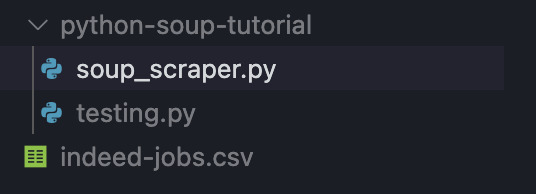
After running the code, our Python and Beautiful Soup scraper will create a new CSV file into our root folder.
And there you have it: you just built your first Python data scraper using Requests and Beautiful Soup in under 10 minutes.
We’ll keep adding new tutorials in the future to help you master this framework. For now, you can read through Beautiful Soup’s documentation to learn more tricks and functionalities.
However, even when web scraping with Python, there are only so many pages you can scrape before getting blocked by websites. To avoid bans and bottlenecks, we recommend using our API endpoint to rotate your IP for every request.
Step 9: Python Web Scraping at Scale with ScraperAPI
All we need to do is to construct our target URL to send the request through ScraperAPI servers. It will download the HTML code and bring it back to us.
url =
'https://api.scraperapi.com?api_key={YOUR_API_LEY}&url=https://www.indeed.com/jobs?q=web+developer&l=New+York'
Now, ScraperAPI will select the best proxy/header to ensure that your request is successful. In case it fails, it will retry with a different proxy for 60 seconds. If it can’t get the 200 response, it will bring back a 500 status code.
To get your API key and 1000 free monthly requests, you can sign in for a free ScraperAPI account. For the first month, you’ll get all premium features so you can test the full extensions of its capabilities.
If you want to scrape a list of URLs or a more complex scraper, here’s a complete guide to integrating Requests and Beautiful Soup with ScraperAPI.
Note: If the result of your target page depends on the location, you can add the parameter &country_code=us. Visit our documentation for a list of country codes compatible with ScraperAPI.
Website Interaction with Python
Interacting with websites programmatically is essential for tasks like automating form submissions, navigating through pages, or simulating user actions.
While tools like Selenium offer full browser automation, MechanicalSoup provides a lightweight alternative for more straightforward tasks. It’s built on top of the requests and BeautifulSoup libraries, making it efficient and easy to interact with HTML elements.
Getting Started with MechanicalSoup
What is MechanicalSoup?
MechanicalSoup is a Python library tailored for automating web interactions. It leverages the power of Requests and BeautifulSoup, two of Python’s most popular libraries for web scraping and HTTP requests. It is ideal for navigating websites, submitting forms, and maintaining session states, all within Python’s easy-to-use ecosystem.
When to Use MechanicalSoup
MechanicalSoup is ideal for:
- Websites without APIs: When a website doesn’t provide a web service (e.g., REST API), MechanicalSoup can help you automate tasks like data retrieval or navigation.
- Testing your websites: It automates simple testing scenarios during web development.
When not to use MechanicalSoup:
- For websites with APIs: If an API is available, it’s more efficient and reliable than scraping HTML.
- For non-HTML content: Websites that don’t use HTML are better handled directly with libraries-like requests.
- For JavaScript-reliant websites: MechanicalSoup doesn’t execute JavaScript. Selenium or a scraping API service like ScraperAPI are better options for such cases.
Benefits of MechanicalSoup
- Lightweight: Faster and simpler than browser-based tools.
- Familiar Syntax: Uses requests and BeautifulSoup, making it intuitive for those familiar with these libraries.
Drawbacks
- Limited interactivity: Lacks support for JavaScript-rendered content or complex user interactions.
Installing MechanicalSoup
To install MechanicalSoup with pip, run:
pip install mechanicalsoup
Then, import it into your project:
import mechanicalsoup
MechanicalSoup is best used when simplicity and speed are priorities and the target website is static or minimally dynamic.
Interact with Website Elements
MechanicalSoup makes navigating websites and interacting with elements straightforward. Below is a quick example of how to open a webpage, follow a link, and extract some information.
Example: Navigating Links
Here’s how to navigate links on a website using MechanicalSoup:
import mechanicalsoup

# Create a StatefulBrowser instance
browser = mechanicalsoup.StatefulBrowser()

# Open a website
browser.open("https://httpbin.org/")

# Follow a link with the text "forms"
browser.follow_link("forms")

# Print the current URL
print(browser.url)
Code Breakdown:
- Creating the browser: The
StatefulBrowsermaintains session states like cookies and history. - Opening a page:
browser.open()sends a GET request to load the specified page. - Following a link:
browser.follow_link()searches for a link containing the text “forms” and navigates to it. - Checking the result:
browser.urloutputs the current page’s URL, showing the navigation succeeded.
Interact with HTML Forms
Form submission is one of MechanicalSoup’s most powerful features. It allows you to automate tasks like logging into websites, submitting queries, or interacting with fields.
Example: Logging into GitHub
In this example, we’ll use MechanicalSoup to log into GitHub and scrape the username displayed on the page after a successful login.
import mechanicalsoup

# Create a StatefulBrowser instance
browser = mechanicalsoup.StatefulBrowser()

# Open GitHub and navigate to the login page
browser.open("https://github.com")
browser.follow_link("login")

# Select the login form
browser.select_form('#login form')

# Fill in the form fields
browser["login"] = "<username>"  # Replace with your GitHub username
browser["password"] = "<password>"  # Replace with your GitHub password

# Submit the form
response = browser.submit_selected()

# Verify login and scrape the username
page = browser.page
messages = page.find("div", class_="flash-messages")
btn = page.find("button", attrs={"id": "switch_dashboard_context_left_column-button"})

if messages:
    print(messages.text)  # Print error messages if login fails
else:
    userName = btn.text.strip() if btn else "Username not found"
    print(userName)
    print("Logged in successfully!")
Code Breakdown:
- Navigate to the form:
- Use
opento access GitHub’s homepage andfollow_linkto navigate to the login page.
- Use
- Select and fill out the form:
- Use
select_formto target the login form using its CSS selector. - Fill in form fields by assigning values to keys matching their
nameattributes.
- Use
- Submit the form:
- The
submit_selectedmethod sends the form data to the server and updates the browser state.
- The
- Scrape the username:
- After login, locate the element displaying the username using the
findmethod and extract its text.
- After login, locate the element displaying the username using the
MechanicalSoup offers a simple yet powerful way to navigate websites, interact with forms, and scrape data. It’s a lightweight solution for static websites and form-based automation, making it an excellent starting point for Python web scraping projects.
Scrape Dynamic Sites with Python
Dynamic websites often rely on JavaScript to load important content, which can be challenging to scrape with traditional tools. To handle these pages effectively, tools like ScraperAPI and Selenium allow you to render and interact with dynamic content.
Use ScraperAPI to Render Dynamic Pages with Python
ScraperAPI offers a simple way to scrape dynamic pages with its render=true parameter, and for more complex tasks, it provides an advanced Render Instruction Set.
Basic Rendering with render=true
To scrape a fully rendered page, you can use the render=true parameter:
import requests

url = 'https://api.scraperapi.com?api_key=YOUR_API_KEY&url=https://example.com&render=true'
response = requests.get(url)

if response.status_code == 200:
    print(response.text)  # Fully rendered HTML content
else:
    print(f"Failed to fetch page: {response.status_code}")
This method is perfect for pages where JavaScript rendering is enough to load all the required content.
Advanced Rendering with the Render Instruction Set
ScraperAPI’s Render Instruction Set offers precise control for scenarios where you need to interact with elements; this feature lets you simulate user interactions like typing into a search bar or waiting for specific elements to load.
Here’s how to use ScraperAPI to scrape IMDB’s dynamic search suggestions:
import requests
from bs4 import BeautifulSoup

# ScraperAPI setup
url = 'https://api.scraperapi.com/'
headers = {
    'x-sapi-api_key': 'YOUR_API_KEY',
    'x-sapi-render': 'true',
    'x-sapi-instruction_set': '[{"type": "input", "selector": {"type": "css", "value": "#suggestion-search"}, "value": "Inception"}, {"type": "wait","value": 10}]'
}
payload = {
    'url': 'https://www.imdb.com'
}

response = requests.get(url, params=payload, headers=headers)

# Parse the rendered HTML with BeautifulSoup
soup = BeautifulSoup(response.text, 'html.parser')

# Extract search suggestions
suggestions = soup.find_all("a", class_='sc-iJCSeZ jCdGGi searchResult searchResult--const')

# Print search suggestions
for suggestion in suggestions:
    print(suggestion.text)
Code Breakdown:
- Render JavaScript and simulate user input:
Thex-sapi-instruction_setsends commands to type “Inception” into the search bar and waits 10 seconds for the results to load. - Parse and extract data:
BeautifulSoup processes the rendered HTML to locate and extract the search suggestions.
Use Selenium to Scrape Dynamic Pages
For dynamic scraping tasks requiring more control, Selenium offers the flexibility to simulate a browser session, interact with elements, and handle JavaScript execution.
Here’s how to use Selenium to scrape IMDB’s search suggestions:
from selenium import webdriver
from selenium.webdriver.common.by import By
from selenium.webdriver.common.keys import Keys
import time

# Set up Chrome WebDriver
options = webdriver.ChromeOptions()
driver = webdriver.Chrome(options=options)

try:
    # Open IMDB's homepage
    driver.get('https://www.imdb.com')

    # Locate the search bar
    search_bar = driver.find_element(By.ID, 'suggestion-search')

    # Simulate typing into the search bar
    search_bar.send_keys('Inception')
    time.sleep(10)  # Wait for suggestions to load

    # Scrape the search suggestions
    suggestions = driver.find_elements(By.CSS_SELECTOR, '.sc-iJCSeZ.jCdGGi.searchResult.searchResult--const')
    for suggestion in suggestions:
        print(suggestion.text)

finally:
    # Close the browser
    driver.quit()
Code Breakdown:
- Simulate typing:
Thesend_keys()function inputs the query “Inception” into IMDB’s search bar, triggering the JavaScript to load suggestions. - Extract dynamic results:
Thefind_elements()method identifies search suggestions using their CSS classes.
Pro Tip 💡
When using Selenium, websites can see your IP address and, most likely, block you from accessing their site after a couple of requests.To avoid getting blocked while using a headless browser, use ScraperAPI’s proxy port method to rotate and distribute your requests through a pool of over 150M proxies.
Choose the Right Tool for Your Needs
- Use ScraperAPI for efficient, scalable scraping without managing a browser environment.
- Use Selenium for tasks requiring greater control over browser interactions or handling complex JavaScript-driven elements.
For more details on ScraperAPI’s capabilities, explore the Render Instruction Set documentation, and to learn more about Selenium, check out our in-depth Selenium tutorial.
Introduction to Data Cleaning and Normalization
Cleaning and normalizing are essential before analyzing or using scraped data. Raw data from websites often contains inconsistencies, errors, or irrelevant information. Data cleaning ensures your dataset is accurate, while normalization standardizes its format for more straightforward analysis. These processes make your data more reliable and ready for meaningful insights.
Tips for Effective Data Cleaning and Normalization
1. Identify and handle missing data
Missing data can skew your analysis if not addressed. Use techniques like filling in missing values with averages or medians or removing rows with incomplete data, depending on the context of your project.
2. Standardize formats
Ensure consistency across your dataset by normalizing formats, such as converting all dates to a standard format (e.g., YYYY-MM-DD) or ensuring numeric data uses the same units.
3. Remove duplicates
Scraping can often result in duplicate rows or entries. Removing duplicates ensures repeated data don’t distort your analysis.
4. Eliminate irrelevant data
Focus on the information you need. Filter unnecessary columns or rows to streamline your dataset and improve processing efficiency.
5. Validate your data
Check for logical inconsistencies, such as negative values in fields that don’t make sense (e.g., age). Use validation rules to ensure your data aligns with the expected parameters.
For a comprehensive guide to data cleaning and normalization, check out our Data Cleaning 101 tutorial. It provides step-by-step instructions and examples to help you master these essential processes.
Applying these tips lets you turn raw, messy data into a well-structured and valuable dataset ready for analysis or integration into your projects.
Common Web Scraping Errors in Python
When scraping websites, HTTP status codes serve as your guide to understanding how the server responds to your requests. Encountering errors is common, and knowing how to handle them can save your scraper from failing.
Here’s a breakdown of the most common HTTP errors you’re likely to face and how to tackle them:
1. 403 Forbidden
This error occurs when the server blocks your request, often because it detects scraping activity. To avoid this, rotate your user-agent headers, use proxies to mask your IP, and add delays between requests. ScraperAPI simplifies this process by managing proxy rotation and headers for you, ensuring your requests remain undetected.
2. 404 Not Found
A 404 error means the resource you’re trying to access doesn’t exist. This could be due to incorrect URLs or changes in the site structure. Double-check your URLs, and ensure your scraper can gracefully handle redirects or missing pages.
3. 429 Too Many Requests
This status code signals that you’ve hit the site’s rate limit. Slow down your request frequency, introduce randomized delays, or use ScraperAPI with rate-limiting mechanisms that can automatically distribute requests across multiple IPs, helping you bypass these limits.
4. 500 Internal Server Error
A 500 error indicates a server-side issue, often temporary. Retrying your request after a short delay may resolve the problem. If the issue persists, consider scraping during off-peak hours or relying on ScraperAPI’s retry functionality, which routes your requests through proxy pools with over 150 million proxies and retries requests for up to 60 seconds to get a successful response.
5. 301/302 Redirect
Redirect errors happen when the server moves the requested resource to a new URL. Ensure your scraper follows redirects automatically by enabling redirection handling in your HTTP library (e.g., Requests).
Understanding and addressing these HTTP errors is critical to building robust scraping scripts. Check out our dedicated error guide for more tips on handling these errors.
Wrapping Up: 3 Projects to Learn Advanced Python Web Scraping
Taking your web scraping skills to the next level involves tackling projects that require advanced techniques and problem-solving. These tutorials dive deep into real-world challenges like extracting structured data, handling dynamic content, and managing proxies, giving you the expertise to scale your web scraping efforts.
1. Looping Through HTML Tables in Python
HTML tables are a common way to present structured data online, from financial statistics to sports scores. This tutorial explains how Python’s BeautifulSoup library can locate and parse table elements, loop through rows and columns, and convert the extracted data into a format ready for analysis, such as Pandas DataFrames.
You’ll also learn practical techniques for handling complex table structures and nested HTML tags. Check out the complete guide on looping through HTML tables.
2. Building a LinkedIn Scraper with Python
Scraping LinkedIn requires navigating login authentication, session management, and dynamic content, making it a perfect project to develop advanced web scraping skills. This tutorial walks you through:
- Setting up a scraper that automates logging in
- Locating key profile details like names, job titles, and locations
- Retrieving LinkedIn data efficiently while respecting LinkedIn’s usage policies
You’ll also learn how to handle JavaScript-rendered content using Python. Start building your LinkedIn scraper with this step-by-step guide.
3. Using and Rotating Proxies in Python
As websites implement stricter anti-scraping measures, rotating proxies becomes essential for avoiding IP bans and ensuring smooth data collection. This tutorial dives into the mechanics of proxy rotation, showing you how to integrate it into Python scraping projects.
You’ll learn to use ScraperAPI to manage proxy pools automatically, customize headers, and ensure your scraper maintains anonymity across multiple requests. Learn how to use and rotate proxies with this in-depth tutorial.
By exploring these tutorials, you’ll gain hands-on experience with advanced web scraping techniques, from parsing intricate HTML structures to managing dynamic data and scaling your projects. These guides are packed with practical examples and actionable tips, making them an excellent next step in your Python scraping journey.
FAQs about Web Scraping with Python
What is web scraping?
Web scraping is the process of using a program to download and extract data from web pages. This technique allows for the automation of data collection and is commonly used in data science and machine learning projects.
Is web scraping with Python legal?
Yes, web scraping with Python is legal if it adheres to the website’s terms of service and does not violate data privacy laws. Always check the site’s robots.txt file and ensure compliance with legal standards to avoid issues.
What’s the best Python library for web scraping?
BeautifulSoup is highly recommended for beginners due to its simplicity and ease of use when parsing HTML and XML documents. For more complex scraping tasks, Scrapy provides a powerful framework for efficiently scraping and crawling web pages.
Is Scrapy better than BeautifulSoup?
Scrapy and BeautifulSoup serve different purposes in web scraping. Scrapy is better suited for large-scale web scraping projects and crawling multiple pages, whereas BeautifulSoup is ideal for simple projects that involve parsing HTML or XML from single pages.
Should I web scrape with Python or another language?
Python is preferred for web scraping due to its extensive libraries designed for scraping (like BeautifulSoup and Scrapy), ease of use, and strong community support. However, other programming languages like JavaScript can also be effective, particularly when dealing with interactive web applications that require rendering JavaScript.
