
Scraping tabular data it’s one of the most powerful skills data scientists can have to gather relevant information at scale.
Nowaday, almost every set of data shown on the internet uses HTML tables to organize and display complex set of data in a more understandable format.
In today’s article, we’re going to use the Rvest package to extract data from HTML tables and send it to a dataframe for further analysis, and import it to a CSV file.
Note: If this is your first time using R, follow the installation and setup instructions from our web scraping in R beginner tutorial. You’ll also learn how to do basic scraping with the Rvest package we’ll be using in this tutorial.

1. Set Up Your Development Environment
The first thing we need to do is creating a new directory for our project. Open Rstudio and click on “create a project”.
![]()
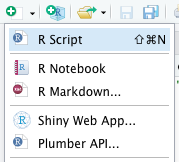
Inside the new folder, click on “new file” and create a new R Script. Let’s call it rvest_html_table (it’ll automatically save it as a .R file).
On our new file, we’ll install the Rvest and Dplyr packages using the following commands:
</p>
install.packages("rvest")
install.packages("dplyr")
<p>
It can take a couple of minutes to install, but with this last step, we’re ready to create our scraper.
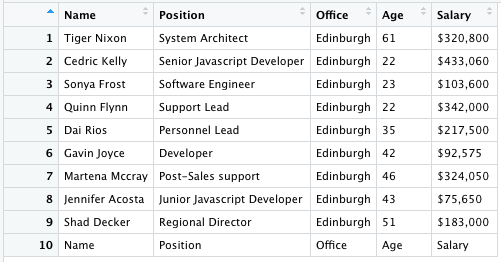
So first, let’s take a look at our target site:
2. Send the Initial Request Through ScraperAPI
For this tutorial, we’ll be scraping https://datatables.net/examples/basic_init/multiple_tables.html. This is a great website to test your scraping knowledge and to understand everything tables.
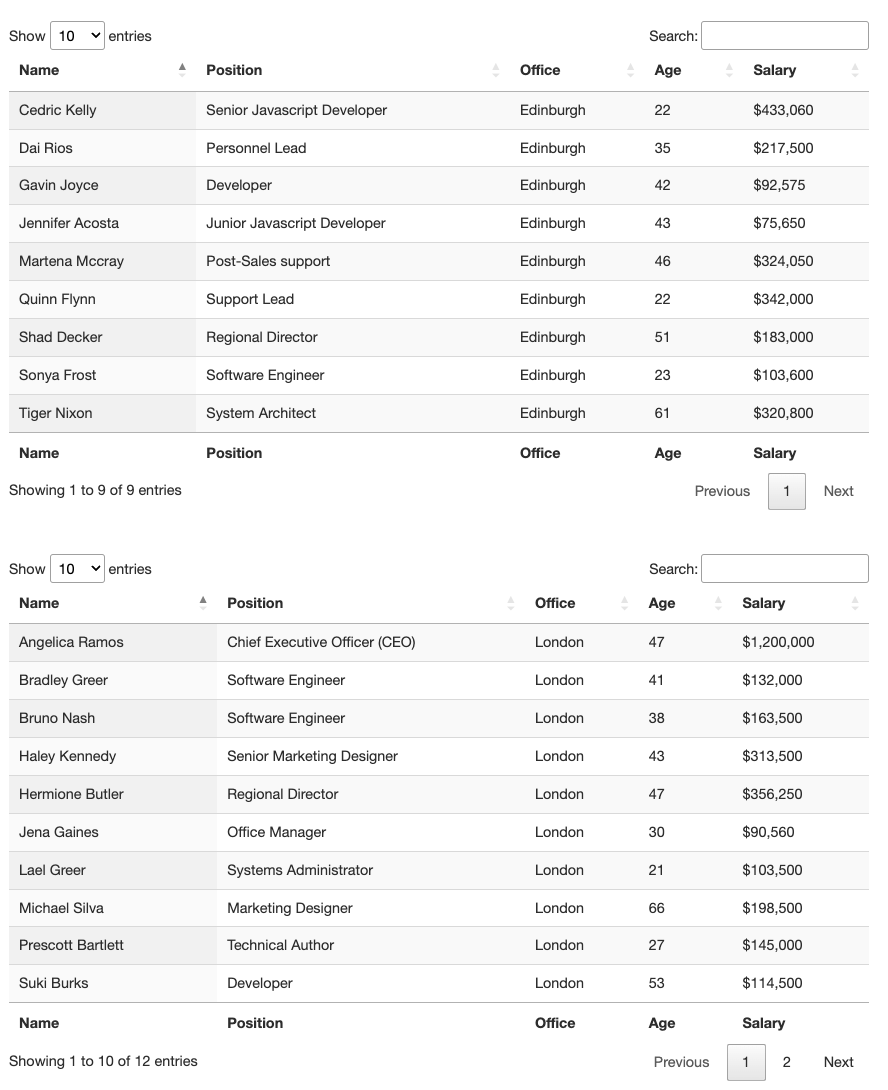
As we can see, there are two tables on this page. We can scrape both of them if we want but for the sake of this guide, let’s try and pick only the first one.
To initiate, all we need to do is to send an HTTP request to the server and download the HTML file, however, as data becomes more and more valuable, a lot of websites are tightening up their anti-scraping technologies, which can make your script useless.
For our web scrapers to be resilience enough to get the job done, we need to make sure we’re doing as much as possible to mimic organic human behavior when scraping table data.
ScraperAPI is a robust solution that automatically handles these complexities by adding just a string to our target URL. It uses machine learning, years of statistical data, 3rd party proxies, and huge browser farms to ensure you never get blocked by anti-scraping techniques.
To use ScraperAPI, all we need to do is create a new ScraperAPI account to generate our API key and redeem 5000 free API calls.

Let’s go back to Rstudio and:
- Import Rvest and Dplyr to our project adding
library("rvest")andlibrary("dplyr")at the top of the file (you can now delete the previous installation commands if you’d like) - Next, we’ll create a new variable called response and download the HTML table using the
read_html()method.
Because we’ll be using ScraperAPI to send the request, we need to construct our URL in the following format:
</p>
http://api.scraperapi.com?api_key={YOUR_API-KEY}&url={TARGET_URL}
<p>
Putting everything together, here’s how it would look like on our code:
</p>
response = read_html("http://api.scraperapi.com?api_key=51e43be283e4db2a5afb62660xxxxxxx&url=https://datatables.net/examples/basic_init/multiple_tables.html")
<p>
Note: If you encountered an error like “read_html function not found”, install and import the XML2 package using these two commands: install.packages(“xml2”) and library(“xml2”).
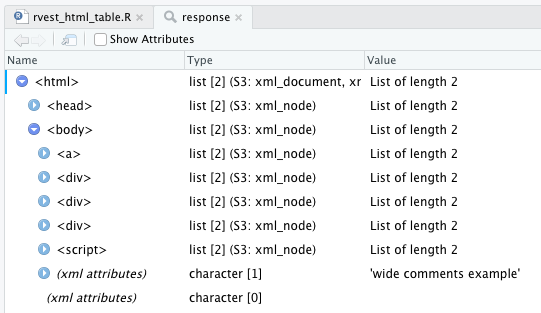
If everything goes well, type view(response) in your console and it’ll show you the data retrieved from the URL.
3. Sending the HTML Table Data to a DataFrame
For tabular data, Rvest has an elegant function that takes an HTML response and detects HTML tables within the document. To use it, let’s create a new variable called tables and use the html_table() function on our response variable using the pipe operator (>):
</p>
tables = response > html_table()
<p>
This will automatically create a dataframe using the data from the table.
A few considerations:
- When the table was missing data from cells, you needed to add a
fill = TRUEparameter to thehtml_table()function, but it’s not necessary anymore. - In the case of this table, the header’s row is built using the
<th>tag, so there’s no need to use the headers parameter inside thehtml_table()function.
4. Selecting the Right Table
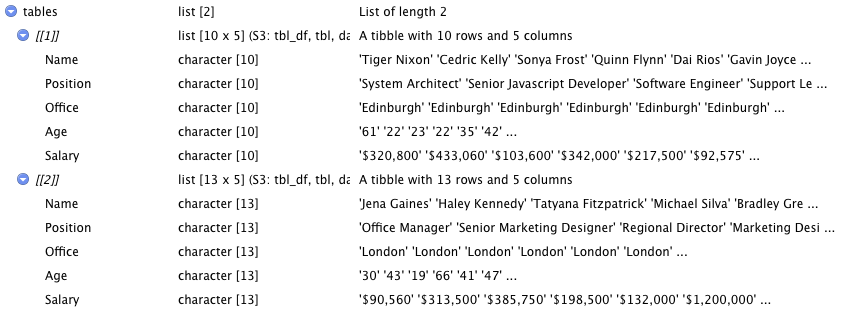
When applied to documents, the html_table() function returns a list of Tibbles (“a package in the R programming language that is used to manipulate and print dataframes”). If you pay close attention, each tibble in the dataframe has a number assigned to it, and we can use it to select the one we need.

</p>
table_one = tables[[1]]
<p>
And it’ll return only the first table data and put it into a dataframe. In the image bellow you can see that only table_one has the dataframe icon on the right.

Click on table_one or type View(table_one) on your console to open it – remember that the View command is case sensitive so make sure V is capitalized.
5. Send DataFrame to a CSV File
Because our dataframe is already created, importing this data to a CSV file is quite easy. First, let’s install the Writexl package with install.packages("writexl") and then import it to our project library("writexl").
To create our file, we’ll use the write_xlsx() function and pass to it our dataframe (table_one) and the path for our file between quotation marks.
</p>
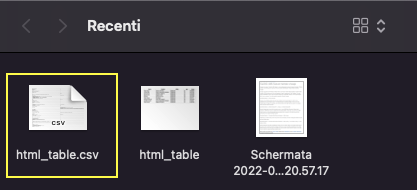
write_xlsx(table_one,"./html_table.csv")
<p>The ./ tells our script to create the file within the current directory (from our project) and then the name for the file.
Note: You can use different extensions for the file like .xlsx.
And that’s it. Congratulations, you just scraped an entire HTML tables in a couple of lines.
Here’s how our script ended up:
</p>
install.packages("rvest")
install.packages("dplyr")

library("rvest")
library("dplyr")
response = read_html("http://api.scraperapi.com?api_key=51e43be283e4db2a5afb62660xxxxxxx&url=https://datatables.net/examples/basic_init/multiple_tables.html")

tables = response > html_table()
table_one = tables[[1]]

install.packages("writexl")
library("writexl")
write_xlsx(table_one,"./html_table.csv")
<p>
Scraping HTML tables with Rvest is extremely easy thanks to the html_table() function. If you’re scraping several tables from a website, assigned each table to their our variable so you can have a dataframe for each one and export them as you’d like.
If you want to scrape HTML tables from paginated pages, take a look at our advance Rvest web scraping tutorial where we go into more detail on scraping multiple pages and combining them into a single dataframe.
Until next time, happy scraping!