


There’s an incredible amount of data on the Internet, and it is a rich resource for any field of research or personal interest. However, not all of this information is easily accessible through traditional means. Some websites do not provide an API to fetch their content; others may use complex technologies that make extracting data using traditional methods difficult.
To help you get started, in this tutorial, we’ll show you how to use the Requests and BeautifulSoup Python packages to scrape data from any website, covering the basics of web scraping, including how to send HTTP requests, parse HTML, and extract specific information.
To make things more practical, we’ll learn how to build a scraper to collect a list of tech articles from Techcrunch, and by the end, you’ve learned how to:
- Download web pages
- Parse HTML content
- Extract data using BeautifulSoup’ methods and CSS selectors
TL;DR: Using BeautifulSoup for Web Scraping
To get started, install both dependencies from your terminal using the following command:
pip install requests beautifulsoup4
Once the installation is done, import requests and BeautifulSoup to your file:
import requests
from bs4 import BeautifulSoup
Send a get() request using Requests to download the HTML content of your target page and store it in a variable – for this example, we’re sending a get() request to BooksToScrape and storing its HTML into a response variable:
response = requests.get(“https://books.toscrape.com/catalogue/page-1.html”)
To extract specific data points from the HTML, we need to parse the response using BS4:
soup = BeautifulSoup(response.content, "lxml")
Lastly, we can pick elements using CSS selectors or HTML tags like so:
title = soup.find(“h1”)
print(title)
What is Beautiful Soup and Why Use it for Web Scraping?
Beautiful Soup is a Python library that makes extracting and navigating data from HTML or XML documents easy. Think of it as a tool that turns messy web pages into neatly organized data, ready for you to work with.
What makes it one of the best tools for web scraping is:
- It’s Simple – Beautiful Soup is easy to learn and use, even if you just start with web scraping. Its syntax is straightforward, so you can quickly extract the needed data without a steep learning curve.
- It’s Flexible – Beautiful Soup works well independently, but it also plays nicely with other tools. For example:
- Pair it with Requests to fetch HTML content from static web pages
- Use it alongside Selenium to scrape dynamic sites with JavaScript
- Combine it with Scrapy for large-scale web crawling projects
- It’s Reliable – Even if the website’s HTML is messy or poorly formatted, Beautiful Soup can still parse it without sweat. It’s like having a handy friend who can untangle even the toughest knots.
- It’s Lightweight – Unlike browser-based tools, Beautiful Soup doesn’t require much processing power, making it faster and more efficient for scraping static content.
Whether working on a simple project or tackling a more complex scraping task, Beautiful Soup is a dependable and versatile choice. And when paired with other libraries, it becomes a powerhouse that adapts to whatever you throw at it.
Prerequisites
To follow this tutorial, you need to install Python 3.7 or greater on your computer. You can download it from the official website if you don’t have it installed.
You will also need the following requirements:
- A virtual environment (recommended)
- Requests
- BeautifulSoup
- Lxml
Installing a Virtual Environment
Before installing the required libraries, creating a virtual environment to isolate the project’s dependencies is recommended.
Creating a Virtual Environment on Windows
Open a command prompt with administrator privileges and run the following command to create a new virtual environment named venv:
python -m venv venv
Activate the virtual environment with the following command:
venv\Scripts\activate
Creating a Virtual Environment on macOS/Linux
Open a terminal and run the following command to create a new virtual environment named venv:
sudo python3 -m venv venv
Activate the virtual environment:
source venv/bin/activate
Installing Requests, BeautifulSoup, and Lxml
Once you have created and activated a virtual environment, you can install the required libraries by running the following command on your terminal:
pip install requests beautifulsoup4 lxml
- Requests is an HTTP library for Python that makes sending HTTP requests and handling responses easy.
- BeautifulSoup is a library for parsing HTML and XML documents.
- Lxml is a powerful and fast XML and HTML parser written in C. Lxml is used by BeautifulSoup to provide XPath support.
Download the Web Page with Requests
The first step in scraping web data is downloading the web page you want to scrape. You can do this using the get() method of the Requests library.
import requests

url = 'https://techcrunch.com/category/startups/'
response = requests.get(url)
print(response.text)
Above, we use Requests to get the HTML response from TechCrunch. The get() method returns a response object containing the HTML of the web page. We’ll use BeautifulSoup to extract the data we need from this HTML response.
Parse the HTML Response with BeautifulSoup
Once you have downloaded the web page, you must parse the HTML. You can do this using the BeautifulSoup library:
from bs4 import BeautifulSoup

soup = BeautifulSoup(response.text, 'lxml)
The BeautifulSoup constructor takes two arguments:
- The HTML to parse
- The parser to use
In this case, we are using the lxml parser, then we pass the HTML response into BeautifulSoup and create an instance called soup.
Navigate the Response Using BeautifulSoup
When an HTML page is initialized within a BeautifulSoup instance, BS4 transforms the HTML document into a complex tree of Python objects and then provides several ways in which we can query this DOM tree:
- Python object attributes: Each BeautifulSoup object has a number of attributes that can be used to access its children, parents, and siblings. For example, the children attribute returns a list of the object’s child objects, and the parent attribute returns the object’s parent object.
- BeautifulSoup methods ( eg
.find()and.find_all()): These can be used to search the DOM tree for elements that match a given criteria. The.find()method returns the first matching element, while the.find_all()method returns a list of all matching elements. - CSS Selectors (eg .select() and .select_one()): CSS selectors let you select elements based on their class, ID, and other attributes.
But which tags should you be searching for?
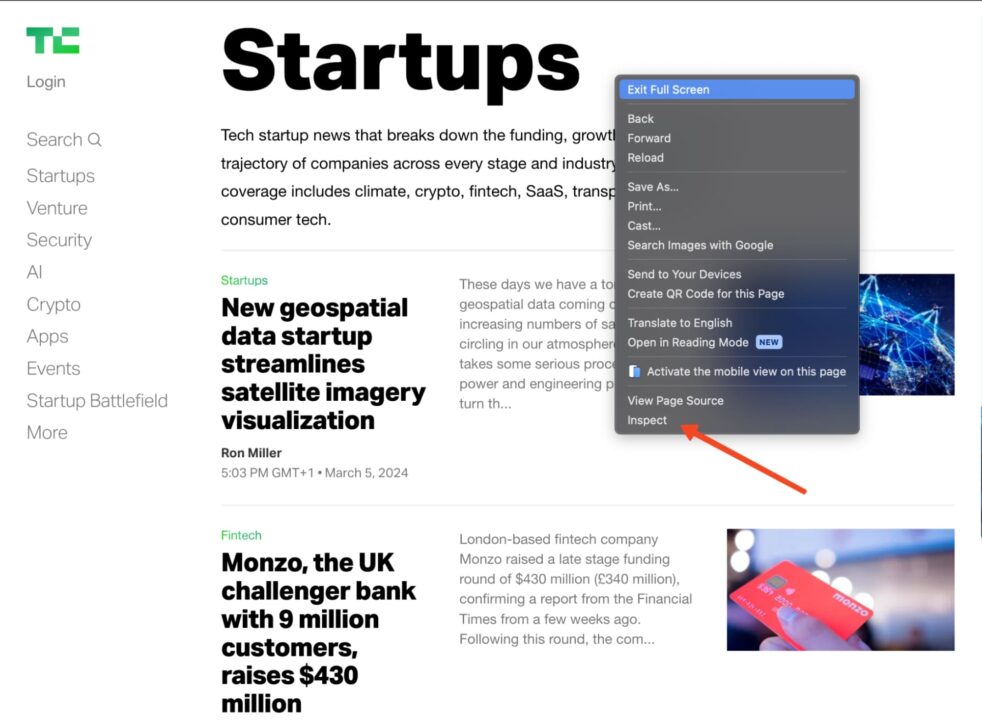
You can find that out by using the inspect option in your browser. Go to the Techcrunch website, find the element you want to scrape, then right-click and choose “Inspect”.
This will open the HTML document at the element you have selected.
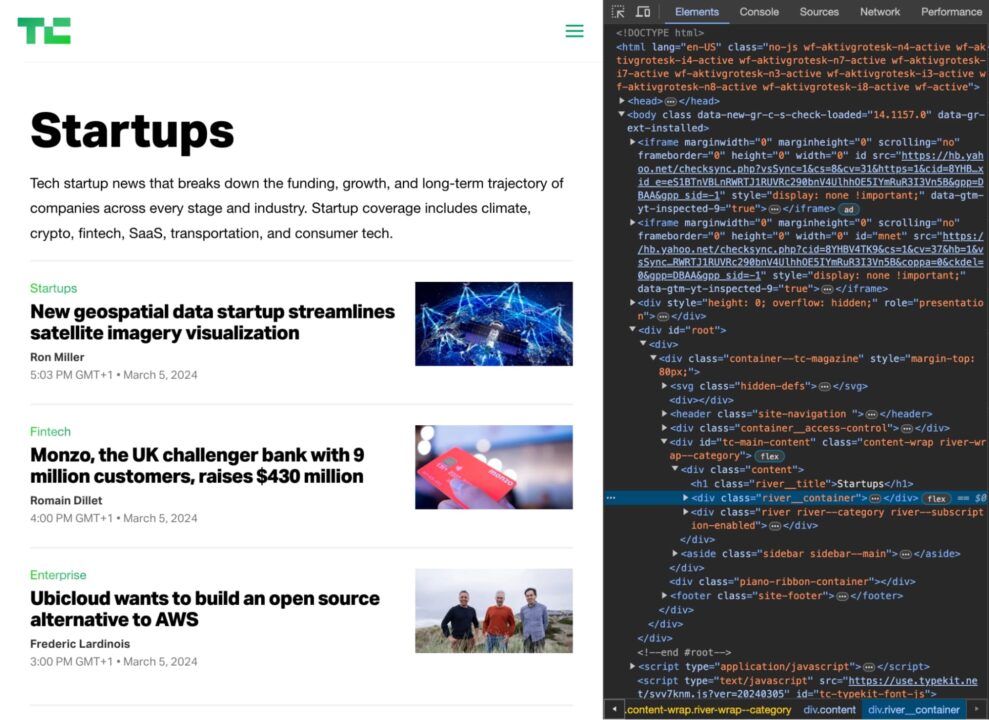
Now, you need to find a combination of HTML element tags and classes that uniquely identify the elements you need.
For example, if you want to scrape the titles of the articles on the TechCrunch homepage, you would inspect the HTML and find that the titles are all contained within h2 tags with the class post-block__title.

So, you could use the following CSS selector to pick the titles:
soup.select('h2.post-block__title')
This would return a list of all the h2 tags with the class post-block__title on the page containing the articles’ titles.
Get an Element by HTML Tag
Syntax: element_name
You can use the find() and find_all() methods to find elements by their HTML tag.
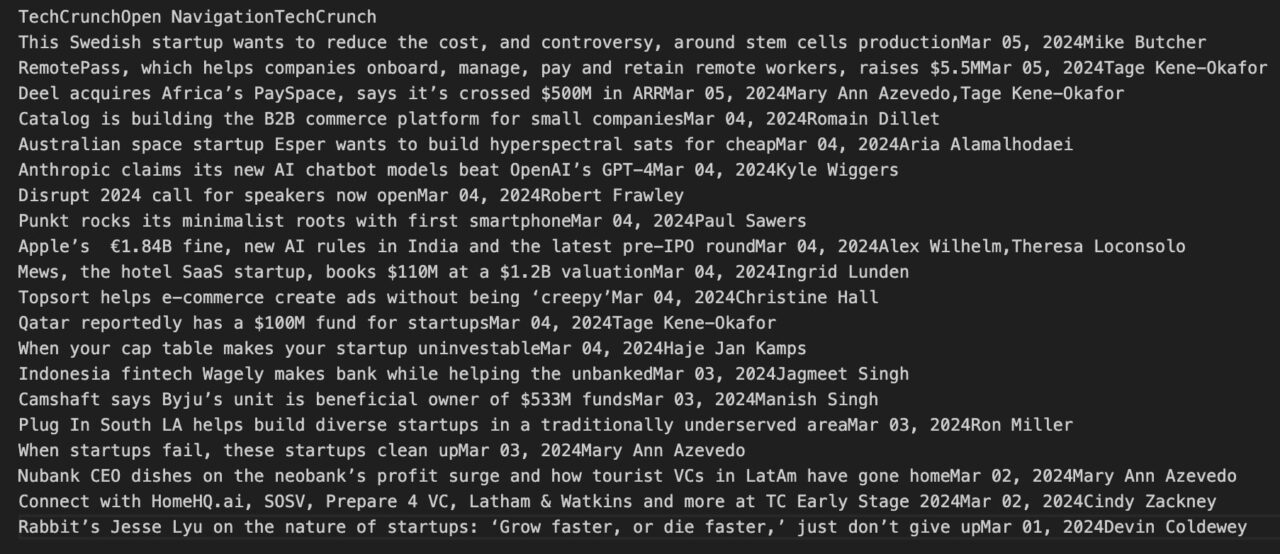
For example, the following code finds all the header tags on the page:
header_tags = soup.find_all('header')
for header_tag in header_tags:
    print(header_tag.get_text(strip=True))
The output, as seen in the console, should be similar to this:
Get an Element by CSS Class
Syntax: .class_name
Class selectors match elements based on the contents of their class attribute.
title = soup.select('.post-block__title__link')[0].text
print(title)
The Dot (.) before the class name indicates to BS4 that we’re talking about a CSS class.
Get an Element By ID
Syntax: #id_value
ID selectors match an element based on the value of the element’s id attribute. In order for the element to be selected, its id attribute must match exactly the value given in the selector.
element_by_id = soup.select('#element_id')  # returns the element at "element_id"
print(element_by_id)
The Hash symbol before the ID’s name tells BS4 that we’re asking for an id.
Get an Element by Attribute Selectors
Syntax: [attribute=attribute_value] or [attribute]
Attribute selectors match elements based on the presence or value of a given attribute. The only difference is that this selector uses square brackets [] instead of a dot (.) as class or a hash symbol (#) as id.
# Get the URL of the article
url = soup.select('.post-block__title__link')[0]['href']
print(url)
Output:
https://techcrunch.com/2024/03/05/new-geospatial-data-startup-streamlines-satellite-imagery-visualization/
Get an Element using XPath
XPath uses a path-like syntax to locate elements within an XML or HTML document. It works very much like a traditional file system.
To find the XPath for a particular element on a page:
Right-click the element on the page and click on “Inspect” to open the developer tools tab.

Select the element in the Elements Tab.
Click on “Copy” -> “Copy XPath”.

Note: If XPath is not giving you the desired result, copy the full XPath instead of just the path. The rest of the steps would be the same.
We can now run the following code to extract the first article on the page using XPath:
from bs4 import BeautifulSoup
import requests
from lxml import etree

url = 'https://techcrunch.com/category/startups/'
headers = {
    "User-Agent": "Mozilla/5.0 (Windows NT 10.0; Win64; x64) AppleWebKit/537.36 (KHTML, like Gecko) Chrome/58.0.3029.110 Safari/537.36",
    "Accept-Language": "en-US, en;q=0.5",
}

response = requests.get(url, headers=headers)
if response.status_code == 200:
    soup = BeautifulSoup(response.content, "lxml")
    dom = etree.HTML(str(soup))
    print(dom.xpath('//*[@id="tc-main-content"]/div/div[2]/div/article[1]/header/h2/a')[0].text)
Here’s the output:
New geospatial data startup streamlines satellite imagery visualization
Requests and Beautiful Soup Web Scraping Example
Let’s combine all of this to scrape TechCrunch for a list of startup articles:
import requests
from bs4 import BeautifulSoup

url = 'https://techcrunch.com/category/startups/'


article_list = []

response = requests.get(url)
if response.status_code == 200:
    soup = BeautifulSoup(response.content, "lxml")

    articles = soup.find_all('header')

    for article in articles:
        title = article.get_text(strip=True)
        url = article.find('a')['href']
        print(title)
        print(url)
This code will print the title and URL of each startup article.
Saving the data to a CSV file
Once you have extracted the data you want from the web page, you can save it to a CSV file for further analysis. To do this using the csv module, add this code to your scraper:
import requests
from bs4 import BeautifulSoup
import csv

url = 'https://techcrunch.com/category/startups/'


article_list = []

response = requests.get(url)
if response.status_code == 200:
    soup = BeautifulSoup(response.content, "lxml")

    articles = soup.find_all('header')

    for article in articles:
        title = article.get_text(strip=True)
        url = article.find('a')['href']
        article_list.append([title, url])

with open('startup_articles.csv', 'w', newline='') as f:
    csvwriter = csv.writer(f)
    csvwriter.writerow(['Title', 'URL'])
    for article in article_list:
        csvwriter.writerow(article)
This will create a CSV file named startup_articles.csv and write the titles and URLs of the articles to the file. You can then open the CSV file in a spreadsheet program like Microsoft Excel or Google Sheets for further analysis.
Saving the data to a JSON file
Once you’ve extracted the needed data, another way to store it is by saving it into a JSON file. JSON (JavaScript Object Notation) is a lightweight and widely used data format, making it ideal for data exchange between applications.
Here’s how you can save the scraped data to a JSON file:
import requests
from bs4 import BeautifulSoup
import json


url = 'https://techcrunch.com/category/startups/'


article_list = []


response = requests.get(url)
if response.status_code == 200:
   soup = BeautifulSoup(response.content, "lxml")


   articles = soup.find_all('h3', class_="loop-card__title")


   for article in articles:
       title = article.get_text(strip=True)
       url = article.find('a')
       if url:
           url = url['href']
       else:
           continue
       article_list.append({"title": title, "url": url})


with open('startup_articles.json', 'w') as f:
   json.dump(article_list, f, indent=4)


print("Data saved to startup_articles.json")
When executed, this script creates a startup_articles.json file in the current directory, storing all the scraped article titles and URLs in JSON format. This file can be used for further analysis or integration with other tools.
Common Challenges with Beautiful Soup Web Scraping
While Beautiful Soup is a powerful and versatile library for web scraping, it has limitations, especially when dealing with more complex websites. Challenges like dynamic content, pagination, and error handling can complicate scraping. However, these challenges can be addressed by combining Beautiful Soup with additional tools or features.
Dynamic Content
You’ve likely encountered dynamic content if you’ve scraped a page only to find it blank. Many modern websites use JavaScript to load their data after the initial HTML is delivered, and Beautiful Soup can’t process these changes by itself.
For example, trying to scrape the JavaScript version of the Quotes to Scrape website using Beautiful Soup alone will leave you with an empty result.
This is where ScraperAPI comes in. By enabling its rendering feature, you can fetch pre-rendered HTML content, bypassing the need for a complete browser automation tool like Selenium.
Here’s how you can handle it:
import requests
from bs4 import BeautifulSoup
import credentials


URL = 'https://quotes.toscrape.com/js/'
API_KEY = credentials.api_key


params = {
'api_key': API_KEY,
'url': URL,
'render': 'true'
}


response = requests.get('https://api.scraperapi.com', params=params)
if response.status_code == 200:
   soup = BeautifulSoup(response.content, 'html.parser')
   quotes = soup.find_all('span', class_='text')
   for quote in quotes:
       print(quote.get_text())
else:
   print(f"Error occurred. Status code: {response.status_code}")
With ScraperAPI, you can handle JavaScript-heavy pages efficiently, saving time and effort without relying on heavy tools like Selenium.
Pagination
Most websites with large datasets use pagination to split their content across multiple pages. Scraping this structure requires handling links to “Next” pages or following predictable URL patterns.
Some sites, like Books to Scrape, use simple URL patterns for their paginated content. Here’s how you can handle it with Beautiful Soup:
import requests
from bs4 import BeautifulSoup


base_url = 'https://books.toscrape.com/catalogue/page-{}.html'
page = 1


while True:
   response = requests.get(base_url.format(page))
   if response.status_code != 200:
       break


   soup = BeautifulSoup(response.content, 'html.parser')
   books = soup.find_all('h3')
   if not books:
       break


   for book in books:
       print(book.get_text(strip=True))

   page += 1
This script dynamically loops through pages until no more content is found. It’s a straightforward solution for static pagination. For a detailed breakdown of handling pagination effectively, check out this step-by-step guide with Python.
Infinite Scrolling
Traditional Beautiful Soup scraping doesn’t work out of the box for websites with infinite scrolling—where new content loads as you scroll. Instead of switching to Selenium, you can use ScraperAPI’s Render Instruction Set to automate scrolling and loading dynamically rendered content. By combining instructions, you can efficiently scrape infinite scrolling pages.
Here’s how you can achieve this:
import requests
from bs4 import BeautifulSoup
import json
import credentials


url = 'https://quotes.toscrape.com/scroll'


# Define the instruction set to scroll the page and wait for content
instruction_set = json.dumps([
   {
   "type": "loop",
   "for": 5, # Number of scroll iterations
   "instructions": [
       {
       "type": "scroll",
       "direction": "y",
       "value": "bottom"
       },
       {
       "type": "wait",
       "value": 3 # Wait 3 seconds after each scroll
       }
       ]
   }
])


headers = {
   "x-sapi-api_key": credentials.api_key,
   "x-sapi-render": "true",
   "x-sapi-instruction_set": instruction_set
}


response = requests.get(f"https://api.scraperapi.com/?url={url}", headers=headers)
if response.status_code == 200:
   soup = BeautifulSoup(response.content, 'html.parser')
   quotes = soup.find_all('span', class_='text')
   for quote in quotes:
       print(quote.get_text())
else:
   print(f"Error occured. Status code: {response.status_code}")
Code Breakdown:
- Scroll Action: The scroll instruction scrolls the page to the bottom.
- Wait Action: After each scroll, the wait instruction pauses for a few seconds to allow new content to load.
- Loop Action: The loop instruction repeats the scroll-and-wait sequence 5 times to load additional content.
- Content Extraction: After rendering the fully scrolled page, Beautiful Soup is used to parse and extract the desired elements.
Why Use ScraperAPI? 💡
ScraperAPI is not just a tool for handling infinite scrolling; it’s a complete solution for web scraping. With features like automatic IP rotation, captcha solving, and JavaScript rendering, it simplifies the most challenging aspects of scraping. Its Render Instruction Set goes a step further, enabling you to automate complex browser interactions, such as scrolling, clicking, and waiting for elements to load—all without the overhead of a full browser automation tool like Selenium.
Error Handling
Web scraping often involves unexpected scenarios, like missing elements or invalid responses. To avoid crashes, it’s crucial to implement error handling in your scraper. Use try-except blocks to handle missing elements or unexpected HTML structures.
Here’s a simple example:
import requests
from bs4 import BeautifulSoup


url = 'https://quotes.toscrape.com/'


response = requests.get(url)
try:
   soup = BeautifulSoup(response.content, 'html.parser')
   quotes = soup.find_all('span', class_='text')
   for quote in quotes:
       print(quote.get_text(strip=True))
except Exception as e:
   print(f"An error occurred: {e}")
With try-except blocks, your scraper can gracefully handle errors and continue working even when unexpected issues arise.
You can effectively tackle even the most challenging web scraping scenarios by combining Beautiful Soup with complementary tools like ScraperAPI and implementing robust error handling.
Best Practices for Web Scraping with Beautiful Soup
Now that we’ve tackled the challenges of scraping dynamic content, handling pagination, and managing errors, let’s talk about how to elevate your web scraping projects to be more efficient.
Incorporating best practices is key to avoiding blocks, maximizing performance, and ensuring your scrapers run smoothly. Here’s how you can do it—with practical examples to get you started.
Use Proxies to Avoid Getting Blocked
When websites detect too many requests from the same IP, they block the scraper or show captchas. Using proxies lets you distribute requests across multiple IPs, reducing the risk of detection.
ScraperAPI lets you manage proxies in several ways, but the most common approaches are using the scraping API and its proxy mode. Both of these solutions will automatically distribute your requests through a pool of over 150M proxies across the globe.
Note: Don’t have an API key? Create a free ScraperAPI account to get 5,000 API credits to test all premium features.
1. Using the scraping API
The simplest way to route your requests through ScraperAPI is sending your get() requests to our endpoint, along with your API key and the URL you want to scrape. The API will use machine learning and statistical analysis to choose the right combination of IP and headers (including generating the necessary cookies) to ensure a successful response.
Here’s how to get started:
import requests


payload = {
   'api_key': 'YOUR_API_KEY',
   'url': 'https://example.com'
}


response = requests.get('https://api.scraperapi.com', params=payload)
print(response.content)
2. Using ScraperAPI in proxy mode
In some cases, you might want to integrate ScraperAPI’s proxy infrastructure with your own proxy pools, eliminating the complexity of refactoring your entire codebase.
Here’s how you can use ScraperAPI as a proxy server to rotate IPs automatically:
import requests


PROXY = "https://scraperapi:YOUR_API_KEY@proxy-server.scraperapi.com:8001"
URL = 'https://example.com'


proxies = {
   "http": PROXY,
   "https": PROXY
}


response = requests.get(URL, proxies=proxies)


if response.status_code == 200:
   print(response.content)
else:
   print(f"Error occurred. Status code: {response.status_code}")
Use Parallelization
Scraping sequentially can be time-consuming, especially when working with large datasets or pages with nested data. You can process multiple elements simultaneously by parallelizing your requests, reducing execution time.
For instance, you can process individual quote blocks in parallel for faster data extraction on the Quotes to Scrape website.
While ScraperAPI doesn’t handle parallelization directly, you can still use it to enhance your scraper by combining its capabilities with Python’s threading to process multiple pages faster.
Here’s how to scrape multiple pages from Quotes to Scrape in parallel:
import requests
from bs4 import BeautifulSoup
from concurrent.futures import ThreadPoolExecutor


API_KEY = 'YOUR_API_KEY'
BASE_URL = 'https://quotes.toscrape.com/page/{}/'


def fetch_page_content(page):
   url = f"https://api.scraperapi.com/?api_key={API_KEY}&url={BASE_URL.format(page)}"
   response = requests.get(url)
   if response.status_code == 200:
       soup = BeautifulSoup(response.content, 'html.parser')
       quotes = [
           {
               "quote": block.find('span', class_='text').get_text(strip=True),
               "author": block.find('small', class_='author').get_text(strip=True),
           }
           for block in soup.find_all('div', class_='quote')
       ]
       return quotes
   return f"Error: {response.status_code}"


NUM_PAGES = 5


with ThreadPoolExecutor(max_workers=5) as executor:
   results = list(executor.map(fetch_page_content, range(1, NUM_PAGES + 1)))


for page_quotes in results:
   if isinstance(page_quotes, list):
       for quote in page_quotes:
           print(quote)
   else:
       print(page_quotes)
In this example:
- Each page is fetched individually through ScraperAPI
- ScraperAPI ensures every request uses a fresh IP and custom headers, making your scraper more robust
- Python’s threading handles the parallelization of the requests, allowing you to scrape multiple pages simultaneously
Combining ScraperAPI with manual parallelization techniques can significantly speed up your scraping process while maintaining reliability.
Note: Make sure to configure your script to stay within your concurrent threads limit based on your plan.
Rotate User-Agents and Headers
Websites often monitor user-agent strings and headers to identify automated bots. Repeated requests using the same user-agent make your scraper easy to detect. Rotating user-agents and headers mimics user behavior, reducing the chances of getting flagged.
You can rotate user-agents by maintaining a list of common user-agent strings and selecting one randomly for each request:
import requests
import random


USER_AGENTS = [
   "Mozilla/5.0 (Windows NT 10.0; Win64; x64) AppleWebKit/537.36 (KHTML, like Gecko) Chrome/91.0.4472.124 Safari/537.36",
   "Mozilla/5.0 (Macintosh; Intel Mac OS X 10_15_7) AppleWebKit/537.36 (KHTML, like Gecko) Chrome/91.0.4472.124 Safari/537.36",
   "Mozilla/5.0 (X11; Linux x86_64) AppleWebKit/537.36 (KHTML, like Gecko) Chrome/91.0.4472.124 Safari/537.36"
]


headers = {"User-Agent": random.choice(USER_AGENTS)}
response = requests.get('https://example.com', headers=headers)
print(response.content)
This approach ensures each request appears to come from a different browser, making your scraper harder to detect.
ScraperAPI simplifies this process by automatically rotating user-agents for every request. This eliminates the need for manual rotation, saving time and effort while ensuring each request is unique.
Note: If needed, you can also customize headers using the keep_headers=true parameter.
Learn more about using headers for web scraping in our guide.
Implement Rate Limiting
Sending too many requests in a short time can overwhelm the target server, triggering rate limits or IP bans. Rate limiting prevents your scraper from making excessive requests.
Here’s how you can manually add rate limits to your scraper:
import time
import requests


urls = ['https://example.com/page1', 'https://example.com/page2']
for url in urls:
   response = requests.get(url)
   print(response.content)
   time.sleep(2) # Wait 2 seconds between requests
Alternatively, ScraperAPI automatically handles rate limits by distributing requests across its proxy network. You can send up to 100 requests per second without worrying about being blocked. This built-in rate handling ensures that even with high-traffic scraping, you can maintain a smooth workflow without being throttled by the target server.
Add Retry Logic
Sometimes, requests fail due to timeouts or temporary server issues. Adding retry logic ensures your scraper doesn’t stop prematurely.
import requests
from time import sleep


def fetch_with_retry(url, retries=3):
   for attempt in range(retries):
       try:
           response = requests.get(url)
           if response.status_code == 200:
               return response.content
       except requests.exceptions.RequestException as e:
           print(f"Attempt {attempt + 1} failed: {e}")
           sleep(2)
   return None


content = fetch_with_retry('https://example.com')
print(content)
ScraperAPI simplifies this by automatically retrying failed requests. Its retry mechanism works seamlessly with high-volume scraping, saving you the effort of building custom logic for every edge case.
These best practices ensure your scrapers are efficient, resilient, and capable of scaling with your needs. You can focus on extracting data without worrying about the technical complexities by leveraging ScraperAPI for tasks like proxy rotation, parallelization, user-agent management, and retry logic.
Congratulations, you just scraped your first website using Requests and BeautifulSoup!
Want to learn more about web scraping? Visit our Scraping Hub. There, you’ll find everything you need to become an expert.
Or, if you’re ready to tackle some real projects, follow our advanced tutorials:
- How to Scrape Cloudflare Protected Websites with Python
- How to Scrape Amazon Product Data
- How to Scrape LinkedIn with Python
- How to Scrape Walmart using Python and BeautifulSoup
Keep exploring, and have fun scraping!
FAQ
Yes, using Beautiful Soup is legal as a tool. However, the legality of web scraping depends on the website’s terms of service and how the data is used. Always check the site’s terms and avoid scraping sensitive or protected information without permission.
For a more in-depth legal overview, check our guide on web scraping legalities.
Beautiful Soup is used in Python to parse and extract data from HTML and XML documents. It simplifies web scraping by allowing users to search for elements by tags, attributes, or CSS selectors. It’s especially useful for navigating and manipulating the Document Object Model (DOM).
Beautiful Soup is better for scraping static web pages as it’s lightweight, faster, and easier to set up. Selenium is better for dynamic pages that rely on JavaScript, as it automates browser interactions to render content. The choice depends on the website you’re scraping.
For static HTML scraping, libraries like Scrapy offer more robust crawling capabilities for large-scale projects. For dynamic content, Selenium or APIs like ScraperAPI are better. Each tool has its strengths depending on the complexity and scale of the scraping task.
Yes, Beautiful Soup is beginner-friendly and has an intuitive syntax. With basic knowledge of Python, you can start using Beautiful Soup to scrape websites in a matter of hours. Its simple syntax makes it an excellent choice for those new to web scraping.