


LinkedIn is one of the most popular job market platforms. Extracting data from LinkedIn public job listings helps you track job market trends, discover new opportunities, or run competitor hiring analysis by seeing which roles companies are actively recruiting for.
That said, scraping LinkedIn data can be tricky because of its dynamic, JavaScript-rendered content, rate limiting, and IP-based blocking.
In this LinkedIn scraping tutorial, I’ll show you how to extract public LinkedIn data using Python by targeting internal job search endpoints and handling common anti-bot protections. Here’s what you’ll learn:
- Scrape LinkedIn public job data using the hidden API
- Collect LinkedIn profile data using Selenium
- Scrape company information through LinkedIn’s search
Ready to build a LinkedIn scraper? Let’s get started!
LinkedIn Scraping Tutorial with Python
In this project, we’ll show you how to build a LinkedIn web scraper using Python that doesn’t violate any privacy policies or require a headless browser to extract the following:
- Job title
- Company hiring
- Job location
- Job URL
Then, we’ll export the data to a CSV file for later analysis or use.

Note: If you’re more proficient in JavaScript, we have a tutorial on building a LinkedIn scraper using Node.js and Cheerio you can check.
Step 1: Bypass LinkedIn anti-bot detection with ScraperAPI
This first step is optional, but it can save you hours of work in the long run. After all, we’re not trying to scrape just one or two pages from LinkedIn but hundreds of them.
To reliably scrape LinkedIn job search results at scale, you’ll need to:
- Handle IP rotations
- Manage a pool of proxies
- Handle CAPTCHAs
- Send proper headers
and more to avoid getting blocked or even banned for life.
ScraperAPI helps simplify this setup by acting as a proxy layer between your Python script and LinkedIn. Requests are sent with rotating IPs and headers, which reduces blocks when accessing public LinkedIn job endpoints without requiring a headless browser or complex proxy management.
First, create a new free ScraperAPI account to have access to our API key.
From there, the only thing you need to do is add this string at the beginning of the URL:
http://api.scraperapi.com?api_key={YOUR_API_KEY}&url=
Resulting in the following function call:
linkedin_scraper('https://api.scraperapi.com?api_key=51e43be283e4db2a5afb62xxxxxxxxxx&url=https://www.linkedin.com/jobs-guest/jobs/api/seeMoreJobPostings/search?keywords=Product%20Management&location=San%20Francisco%20Bay%20Area&geoId=90000084&trk=public_jobs_jobs-search-bar_search-submit&position=1&pageNum=0&start=', 0)
Note: This URL will make more sense as we move further down the tutorial. For now, just keep in mind we’ll route our requests through the API.
This way, the HTTP request will be processed by ScraperAPI’s server. It’ll rotate IPs after every request (or as needed) and choose the right Headers based on years of statistical analysis and machine learning.
In addition, ScraperAPI has ultra-premium proxies chosen specifically to handle really hard websites like LinkedIn. To use them enable the ultra_premium=true parameter in the request.
Step 2: Set up your LinkedIn data scraping project directory
Let’s start by installing all the dependencies we’ll be using for this LinkedIn scraping project.
Assuming you already have Python 3 installed, open VScode – or your favorite text editor – and open a new terminal window.
From there, use the following commands to install the libraries:
- Requests:
pip3 install requests - Beautiful Soup:
pip3 install beautifulsoup4 - CSV: Python comes with a CSV module ready to use
With our dependencies installed, let’s create a new file and name it linkedin_python.py and import the libraries at the top:
import csv
import requests
from bs4 import BeautifulSoup
Step 3: Use Chrome DevTools to understand LinkedIn’s site structure
Before we can scrape LinkedIn job listings, we first need to understand how to interact with its data.
To get started, navigate to the homepage at https://www.linkedin.com/ from an InPrivate browser window (Incognito in Chrome) and click on jobs at the top of the page.
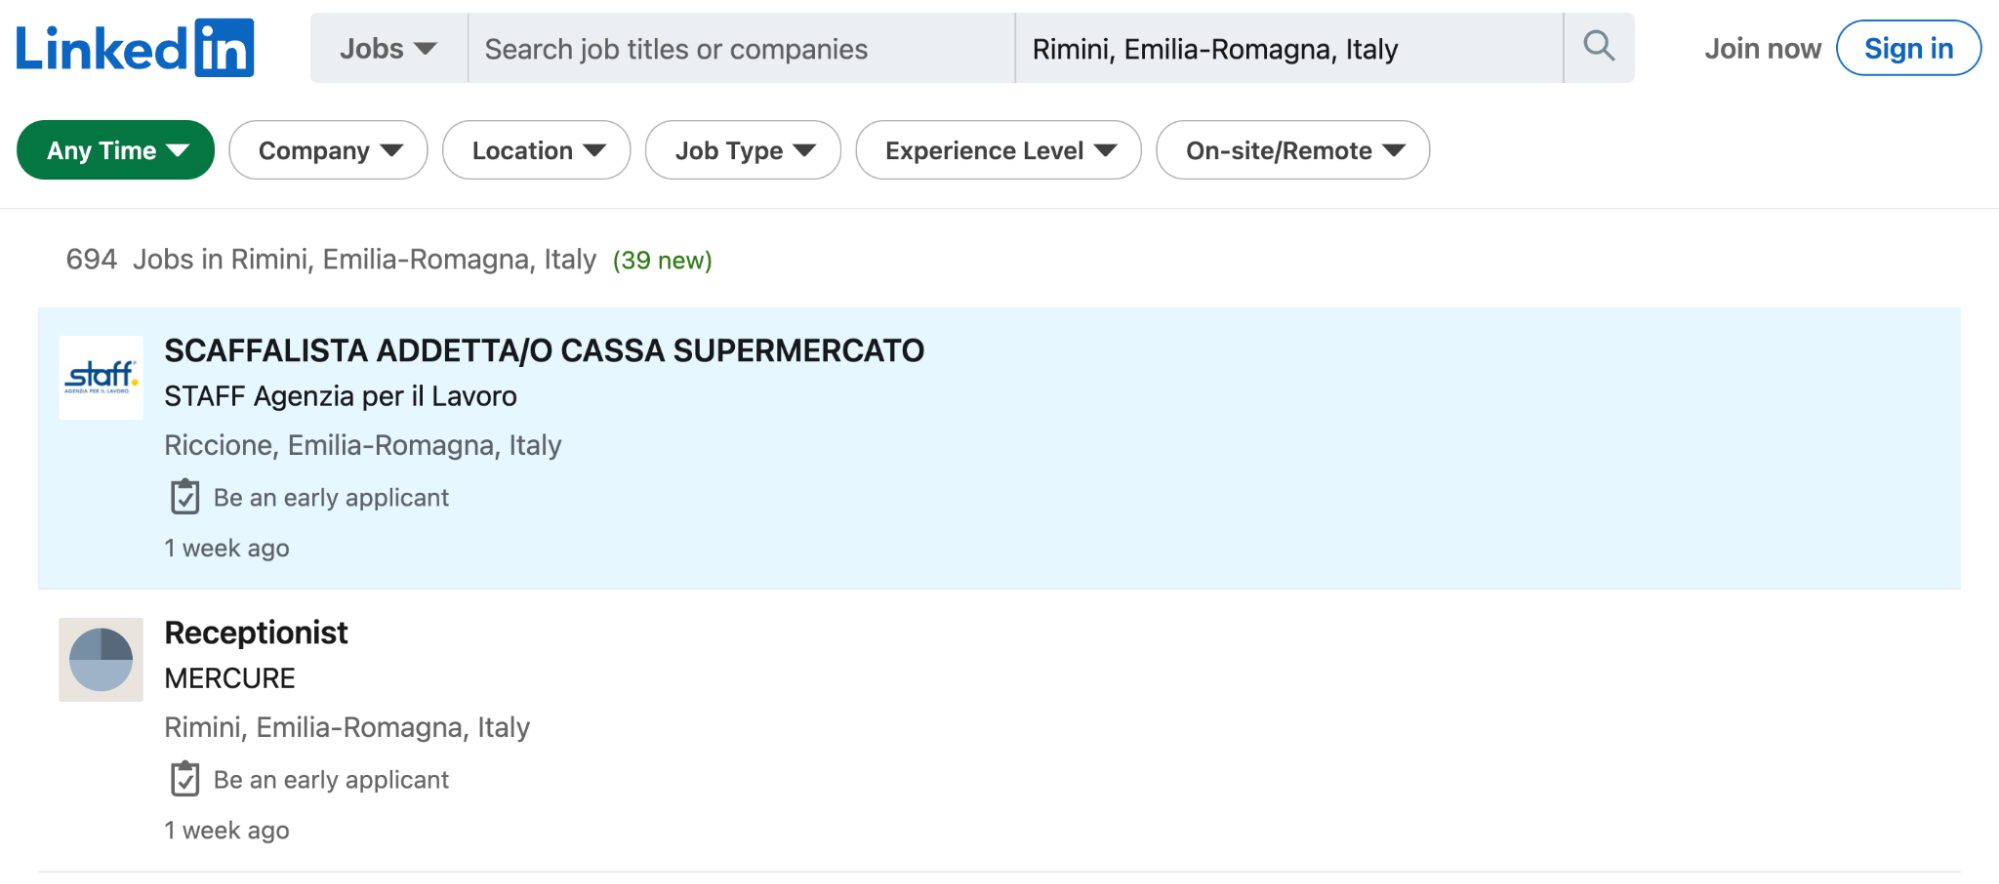
It will send us directly to the LinkedIn job search result page, where we can create a new search. For the sake of this example, let’s say that we’re trying to build a list of product management jobs in San Francisco.
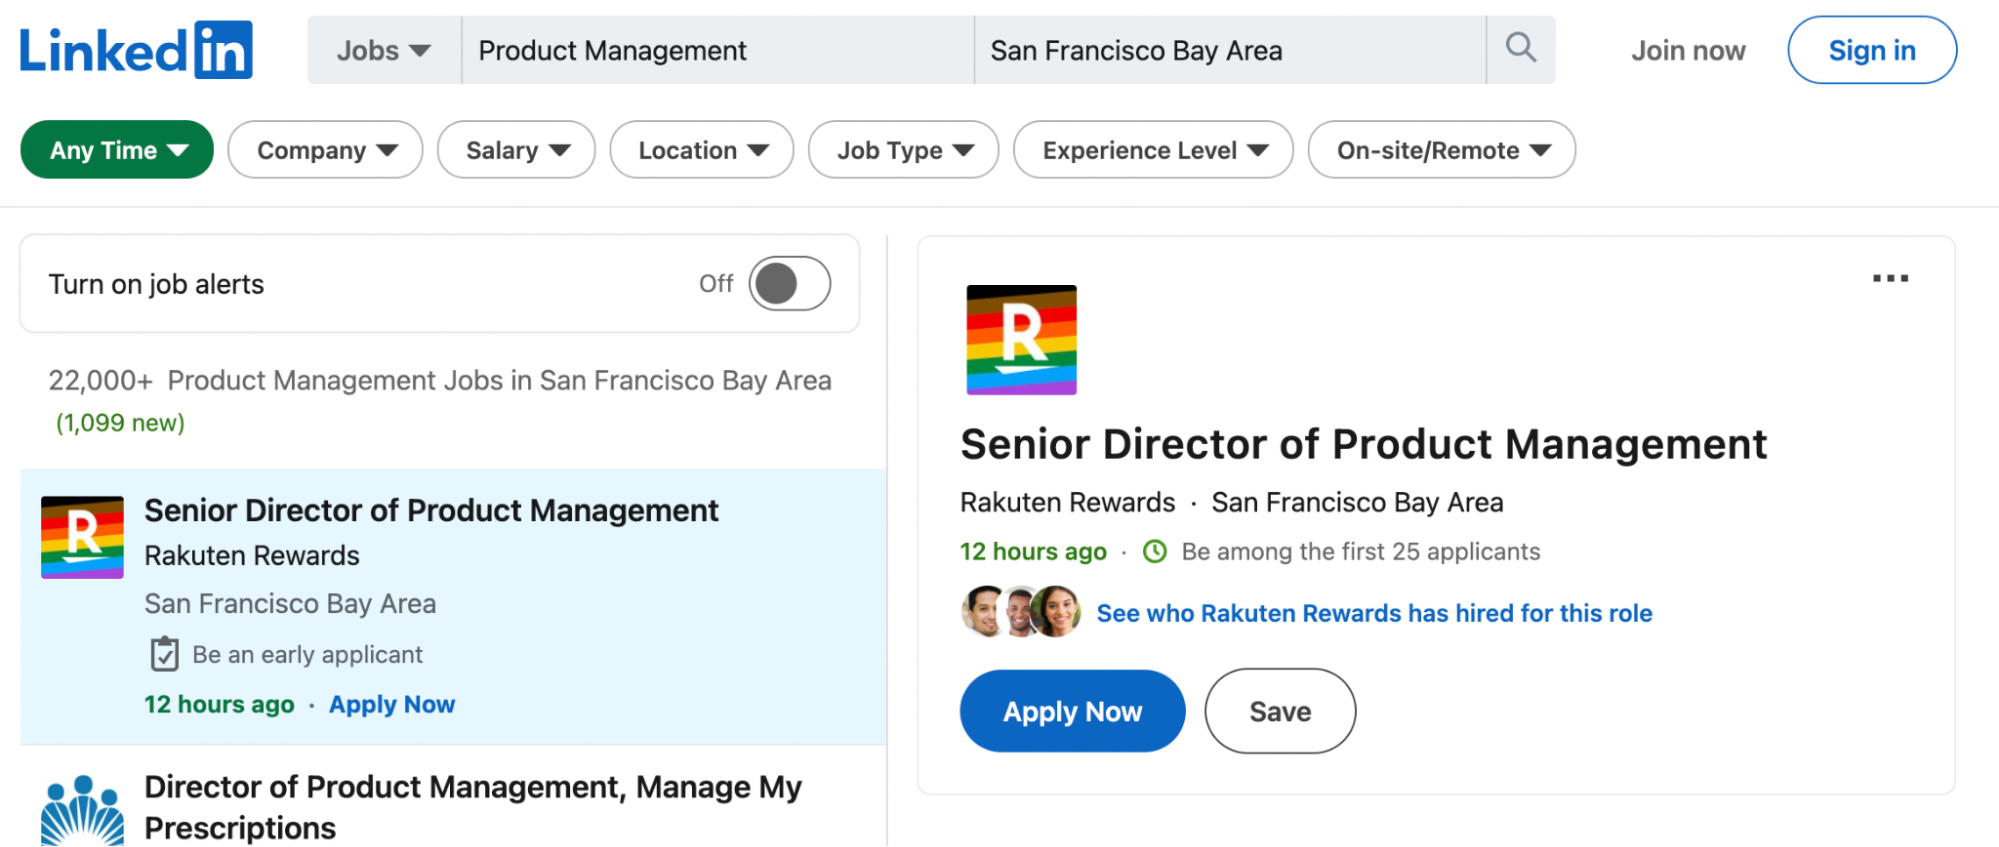
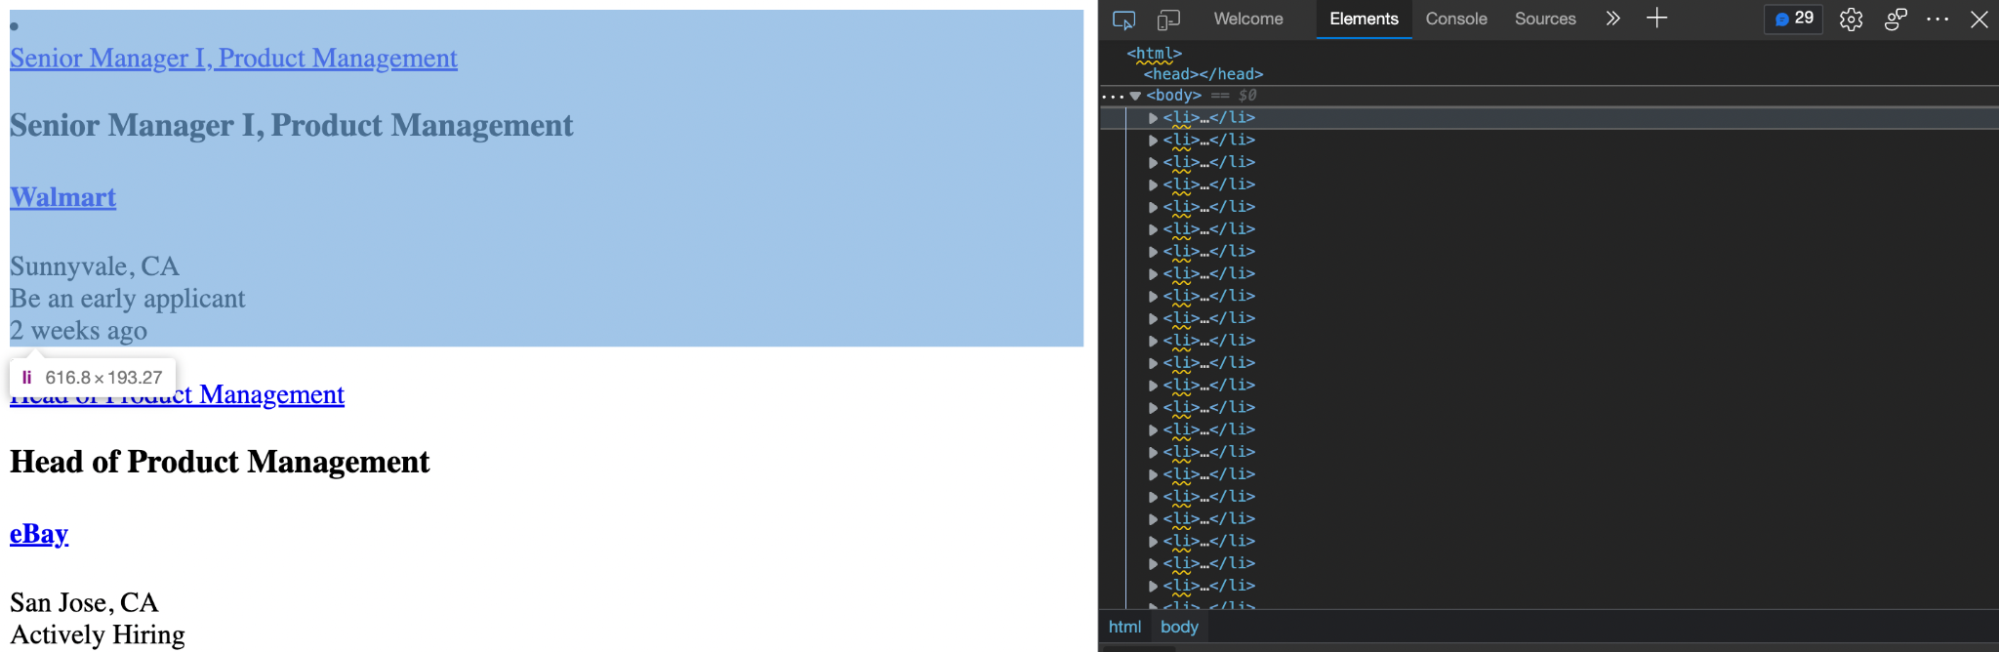
So, a first approach would be to grab the <ul> element and iterate through every <li> tag inside to extract the data we’re looking for.
But there’s a problem: to access new jobs, LinkedIn uses infinite scrolling pagination, which means there is no “next page” button to grab the next page URL link from, nor does the URL itself change.
In cases like this, we can use a headless browser like Selenium to access the site, extract the data, and then scroll down to reveal the new data.
Of course, as we previously stated, we’re not doing that in this web scraping project. Instead, let’s outsmart LinkedIn anti-scraping measures by using the Network Tab inside DevTools.
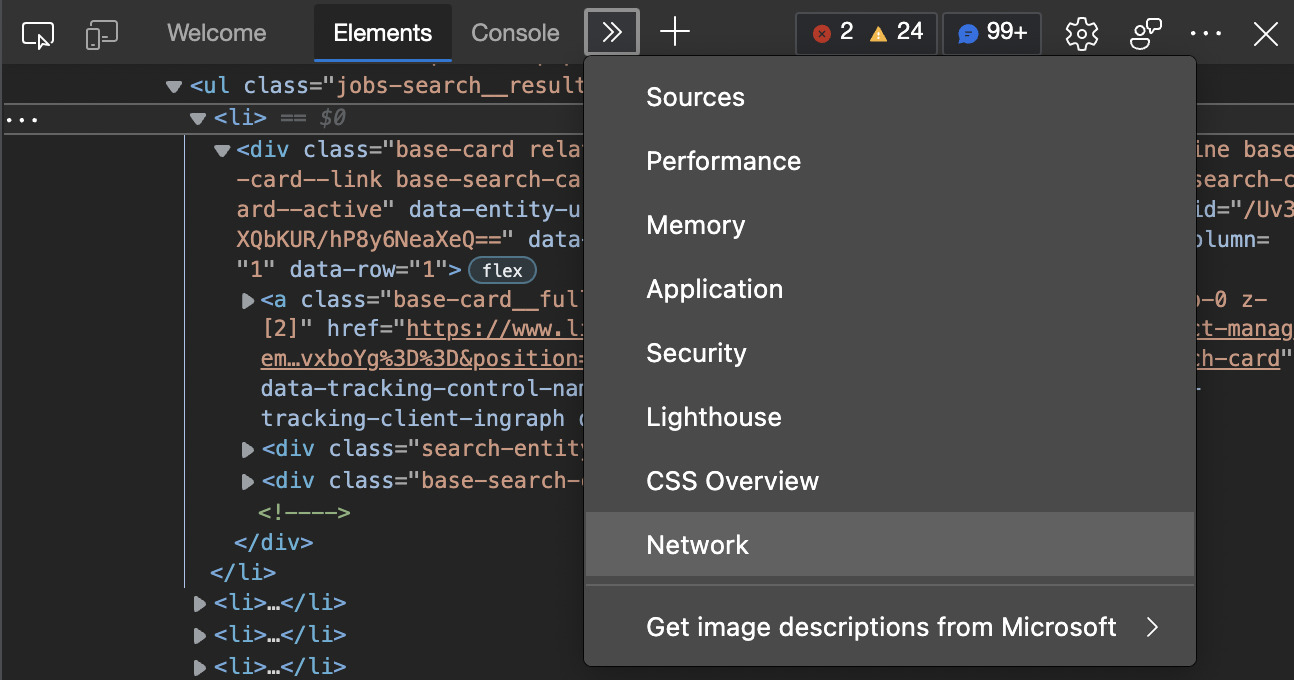
Step 4: Use the DevTool’s Network Tab to find the hidden API
With DevTools open, we can navigate to the Network Tab from the dropdown menu at the top of the window.
To populate the report, just reload the page, and you’ll be able to see all the fetch requests the browser is running to render the data on the page. After scrolling to the bottom, the browser sends a new request to the URL.
Let’s try this new URL in our browser to see where it takes us:
Perfect, this page has all the information we want right there for the grabbing!
An additional finding is that this URL has a structure we can actually manipulate by changing the value in the start parameter.
To put this to a test, let’s change the value to 0 – which is the starting value from the organic URL:
https://www.linkedin.com/jobs/search?keywords=Product%20Management&location=San%20Francisco%20Bay%20Area&geoId=90000084&trk=public_jobs_jobs-search-bar_search-submit&position=1&pageNum=0

And yes, that did the trick. Confirmed because the first job for each page is the same.
Experimenting is crucial for web scraping, so here are a few more things we tried before settling for this solution:
- Changing the
pageNumparameter doesn’t change anything on the page. - The
startparameter increases by 25 for every new URL. We found this out by scrolling down the page and comparing the fetch requests sent by the site itself. - Changing the
startparameter by 1 (so start=2, start=3, and so on) will change the resulting page by hiding the previous job listings out of the page – which is not what we want. - The current last page is start=975. It goes to a 404 page when hitting 1000.
Having our initial URL, we can start writing our LinkedIn scraper.
Step 5: Parse LinkedIn using Requests and Beautiful Soup
Sending a request and parsing the returning response is super simple in Python.
- First, let’s create a variable containing our initial URL and pass it to the
requests.get()method. - Then, we’ll store the returned HTML in a variable called “response” to create our Python object. For testing, let’s print
response:
url = 'https://www.linkedin.com/jobs-guest/jobs/api/seeMoreJobPostings/search?keywords=Product%20Management&location=San%20Francisco%20Bay%20Area&geoId=90000084&trk=public_jobs_jobs-search-bar_search-submit&position=1&pageNum=0&start=0'

response = requests.get(url)

print(response)

Awesome. A 200 status code indicates a successful HTTP request.
However, before we can start extracting any data, we’ll need to parse the raw HTML data to make it easier to navigate using CSS selectors.
To do so, create a new Beautiful Soup object by passing response.content as the first argument, and our parser method as the second argument:
soup = BeautifulSoup(response.content,'html.parser')
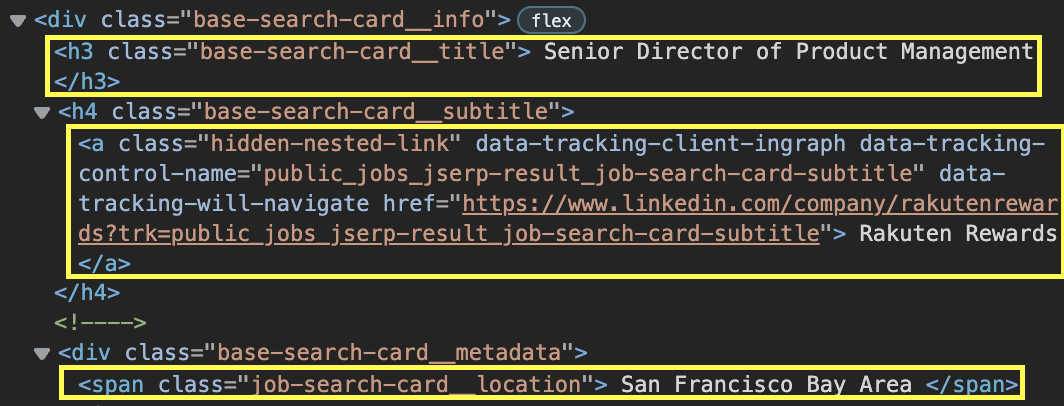
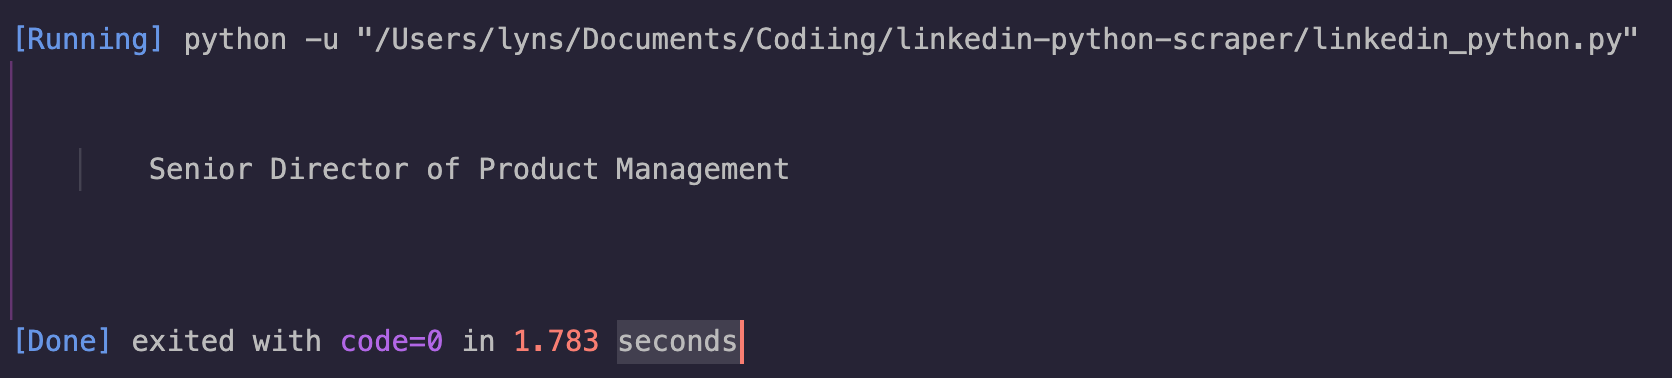
Because testing should be a part of our development process, let’s do a simple experiment using our new soup object by selecting and printing the first job title on the page, which we already know is wrapped inside <h3> tags with the class base-search-card__title.
job_title = soup.find('h3', class_='base-search-card__title').text
print(job_title)
soup.find() will do exactly what it says. It’ll find an element inside our Beautiful Soup object that matches the parameters we stated.
By adding the .text method at the end, it’ll return only the text inside the element without the whole HTML surrounding it.
To delete all the white space around the text, all we need to do is add the .strip() method at the end of our string.
Step 6: Scrape multiple LinkedIn pages using conditions
Here’s where things get a little tricky, but we’ve already done the hardest part: figuring out how to move through the pages.
In simple words, all we need to do is create some logic to change the start parameter in our URL.
In an earlier article, we talked about scraping paginated pages in Scrapy, but with Beautiful Soup, we’ll do something different.
For starters, we’ll define a new function that will contain the entirety of our code and pass webpage and page_number as arguments – we’ll use these two arguments to build the URL we’ll use to send the HTTP request.
def linkedin_scraper(webpage, page_number):
next_page = webpage + str(page_number)
print(str(next_page))
response = requests.get(str(next_page))
soup = BeautifulSoup(response.content,'html.parser')
In the variable next_page we’re combining both arguments – where webpage is a string and page_number, being a number, needs to be turned into a string – before passing it to Requests for sending the result URL.
For the next step to make sense, we need to understand that our scraper will:
- Create the new URL
- Send the HTTP request
- Parse the response
- Extract the data
- Send it to a CSV file
- Increase the start parameter
- Repeat until it breaks
To increase the start parameter in a loop, we’ll create an If condition:
if page_number < 25:
page_number = page_number + 25
linkedin_scraper(webpage, page_number)
What we’re saying here is that as long as page_number is not higher than 25 (so if it’s 26 or higher it’ll break), page_number will increase by 25 and pass the new number to our function.
Why 25 you ask? Because before going all in, we want to make sure that our logic works with a simple test.
print(response)
print(page_number)

if page_number < 25:
page_number = page_number + 25
linkedin_scraper(webpage, page_number)

linkedin_scraper('https://www.linkedin.com/jobs-guest/jobs/api/seeMoreJobPostings/search?keywords=Product%20Management&location=San%20Francisco%20Bay%20Area&geoId=90000084&trk=public_jobs_jobs-search-bar_search-submit&position=1&pageNum=0&start=', 0)
We’re going to print the response status code and page_number to verify that we’re accessing both pages.
To run our code, we’ll need to call our function with the relevant parameters.
Note: Notice that in the parameters, we separated the start parameter from its value. We need its value to become a number so we can increase it in the If statement.
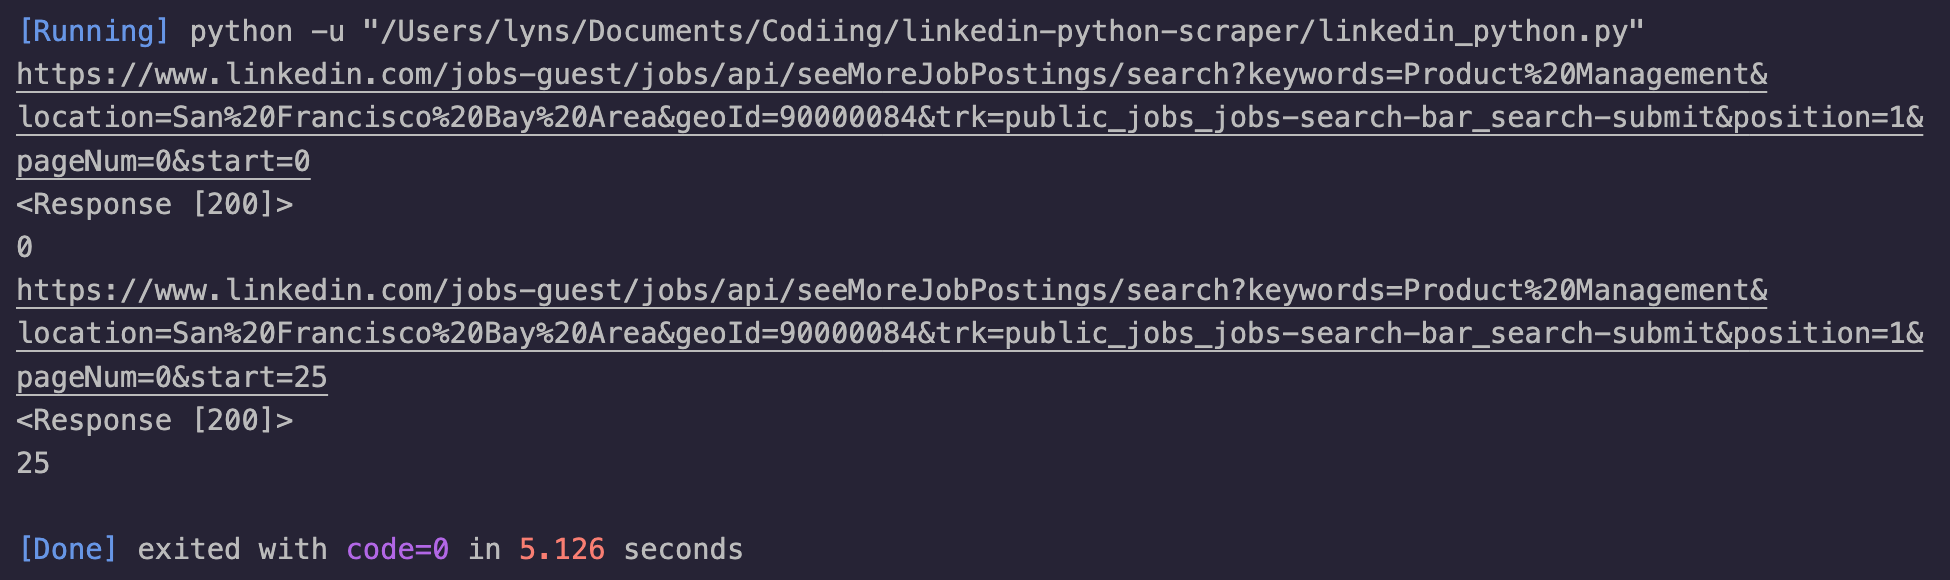
We’ve also added a print() statement for the new URL created, just to verify that everything is working correctly.
Step 7: Test your selectors
We already found the elements and classes we’re going to be using for our parser. Nevertheless, it’s always essential to test them out to avoid unnecessary requests to the server.
Right inside the DevTools’s console, we can use the document.querySelectorAll() method to test each CSS selector from the browser.
Here’s an example for extracting the job title:
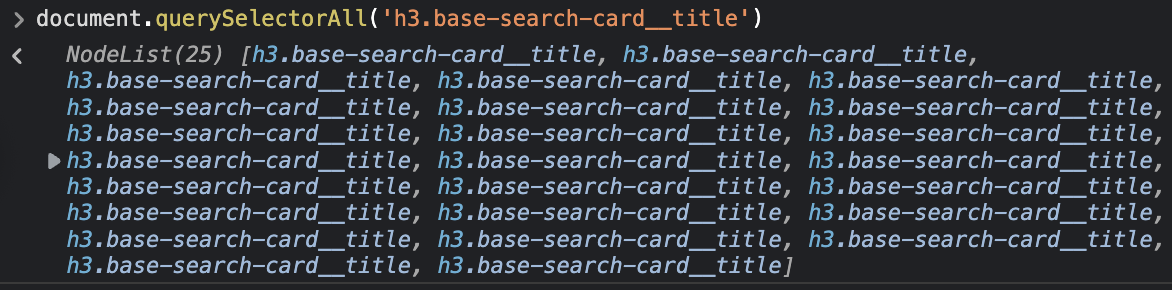
It returns a NodeList of 25, which matches the number of jobs on the page. We can do the same thing for the rest of our targets. Here are our targets:
- Job title: ‘h3′, class_=’base-search-card__title’
- Company: ‘h4′, class_=’base-search-card__subtitle’
- Location: ‘span’, class_=’job-search-card__location’
- URL: ‘a’, class_=’base-card__full-link’
Notice that we changed the syntax to match the .find() method. If you want to keep using the same JQuery-like selectors, you can use the .select() function instead.
Step 8: Scrape LinkedIn job data
Extracting the data is as simple as selecting all the parent elements that are wrapping our data and then looping through them to extract the information we want.
Inside each <li> element, there’s a div with a class we can target:

To access the data inside, let’s create a new variable to pick all these <div>s.
jobs = soup.find_all('div', class_='base-card relative w-full hover:no-underline focus:no-underline base-card--link base-search-card base-search-card--link job-search-card')
Now that we have a list of <div>s, we can create our for loop using the CSS selectors we chose:
for job in jobs:
job_title = job.find('h3', class_='base-search-card__title').text.strip()
job_company = job.find('h4', class_='base-search-card__subtitle').text.strip()
job_location = job.find('span', class_='job-search-card__location').text.strip()
job_link = job.find('a', class_='base-card__full-link')['href']
Note: If you feel like we’re moving too fast, we recommend you read our Python web scraping tutorial for beginners. It goes into more detail on this process.
Step 9: Import LinkedIn jobs to a CSV file
Outside our main function, we’ll open a new file, create a new writer, and tell it to create our heading row using the .writerow() method:
file = open('linkedin-jobs.csv', 'a')
writer = csv.writer(file)
writer.writerow(['Title', 'Company', 'Location', 'Apply'])
When opening a file you’ll want to continuously add new rows to, you’ll need to open it in append mode, hence why the a as a second argument in the open() function.
To create a new row with the data extracted from the parser, add this snippet of code at the end of the for loop:
writer.writerow([
job_title.encode('utf-8'),
job_company.encode('utf-8'),
job_location.encode('utf-8'),
job_link.encode('utf-8')
])
At the end of each iteration through the list of jobs, our scraper will append all the data into a new row.
Note: It’s important to make sure that the order we add the new data is in the same order as our headings.
To finish this step, let’s add an else statement to close the file once the loop breaks.
else:
file.close()
print('File closed')
Step 10: Run your LinkedIn web scraper
Congratulations, you just created your first LinkedIn scraper!
If you’ve followed along, here’s how your code base should look like:
import csv
import requests
from bs4 import BeautifulSoup

file = open('linkedin-jobs.csv', 'a')
writer = csv.writer(file)
writer.writerow(['Title', 'Company', 'Location', 'Apply'])

def linkedin_scraper(webpage, page_number):
next_page = webpage + str(page_number)
print(str(next_page))
response = requests.get(str(next_page))
soup = BeautifulSoup(response.content,'html.parser')

jobs = soup.find_all('div', class_='base-card relative w-full hover:no-underline focus:no-underline base-card--link base-search-card base-search-card--link job-search-card')
for job in jobs:
job_title = job.find('h3', class_='base-search-card__title').text.strip()
job_company = job.find('h4', class_='base-search-card__subtitle').text.strip()
job_location = job.find('span', class_='job-search-card__location').text.strip()
job_link = job.find('a', class_='base-card__full-link')['href']

writer.writerow([
job_title.encode('utf-8'),
job_company.encode('utf-8'),
job_location.encode('utf-8'),
job_link.encode('utf-8')
])

print('Data updated')

if page_number < 25:
page_number = page_number + 25
linkedin_scraper(webpage, page_number)
else:
file.close()
print('File closed')

linkedin_scraper('https://www.linkedin.com/jobs-guest/jobs/api/seeMoreJobPostings/search?keywords=Product%20Management&location=San%20Francisco%20Bay%20Area&geoId=90000084&trk=public_jobs_jobs-search-bar_search-submit&position=1&pageNum=0&start=', 0)
We added a few print() statements as visual feedback.
After running the code, the script will create a CSV file with the data scraped:

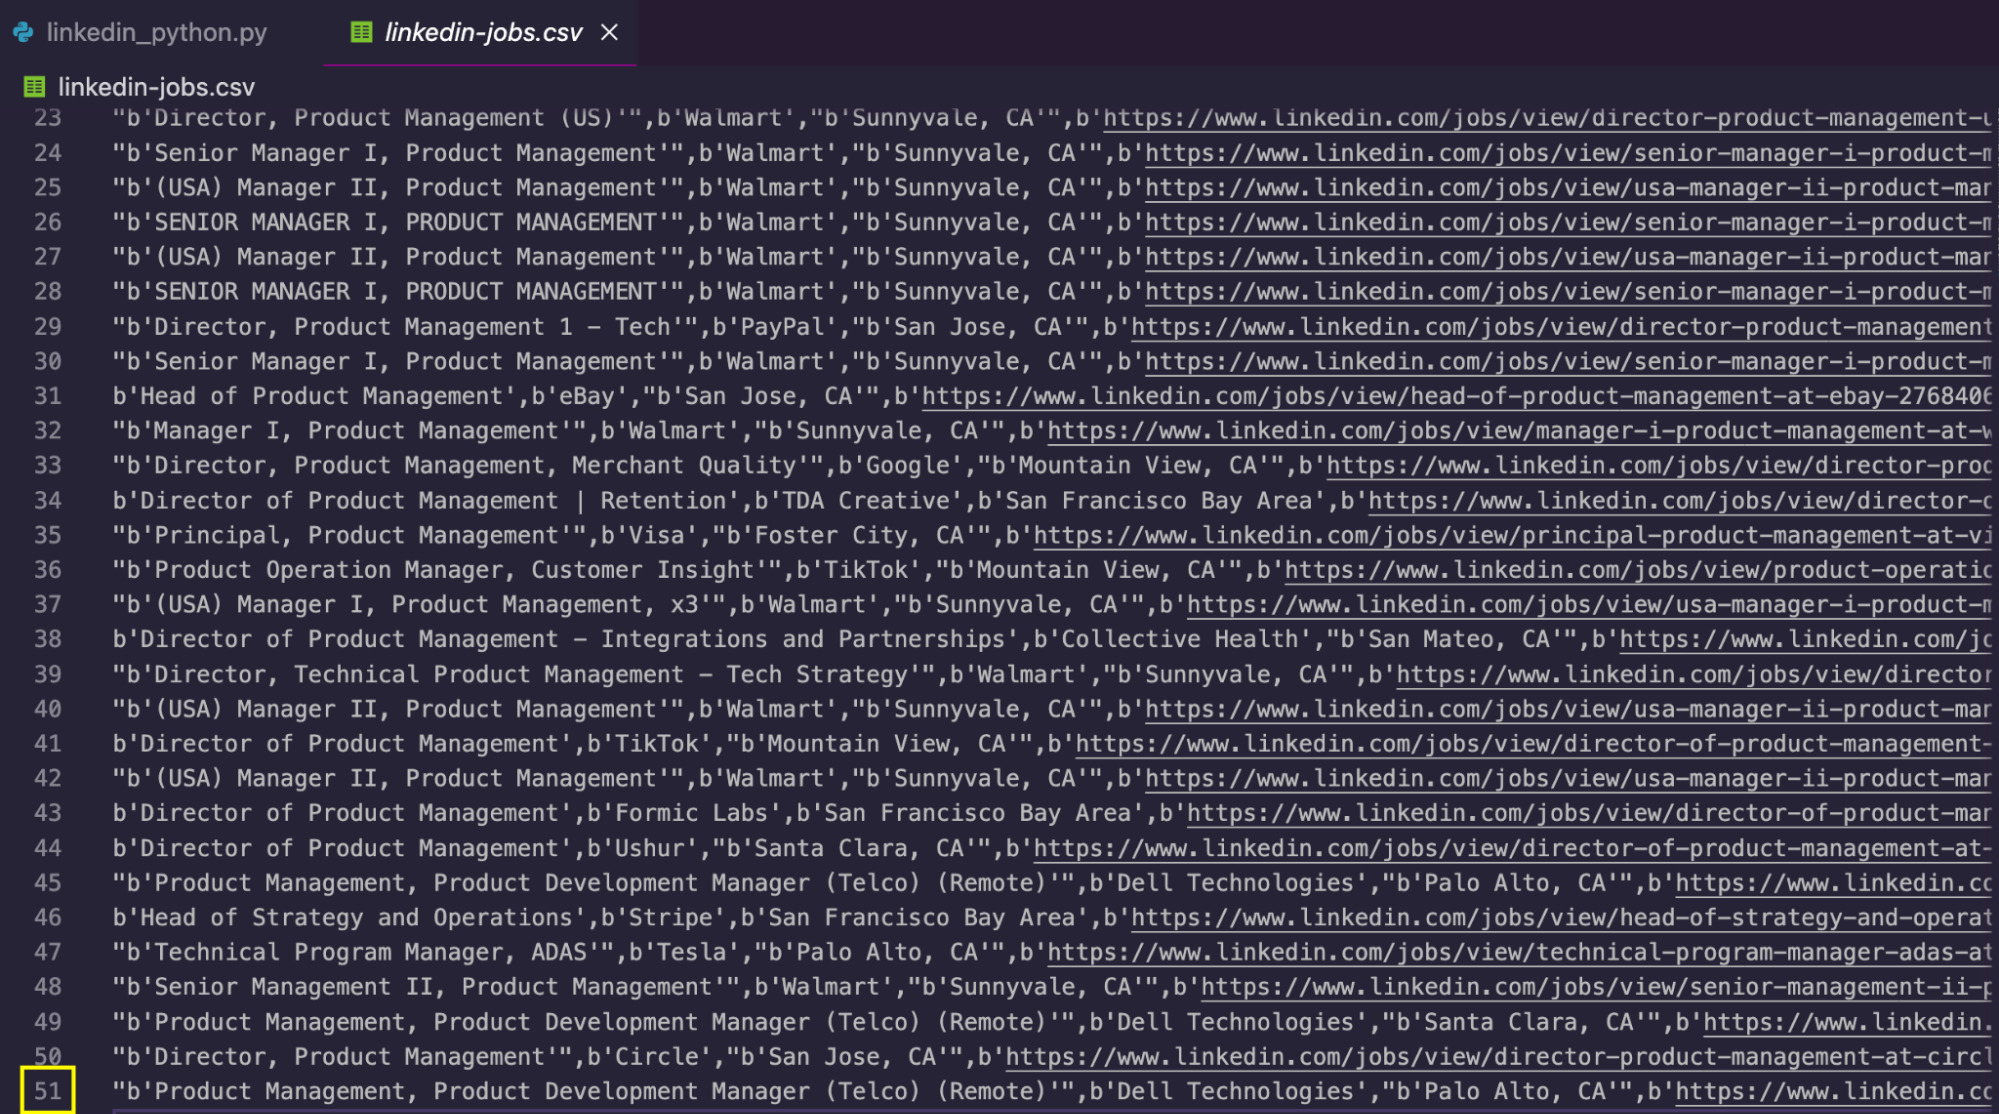
To get even more data, you can increase the limit in the if condition to scrape more pages, handle the keywords parameter to loop through different queries and/or change the location parameter to scrape the same job title across different cities and countries.
How to Scrape LinkedIn Profiles Based on Job Title (LinkedIn Scraper)
Note: Before proceeding, remember that scraping data behind login walls can have legal implications and may violate LinkedIn’s terms of service. We strongly discourage using this technique without permission. For this tutorial, we’ll use a burner account and a proxy server to minimize the risk of being blocked.
While our previous method effectively scraped LinkedIn job listings, it doesn’t provide the in-depth profile information we need for candidate research. To access this data, we need to scrape individual profiles.
Let’s go over how to build a web scraper to collect data from LinkedIn profiles based on a specific job title using Selenium with undetected-chromedriver. This section assumes you already have a basic understanding of how Selenium works.
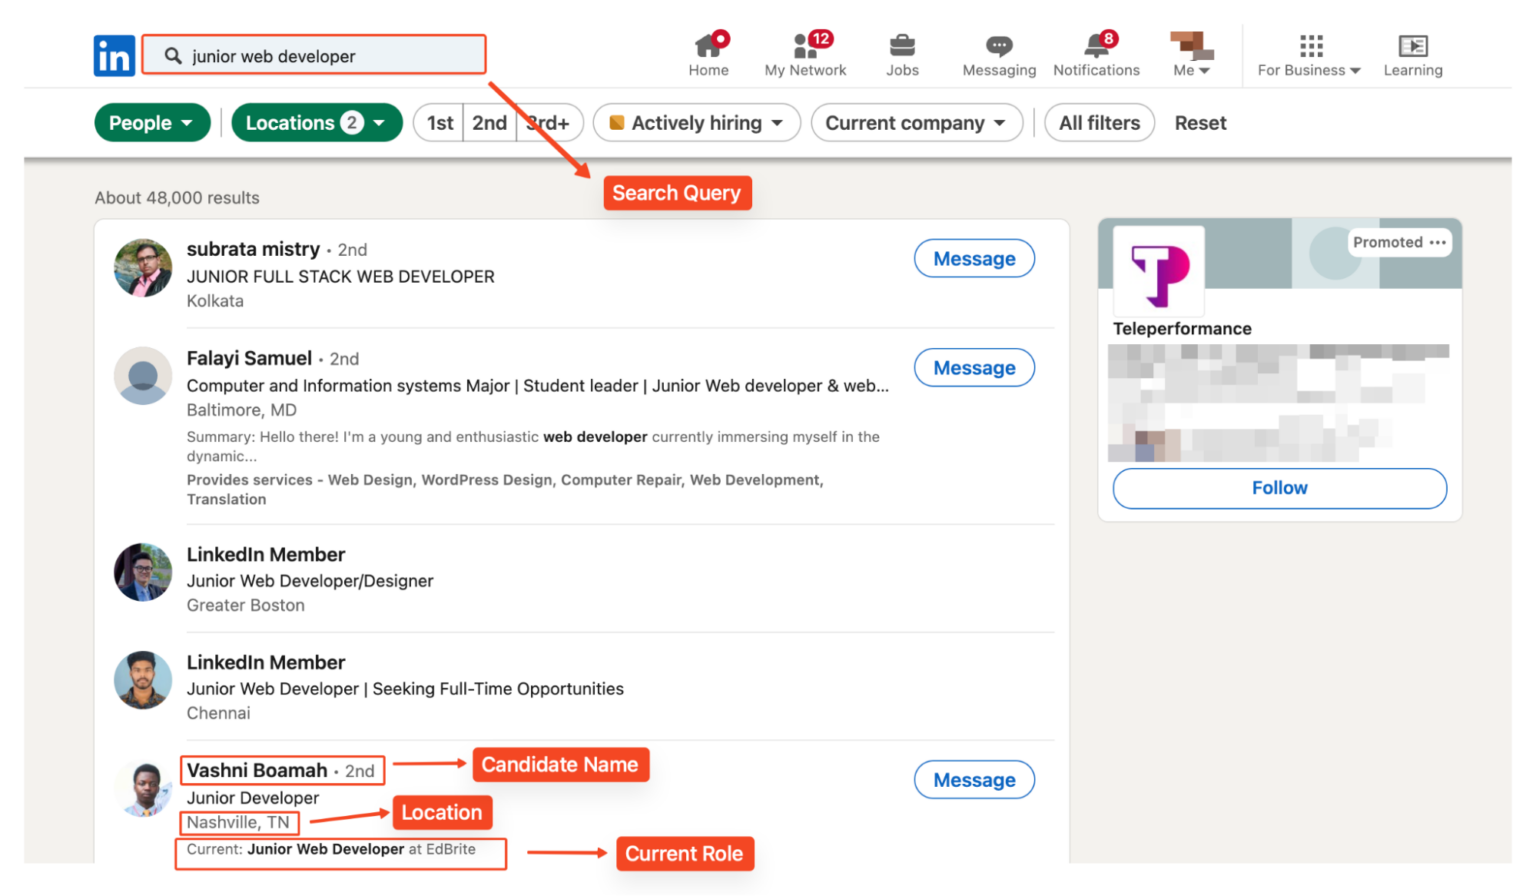
However, this method can be valuable for building a candidate database, especially if you want to search across several locations. For each candidate, we’ll capture the following information:
- Candidate’s name
- LinkedIn profile URL
- Job title
- Location
- Current role, if available
1. Set up your development environment
To scrape LinkedIn profiles, we’ll use the following Python libraries:
- Selenium: Automates browser interaction.
- Selenium-wire: Extends selenium capabilities.
- Undetected-chromedriver: Helps bypass anti-bot detection.
- Beautiful Soup: Parses HTML content.
- Lxml: Powerful XML and HTML parser
- CSV: Handles CSV file operations.
Proceed to install the required libraries using pip:
pip install selenium selenium-wire undetected-chromedriver beautifulsoup4 lxml webdriver-manager setuptools
2. Import the necessary libraries
Next, import the required libraries and set up the Selenium WebDriver using the appropriate options.
from selenium.webdriver.chrome.options import Options
from selenium.webdriver.common.by import By
from selenium.webdriver.support.ui import WebDriverWait
from selenium.webdriver.support import expected_conditions as EC
from time import sleep
import undetected_chromedriver as uc
from bs4 import BeautifulSoup
import csv
3. Configure your proxy settings
We then proceed to set up our proxy configuration. Using a proxy helps distribute requests and reduce the risk of IP-based blocking:
proxy_host = 'your_proxy_host'
proxy_port = 'your_proxy_port'
proxy_username = 'your_username'
proxy_password = 'your_password'

proxy_url = f'https://{proxy_username}:{proxy_password}@{proxy_host}:{proxy_port}'
Note: Replace “your_proxy_host“, “your_proxy_port ”, “your_username”, and “your_password” with your actual proxy credentials.
The proxy configuration is then set up using Selenium Wire options:
seleniumwire_options = {
    'proxy': {
        'http': proxy_url,
        'https': proxy_url,
    },
    'verify_ssl': False,
}
4. Navigate to LinkedIn
For this example, we’re searching for “junior web developers” in the United States and India.
The URL includes location parameters for targeted searching:
linkedin_url = 'https://www.linkedin.com/search/results/people/?geoUrn=%5B%22103644278%22%2C%22102713980%22%5D&keywords=junior%20web%20developer&origin=FACETED_SEARCH'
Use the “driver.get()” method to navigate to the target LinkedIn page.
# Initialize the undetected Chrome driver with proxy settings
driver = uc.Chrome(options=options, seleniumwire_options=seleniumwire_options)

# Go to the LinkedIn page
driver.get(linkedin_url)
We configure Chrome options to minimize detection:
options = Options()
options.add_argument("--disable-blink-features=AutomationControlled")
options.add_argument("--headless=new")
5. Log in into your LinkedIn account
To access profile data, we’ll need to log into LinkedIn. We highly recommend using a dummy account to avoid risking your personal profile. We’ll find the email and password input fields using their HTML IDs, then use the send_keys() method to enter your credentials.
# Wait for the username and password fields to load and enter credentials
username_field = WebDriverWait(driver, 20).until(EC.presence_of_element_located((By.ID, 'username')))
username_field.send_keys('Linkedin_username')
password_field = driver.find_element(By.ID, 'password')
password_field.send_keys(‘Linkedin_password’)
login_button = driver.find_element(By.CSS_SELECTOR, '.login__form_action_container button')
login_button.click()

print("Sign In Successful...\n")

# Allow some time to bypass CAPTCHA if needed
sleep(10)
Note: Replace “Linkedin_username” and “Linkedin_password” with your actual LinkedIn login credentials.
6. Scrape LinkedIn profile data with Python Selenium
After logging in, we create a CSV file to store our scraped data:
with open('linkedin_profiles.csv', 'w', newline='', encoding='utf-8') as csvfile:
    fieldnames = ['Name', 'Profile Link', 'Job Title', 'Location', 'Current Role']
    writer = csv.DictWriter(csvfile, fieldnames=fieldnames)
    writer.writeheader()
The scraper loops through the first five (5) pages of search results, extracting key information from each profile.
We can scrape more pages by simply adjusting the number of pages to scrape:
for page_number in range(1, 6):
        page_url = linkedin_url + f"&page={page_number}"
        driver.get(page_url)
        print(f"Scraping page {page_number}...\n")
For each profile, we’ll find and parse the user data using BeautifulSoup. Let’s break down each element we’re extracting from the LinkedIn profiles:
Finding Profile Containers
First, we need to locate all profile containers on the page. We’ll use BeautifulSoup’s find_all() method to get all these containers:
profiles = soup.find_all('li', class_='reusable-search__result-container')
Name Extraction
To extract the user’s name, located within a <span> tag with the attribute aria-hidden='true'. We use the find method to locate this tag within each profile. Some profiles might be hidden or restricted, so we include a fallback to “LinkedIn Member“:
name_tag = profile.find('span', {'aria-hidden': 'true'})
name = name_tag.get_text(strip=True) if name_tag else "LinkedIn Member"
Next, we extract the URL to the user’s LinkedIn profile:
profile_link_tag = profile.find('a', class_='app-aware-link', href=True)
profile_link = profile_link_tag['href'] if profile_link_tag else "N/A"
Job Title
The user’s job title is found within a div element with the ‘entity-result__primary-subtitle‘ class:
job_title_tag = profile.find('div', class_='entity-result__primary-subtitle')
job_title = job_title_tag.get_text(strip=True) if job_title_tag else "N/A"
If the job title is not available, we assign “N/A” to the job_title variable.
Location Information
Location data is stored in a div with the ‘entity-result__secondary-subtitle‘ class:
location_tag = profile.find('div', class_='entity-result__secondary-subtitle')
location = location_tag.get_text(strip=True) if location_tag else "N/A"
Current Role
To extract the current role or position, we look for a <p> tag with the class entity-result__summary. We check if the text starts with “Current:” and extract the relevant information:
current_role = "N/A"
summary_p = profile.find('p', class_='entity-result__summary')
if summary_p:
    summary_text = summary_p.get_text(strip=True)
    if summary_text.startswith("Current:"):
        current_role = summary_text.replace("Current:", "").strip()
7. Export the LinkedIn scraped data to the CSV file
After extracting all the necessary information, we write the data to our CSV file using the writer.writerow() method:
writer.writerow({
    'Name': name,
    'Profile Link': profile_link,
    'Job Title': job_title,
    'Location': location,
    'Current Role': current_role
})
We also print a confirmation message to indicate that the profile has been saved:
print(f"Saved profile: {name}")
8. Closing the Browser
After scraping, close the browser to free up system resources.
# Close the browser
driver.quit()
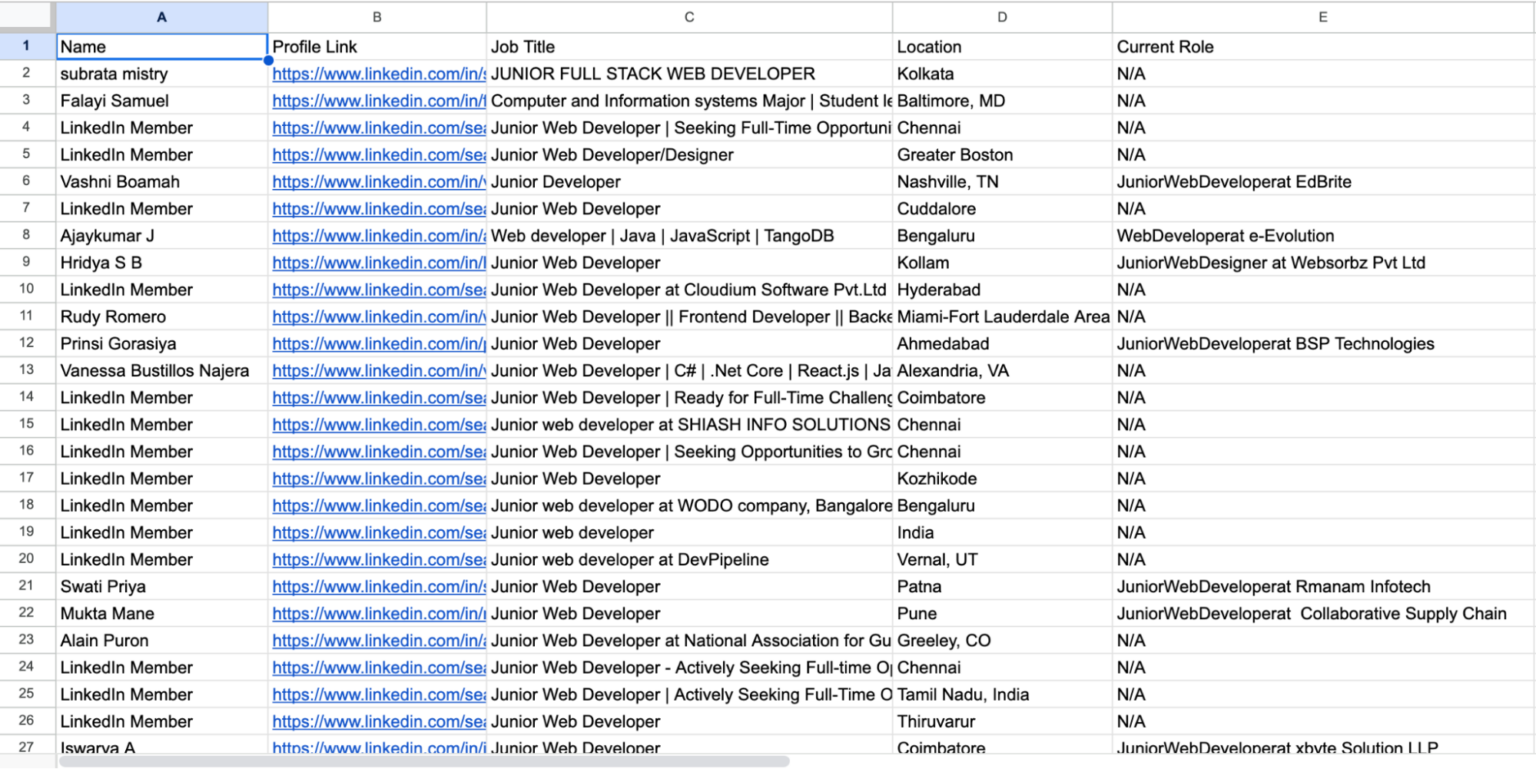
9. View the exported data
Congratulations! You’ve successfully built a LinkedIn job profile scraper and extracted some data.
Now, After running the script, you’ll have a CSV file named linkedin_profiles.csv containing the scraped data:
10. Full code: Scraping LinkedIn Profiles with Selenium
This full code integrates all the techniques we used in this section.
from selenium.webdriver.chrome.options import Options
from selenium.webdriver.common.by import By
from selenium.webdriver.support.ui import WebDriverWait
from selenium.webdriver.support import expected_conditions as EC
from time import sleep
import undetected_chromedriver as uc
from bs4 import BeautifulSoup
import csv

proxy_host = 'your_proxy_host'
proxy_port = 'your_proxy_port'
proxy_username = 'your_linkedin_email'
proxy_password = 'your_password'

# Construct the proxy URL
proxy_url = f'https://{proxy_username}:{proxy_password}@{proxy_host}:{proxy_port}'

# LinkedIn URL and credentials
linkedin_url = 'https://www.linkedin.com/search/results/people/?geoUrn=%5B%22103644278%22%2C%22102713980%22%5D&keywords=junior%20web%20developer&origin=FACETED_SEARCH'
username = "Your_linkedin_username"
password = "Your_linkedin_password"

# Setting Chrome options and proxy configuration for undetected_chromedriver
options = Options()
options.add_argument("--disable-blink-features=AutomationControlled")
options.add_argument("--headless=new")


seleniumwire_options = {
    'proxy': {
        'http': proxy_url,
        'https': proxy_url,
    },
    'verify_ssl': False,
}

# Initialize the undetected Chrome driver with proxy settings
driver = uc.Chrome(options=options, seleniumwire_options=seleniumwire_options)

# Go to the LinkedIn page
driver.get(linkedin_url)

# Wait for the username and password fields to load and enter credentials
username_field = WebDriverWait(driver, 20).until(EC.presence_of_element_located((By.ID, 'username')))
username_field.send_keys(username)
password_field = driver.find_element(By.ID, 'password')
password_field.send_keys(password)
login_button = driver.find_element(By.CSS_SELECTOR, '.login__form_action_container button')
login_button.click()

print("Sign In Successful...\n")

sleep(10)

# Open a CSV file to write the data
with open('linkedin_profiles.csv', 'w', newline='', encoding='utf-8') as csvfile:
    fieldnames = ['Name', 'Profile Link', 'Job Title', 'Location', 'Current Role']
    writer = csv.DictWriter(csvfile, fieldnames=fieldnames)
    writer.writeheader()  # Write the header row

    # Loop through the first 5 pages
    for page_number in range(1, 6):
        page_url = linkedin_url + f"&page={page_number}"
        driver.get(page_url)
        print(f"Scraping page {page_number}...\n")

        # Wait for the search results to load
        sleep(5)

        # Locate and parse the profile details
        try:
            page_source = driver.page_source
            soup = BeautifulSoup(page_source, 'lxml')
            profiles = soup.find_all('li', class_='reusable-search__result-container')

            for profile in profiles:
                # name
                name_tag = profile.find('span', {'aria-hidden': 'true'})
                name = name_tag.get_text(strip=True) if name_tag else "LinkedIn Member"

                # profile link
                profile_link_tag = profile.find('a', class_='app-aware-link', href=True)
                profile_link = profile_link_tag['href'] if profile_link_tag else "N/A"

                # job title
                job_title_tag = profile.find('div', class_='entity-result__primary-subtitle')
                job_title = job_title_tag.get_text(strip=True) if job_title_tag else "N/A"

                # location
                location_tag = profile.find('div', class_='entity-result__secondary-subtitle')
                location = location_tag.get_text(strip=True) if location_tag else "N/A"

                # current (if any)
                current_role = "N/A"
                summary_p = profile.find('p', class_='entity-result__summary')
                if summary_p:
                    summary_text = summary_p.get_text(strip=True)
                    if summary_text.startswith("Current:"):
                        current_role = summary_text.replace("Current:", "").strip()

                # Write the extracted data to the CSV file
                writer.writerow({
                    'Name': name,
                    'Profile Link': profile_link,
                    'Job Title': job_title,
                    'Location': location,
                    'Current Role': current_role
                })

                print(f"Saved profile: {name}")

        except Exception as e:
            print(f"An error occurred on page {page_number}: {e}")

# Close the browser
driver.quit()
How to Scrape Company Data from LinkedIn – LinkedIn Scraping Tutorial
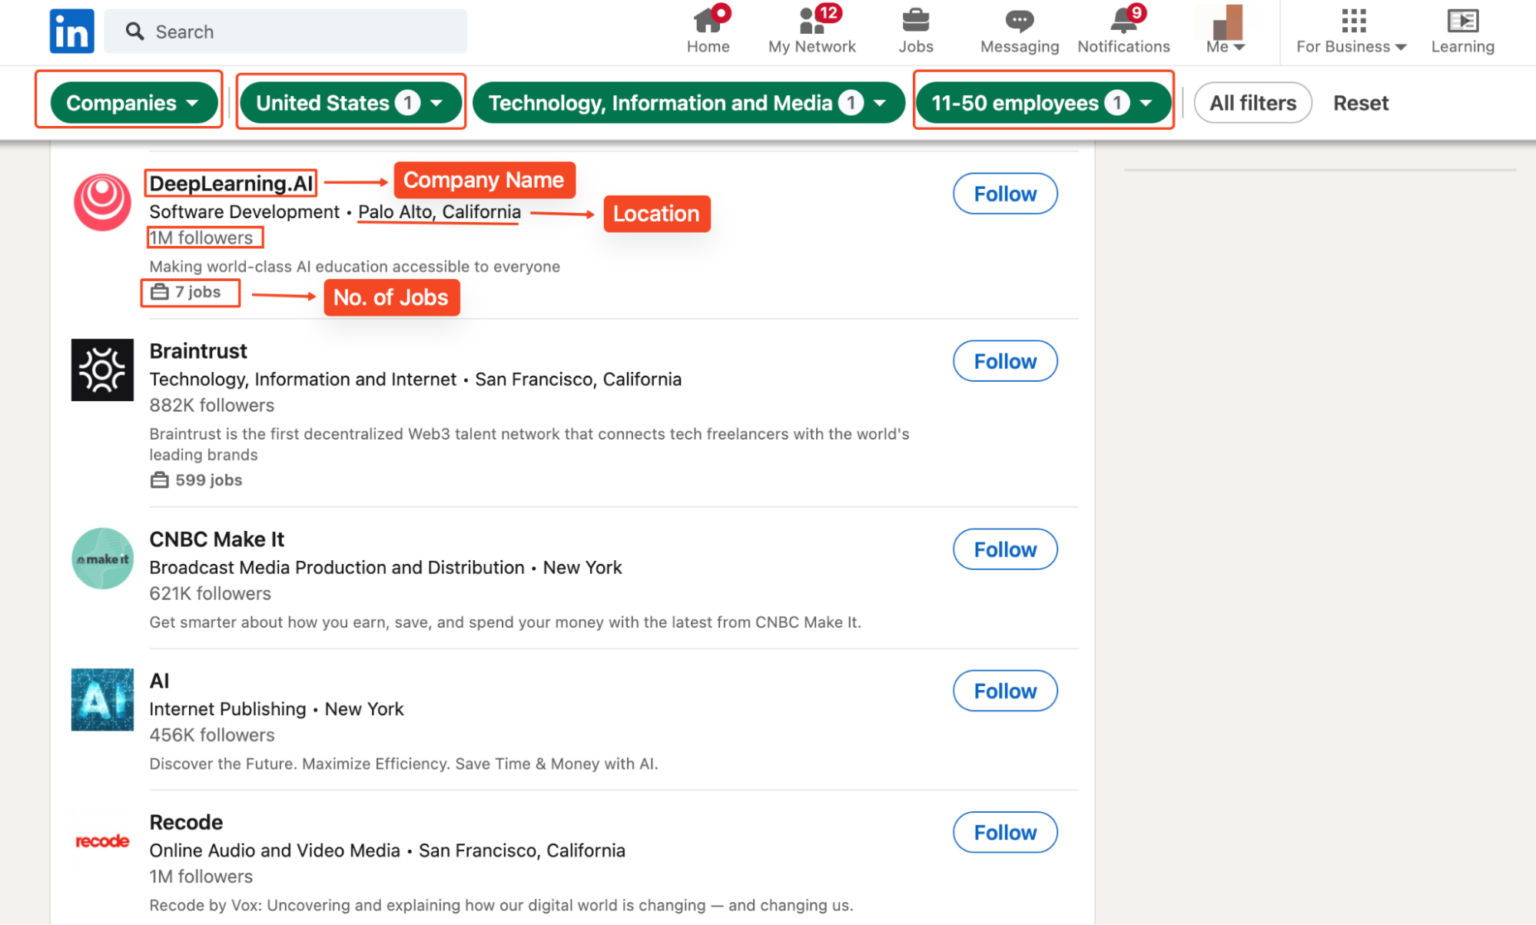
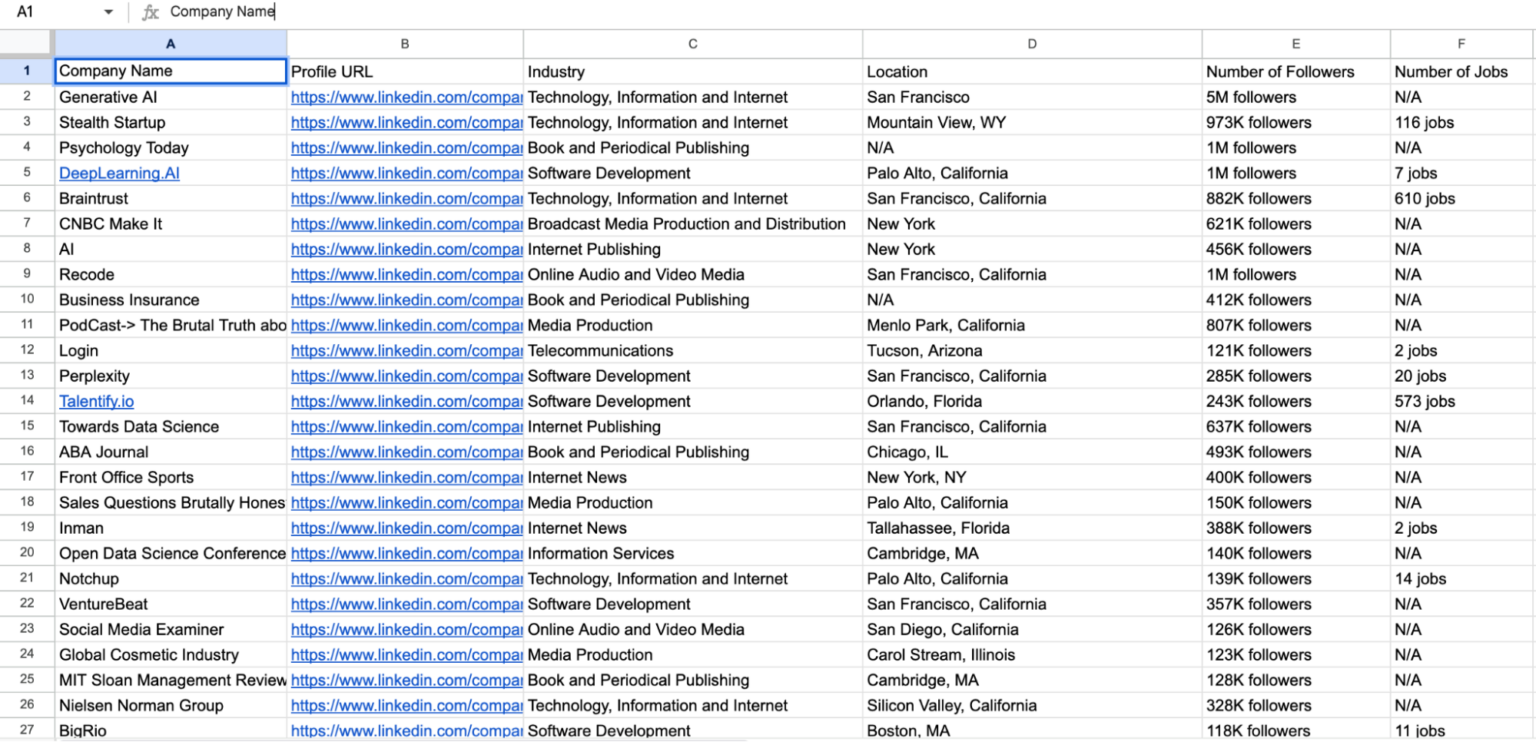
To scrape LinkedIn company data, we can build on our user profile scaping technique and adapt our code to target LinkedIn companies. For good measure, we’ll scrape technology companies in the USA with 11-50 employees to gather information such as their names, LinkedIn profiles, follower count, websites, industry, and headquarters.
We’ll use the same libraries and setup as before. To get started, navigate to the company search results page:
linkedin_url = 'https://www.linkedin.com/search/results/companies/?companyHqGeo=%5B%22103644278%22%5D&companySize=%5B%22C%22%5D&industryCompanyVertical=%5B%221594%22%5D&origin=FACETED_SEARCH&sid=G4U'
But our focus is exclusively on scraping company-specific data highlighted below:
1. Loop through LinkedIn pagination and extract company details
After logging in, we’ll loop through the first five pages of the search results to collect data from multiple companies. We’ll construct the URL for each page by appending the page number and navigating to it. We then wait a few seconds for the page to load.
for page_number in range(1, 6):
    page_url = linkedin_url + f"&page={page_number}"
    driver.get(page_url)
    print(f"Scraping page {page_number}...\n")
    sleep(5)  # Adjust sleep time if necessary
2. Parse the page source
We parse the page source using BeautifulSoup to retrieve all the company listings on the current page:
page_source = driver.page_source
soup = BeautifulSoup(page_source, 'lxml')
company_listings = soup.find_all('li', class_='reusable-search__result-container')
3. Extract the company name
We extract the company name from the <span> tag with the class entity-result__title-text. If the name tag isn’t found, we default to “N/A”.
name_tag = company_li.find('span', class_='entity-result__title-text')
company_name = name_tag.get_text(strip=True) if name_tag else "N/A"
4. Extract the company profile URL
The company profile link is within a <a> tag with the class app-aware-link. We extract the href attribute to get the URL:
profile_link_tag = company_li.find('a', class_='app-aware-link', href=True)
company_profile_url = profile_link_tag['href'] if profile_link_tag else "N/A"
5. Extract the industry, location and number of followers
The industry and location are within a <div> tag with the class entity-result__primary-subtitle. They are typically separated by a ‘•’:
primary_subtitle_tag = company_li.find('div', class_='entity-result__primary-subtitle')
primary_subtitle = primary_subtitle_tag.get_text(strip=True) if primary_subtitle_tag else "N/A"
if '•' in primary_subtitle:
    industry, location = [text.strip() for text in primary_subtitle.split('•', 1)]
else:
    industry, location = primary_subtitle, "N/A"
Then we find the number of followers from a <div> tag with the class entity-result__secondary-subtitle:
secondary_subtitle_tag = company_li.find('div', class_='entity-result__secondary-subtitle')
num_followers = secondary_subtitle_tag.get_text(strip=True) if secondary_subtitle_tag else "N/A"
6. Extract number of jobs available at each company
We then proceed to search for the number of jobs in the company within <div> tags that have the class reusable-search-simple-insight__text-container:
num_jobs = "N/A"
insight_tags = company_li.find_all('div', class_='reusable-search-simple-insight__text-container')
for insight_tag in insight_tags:
    insight_text = insight_tag.get_text(strip=True)
    if 'jobs' in insight_text:
        num_jobs = insight_text
        break
7. Export the scraped company data to a CSV file
After extracting all the required information, we write the data to our CSV file. This adds a new row to the CSV file for each company:
writer.writerow({
    'Company Name': company_name,
    'Profile URL': company_profile_url,
    'Industry': industry,
    'Location': location,
    'Number of Followers': num_followers,
    'Number of Jobs': num_jobs
})

print(f"Saved company: {company_name}")
8. Close the browser
After the scraping is complete, we close the browser and print a confirmation message. This frees up system resources and signals the end of the script:
driver.quit()
print("Scraping complete.")
9. Full code and view the collected data
This is the full code we used to scrape company data off LinkedIn.
from selenium.webdriver.chrome.options import Options
from selenium.webdriver.common.by import By
from selenium.webdriver.support.ui import WebDriverWait
from selenium.webdriver.support import expected_conditions as EC
from time import sleep
import undetected_chromedriver as uc
from bs4 import BeautifulSoup
import csv

# Proxy credentials and LinkedIn credentials
proxy_host = 'your_proxy_host'
proxy_port = 'your_proxy_port'
proxy_username = 'your_proxy_username'
proxy_password = 'your_proxy_password'
proxy_url = f'https://{proxy_username}:{proxy_password}@{proxy_host}:{proxy_port}'

linkedin_url = 'https://www.linkedin.com/search/results/companies/?companyHqGeo=%5B%22103644278%22%5D&industryCompanyVertical=%5B%221594%22%5D&origin=FACETED_SEARCH&sid=G4U'


username = "your_linkedin_email"
password = "your_password"

# Set Chrome options
options = Options()
options.add_argument("--disable-blink-features=AutomationControlled")
options.add_argument("--headless=new")

# Initialize the undetected Chrome driver with proxy settings
driver = uc.Chrome(options=options, seleniumwire_options={
    'proxy': {'http': proxy_url, 'https': proxy_url},
    'verify_ssl': False
})

# Log into LinkedIn
driver.get(linkedin_url)
username_field = WebDriverWait(driver, 20).until(
    EC.presence_of_element_located((By.ID, 'username'))
)
username_field.send_keys(username)
driver.find_element(By.ID, 'password').send_keys(password)
driver.find_element(By.CSS_SELECTOR, "button[type='submit']").click()
print("Sign In Successful...\n")
sleep(10)  # Wait for the login process to complete

# Open a CSV file to write the company data
with open('linkedin_companies.csv', 'w', newline='', encoding='utf-8') as csvfile:
    fieldnames = ['Company Name', 'Profile URL', 'Industry', 'Location', 'Number of Followers', 'Number of Jobs']
    writer = csv.DictWriter(csvfile, fieldnames=fieldnames)
    writer.writeheader()

    # Loop through the first 5 pages
    for page_number in range(1, 6):
        page_url = linkedin_url + f"&page={page_number}"
        driver.get(page_url)
        print(f"Scraping page {page_number}...\n")
        sleep(5)

        # Parse page source and extract company data
        try:
            page_source = driver.page_source
            soup = BeautifulSoup(page_source, 'lxml')
            company_listings = soup.find_all('li', class_='reusable-search__result-container')

            for company_li in company_listings:
                # company name
                name_tag = company_li.find('span', class_='entity-result__title-text')
                company_name = name_tag.get_text(strip=True) if name_tag else "N/A"

                # company profile link
                profile_link_tag = company_li.find('a', class_='app-aware-link', href=True)
                company_profile_url = profile_link_tag['href'] if profile_link_tag else "N/A"

                # industry and location
                primary_subtitle_tag = company_li.find('div', class_='entity-result__primary-subtitle')
                primary_subtitle = primary_subtitle_tag.get_text(strip=True) if primary_subtitle_tag else "N/A"
                if '•' in primary_subtitle:
                    industry, location = [text.strip() for text in primary_subtitle.split('•', 1)]
                else:
                    industry, location = primary_subtitle, "N/A"

                # number of followers
                secondary_subtitle_tag = company_li.find('div', class_='entity-result__secondary-subtitle')
                num_followers = secondary_subtitle_tag.get_text(strip=True) if secondary_subtitle_tag else "N/A"

                # number of jobs (if any)
                num_jobs = "N/A"
                insight_tags = company_li.find_all('div', class_='reusable-search-simple-insight__text-container')
                for insight_tag in insight_tags:
                    insight_text = insight_tag.get_text(strip=True)
                    if 'jobs' in insight_text:
                        num_jobs = insight_text
                        break

                # Write company data to the CSV file
                writer.writerow({
                    'Company Name': company_name,
                    'Profile URL': company_profile_url,
                    'Industry': industry,
                    'Location': location,
                    'Number of Followers': num_followers,
                    'Number of Jobs': num_jobs
                })

                print(f"Saved company: {company_name}")

        except Exception as e:
            print(f"An error occurred on page {page_number}: {e}")

# Close the browser
driver.quit()
print("Scraping complete.")
Running this code will generate a CSV file named linkedin_companies.csv containing the scraped company data.
How to Turn LinkedIn Pages into LLM-Ready Data
Earlier, we explored how to use BeautifulSoup to scrape LinkedIn profiles and extract fields like job titles, companies, education, and skills. While this approach works well for structured data extraction, it can quickly become tedious if you’re trying to write summaries, highlight careers, or compare profiles using a language model.
Instead, you can use ScraperAPI’s output_format=markdown to return the entire LinkedIn profile in a clean, structured format, ideal for feeding into Gemini or another LLM without cleaning the data yourself.
Step 1: Obtain and Secure Your API Keys
To get started, ensure you have a ScraperAPI key and a Google Gemini API key. If you already have them, you can skip to the next step. You can get your ScraperAPI key from your dashboard or sign up here for a free one with 5,000 API credits.
To get a Gemini API key:
- Go to Google AI Studio
- Sign in with your Google account
- Click on Create API Key
- Follow the prompts to generate your key
Step 2: Scrape LinkedIn as Markdown
Let’s say you want to analyse a sample profile like Sundar Pichai’s using Gemini. You can use ScraperAPI to request the profile data in Markdown like this:
import requests

API_KEY = "YOUR_SCRAPERAPI_KEY"
url = "https://www.linkedin.com/in/sundarpichai/"

payload = {
    "api_key": API_KEY,
    "url": url,
    "ultra_premium": True,
    "output_format": "markdown"
}

response = requests.get("https://api.scraperapi.com", params=payload)
markdown_data = response.text
print(markdown_data)
Sample Output:
## About
CEO of Google and Alphabet. Focused on organizing the world's information and making it universally accessible and useful, building great products, and developing advanced technologies, including AI, to help people everywhere.
## Experience
* [ Google 21 years 3 months ](https://www.linkedin.com/company/google?trk=public%5Fprofile%5Fexperience-group-header "Google")
* [  ](https://www.linkedin.com/company/google?trk=public%5Fprofile%5Fexperience-item%5Fprofile-section-card%5Fimage-click)
### CEO
#### [ Google ](https://www.linkedin.com/company/google?trk=public%5Fprofile%5Fexperience-item%5Fprofile-section-card%5Fsubtitle-click)
2015 \- Present10 years
* [  ](https://www.linkedin.com/company/google?trk=public%5Fprofile%5Fexperience-item%5Fprofile-section-card%5Fimage-click)
### Product Management + Leadership
#### [ Google ](https://www.linkedin.com/company/google?trk=public%5Fprofile%5Fexperience-item%5Fprofile-section-card%5Fsubtitle-click)
Apr 2004 \- 2015 11 years
## Education
* [ ](https://www.linkedin.com/school/the-wharton-school/?trk=public%5Fprofile%5Fschool%5Fprofile-section-card%5Fimage-click)
### [ The Wharton School](https://www.linkedin.com/school/the-wharton-school/?trk=public%5Fprofile%5Fschool)
#### MBA
* [ ](https://www.linkedin.com/school/stanford-university/?trk=public%5Fprofile%5Fschool%5Fprofile-section-card%5Fimage-click)
### [ Stanford University](https://www.linkedin.com/school/stanford-university/?trk=public%5Fprofile%5Fschool)
Step 3: Summarize the Repository with Gemini
Now that you have the Markdown, you can feed it to Google Gemini and extract a clean summary.
Start by installing the Gemini SDK if you haven’t already:
pip install google-generativeai
Now you can request a summary from Gemini using a custom prompt:
import google.generativeai as genai

genai.configure(api_key="YOUR_GEMINI_API_KEY")
model = genai.GenerativeModel(model_name="gemini-2.0-flash")

prompt = f"""
You are a professional resume reviewer. Based on the LinkedIn profile below, provide:
- A 3-sentence professional summary
- Three key career milestones
- A bullet list of core skills and expertise

Here is the profile:
{markdown_data}
"""
response = model.generate_content(prompt)
print(response.text)
Sample Output from Gemini:
Okay, here's a resume review based on the provided LinkedIn profile for Sundar Pichai:

**Professional Summary**

Sundar Pichai is a highly accomplished technology executive, currently serving as the CEO of both Google and Alphabet. He is driving the company's mission to organize the world's information and make it accessible and useful to all. With a focus on innovation, he spearheads the development of cutting-edge technologies, particularly in artificial intelligence.

**Key Career Milestones**

*   **CEO of Google (2015 - Present):** Leading Google through a period of significant growth and innovation, navigating complex technological and business challenges.
*   **Product Management + Leadership at Google (2004-2015):** Drove development and strategy for key Google products, demonstrating strong leadership and product vision.
*   **Becoming CEO of Alphabet:** Assumed leadership of Alphabet alongside Google, expanding his responsibilities to oversee the parent company and its diverse portfolio of ventures.

**Core Skills and Expertise**

*   Leadership & Management
*   Product Strategy & Development
*   Artificial Intelligence (AI)
*   Technology Vision & Innovation
*   Business Strategy
*   Global Operations
*   Team Leadership
*   Cloud Computing
*   Search Technologies
*   Strategic Partnerships
With just a few lines of code, you turn a complete LinkedIn profile into a structured summary, no need to parse HTML or clean up messy data. The Markdown output provides a clean, consistent format that large language models can immediately understand and work with.
From there, it’s all about how you shape the prompt. Whether you’re identifying top candidates, highlighting career milestones, or analysing trends across profiles, Gemini makes it easy to adapt the output to fit your goals.
For anyone building tools around hiring, research, or professional networking, this setup saves time and makes scaling much easier.
Get the LinkedIn Data You Want With ScraperAPI
Building a LinkedIn scraper can be daunting, especially with the risk of getting blocked. But, if you follow this LinkedIn web scraping guide, we guarantee that you can extract and export LinkedIn data in bulk without hiccups.
Remember that if the project is larger than just a couple of pages, using ScraperAPI’s integration will help you avoid roadblocks and keep your IP safe from anti-scraping systems.
Don’t know where to start? Contact our sales team and let our experts build the perfect plan for your use case!
Until next time, happy scraping!
Other web scraping guides that may interest you:
- How to Scrape LinkedIn Legally: 15k Job Listing in Seconds
- 10 Tips For Web Scraping Without Getting Blocked/Blacklisted
- Top 10 Free Proxies for Web Scraping – Best of the Best (Free Proxy List)
LinkedIn Scraping FAQs
LinkedIn knows its data is valuable, so it goes to great lengths to ensure no one can obtain it. To detect and prevent automated scraping, LinkedIn utilizes methods like rate restriction, CAPTCHAs, and IP blocking, which require advanced web scraping tools and techniques to bypass them.
Yes, scraping LinkedIn is legal as long as the data you collect is publicly available.
However, scraping data from LinkedIn while logged in violates LinkedIn’s User Agreement and can have legal implications. Check out our in-depth guide on web scraping legality to learn more.
As demonstrated in this tutorial, you can legally scrape LinkedIn data by accessing only publicly available information without logging in. Data collected via public directories and search results not requiring authentication are generally permissible.
