


C# is a general-purpose programming language that is mainly used in enterprise projects and applications, with roots in the C family – making it a highly efficient language to have in your tool belt.
Because of its popularity, C# has a vast set of tools that allow developers to implement elegant solutions, and web scraping isn’t the exception.
In this tutorial, we’ll create a simple web scraper using C# and its easy-to-use scraping libraries. Plus, we’ll teach you how to avoid getting your bot blocked with a simple line of code.
However, there are a few things we need to cover before we start writing our code.
Why Use C# Instead of C for Web Scraping?
C is a widely used mid-level programming language capable of build operating systems and program applications. However, using C for web scraping can be both expensive and inefficient.
Building a C web scraper would have us creating many components from scratch or writing long, convoluted code files to do simple functions.
When choosing a language to build our web scraper, we’re looking for simplicity and scalability. There’s no point in committing to a tool that makes our job harder, is it?
Instead, we can use C# and .NET Core to build a functional web scraper in a fraction of the time using tools like ScrapySharp and HtmlAgilityPack.
These frameworks make sending HTTP requests and parse the DOM easy and clean, and we’ll thank a clean code when it’s time to maintain our scraper.
HTML and CSS Basics for Web Scraping in C#
Before we can write any code, we first need to understand the website we want to get data from, paying particular attention to the HTML structure and the CSS selectors.
Let’s do a brief overview of this structure – if you’re already familiar with HTML and CSS, you can move to the next section.
HTML Tags
Hypertext Markup Language (HTML) is the basic block of the web. Every website uses HTML to tell the browser how to render its content by wrapping each element between tags.
<h1>This tells the browser this is the most important heading on the page</h1>
The most common tags we’ll scrape are:
- H1 to 6 – defines headings in a descending hierarchy. We usually scrape these elements to get product names, content titles, and news headlines.
- div – it specifies a section of a page and is used to organized the content. In some cases, we want to get a specific <div> to tell our scraper where to look for an element.
- p – defines an element like a paragraph. Between these tags, we can usually find descriptions, listing details, and even prices.
- a – tells the browser the element is a link targeting another page (internal or external). In some cases, titles are wrapped inside <a> tags, so we’ll need to extract the text from the link to access them. Also, we can target the href attribute to get the URL; this is especially important for storing the data source or following paginations.
To take a look at the HTML structure of a website, hit Ctrl/Command + Shift + C (or right-click and hit inspect) on the page you want to scrape.
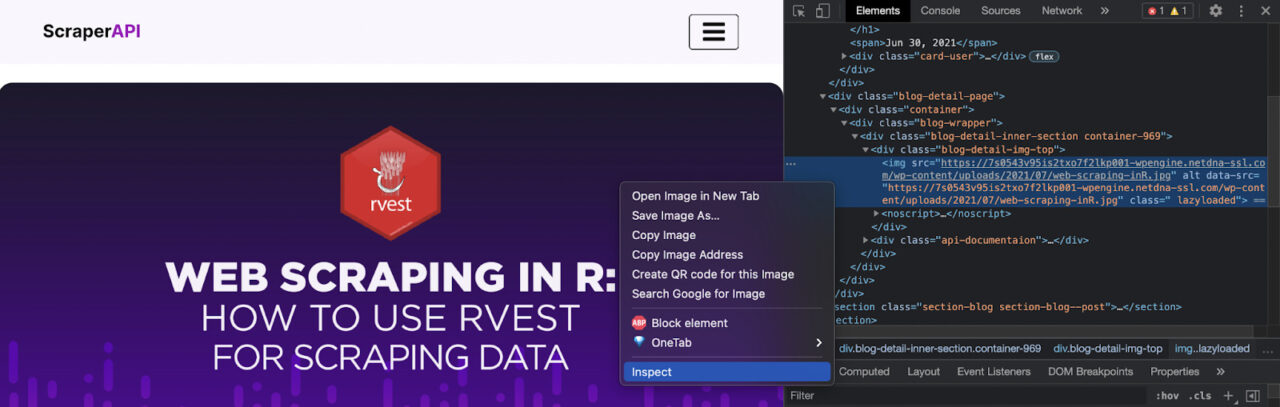
We’re now inside the Inspector or the browser’s Developer Tools. This will help us find each element’s source code and understand how to make our scraper find it.
Let’s say that we want the title of this article. From the Inspector tool, click on the title, and the console will jump to that element.

It seems the title is wrapped around a <span> tag inside an <h1>.
Of course, every website is built differently, so spending some time understanding the logic of a site is really important to avoid bottlenecks later on.
A common occurrence is that the pages use the same HTML tags for different elements. If we just target the tag, we’ll be scraping a lot of unnecessary information (wasting time and resources).
So how do we tell our scraper which element to find and return?
CSS and XPath Selectors
If we look at the elements, we can see that each component has a class or an ID.

These attributes are used to differentiate common tags from each other that can later be selected using Cascading Style Sheets (CSS) selectors and style them.
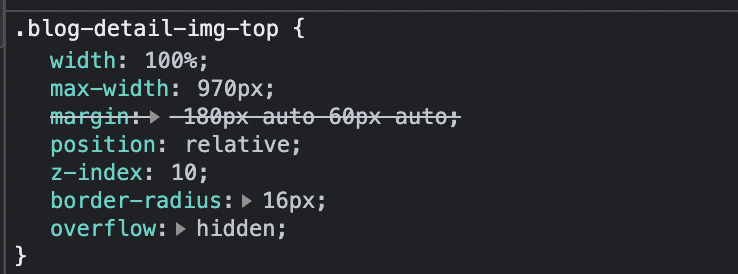
In the example above, the dot (.) represents ‘class’.
In other words, we’re selecting all elements with the class=”blog-detail-img-top” and applying the underneath styling.
We can use the same logic to pick elements from the page using our scraper by defining the element + class (‘a.className’) or element + ID (‘a#idName’)
An alternative to CSS selectors is using the XPath of the element.
XML Path (XPath) uses xpath expressions to select nodes from an XML or HTML document. So instead of selecting a class or ID, we would create a path to the element itself.
Here’s a helpful table of comparisons from Slotix’s Git Repo:
| Goal | CSS 3 | XPath |
| All Elements | * | //* |
| All P Elements | p | //p |
| All Child Elements | p>* | //p/* |
| Element By ID | #foo | //*[@id=’foo’] |
| Element By Class | .foo | //*[contains(@class,’foo’)] |
| Element With Attribute | *[title] | //*[@title] |
| First Child of All P | p>*:first-child | //p/*[0] |
| All P with an A child | Not possible | //p[a] |
| Next Element | p + * | //p/following-sibling::*[0] |
| Previous Element | Not possible | //p/preceding-sibling::*[0] |
There are scenarios where CSS selectors won’t help us, so knowing how to write xpath expressions can come in handy.
The beauty of this is that we can combine the two of them into our project without problem.
CSS selectors are easy to implement, so in most cases, it would be the best road. But in those moments when we need to be more specific or when there are no classes or IDs to rely on, implementing an XPath expression will allow us to grab the elements.
An excellent example of this is using XPath to find elements containing specific text – which would be impossible to do using CSS.
With the basics out of the way, let’s start building our C# web scraper.
How to Scrape a Static Page Using C#
There are four main components or steps to scrape web content:
- Send an HTTP request to the server to download the HTML source code.
- Parse the DOM
- Select the elements we want to scrape
- Store them into a database (CSV, JSON, etc.)
We’ll be scraping Hubspot’s customer retention blog and gathering each article’s title for our example.
You can use this process to create a database of your competitors’ content faster than it would be to do by hand.
1. Setting Up Our Development Environment
We’ll want to install a few things to create our C# scraper, starting with .NET Core and Visual Studio Code.
Installing .NET Core
.NET Core is an open-source, general-purpose, cross-platform framework maintained by Microsoft that uses C# (although you can also use F#) to create various programs and applications.
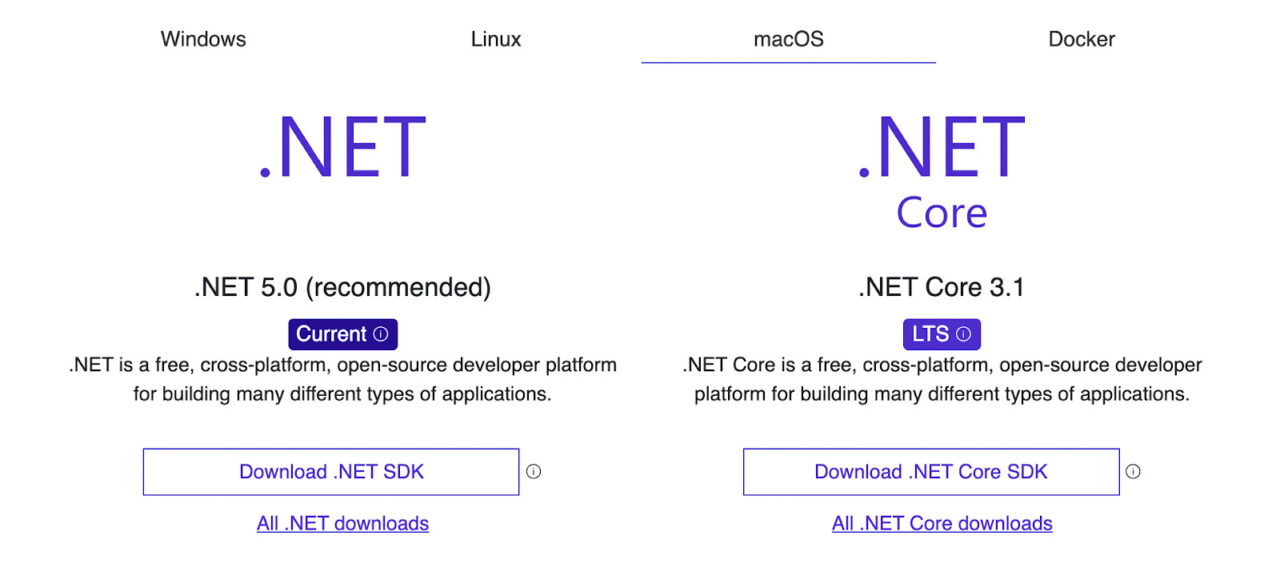
To install it, go to .NET’s website and choose your preferred option depending on your machine. In our case, we’ll be going with the recommended version for Mac.
After the SDK is downloaded, we just follow the installation wizard.
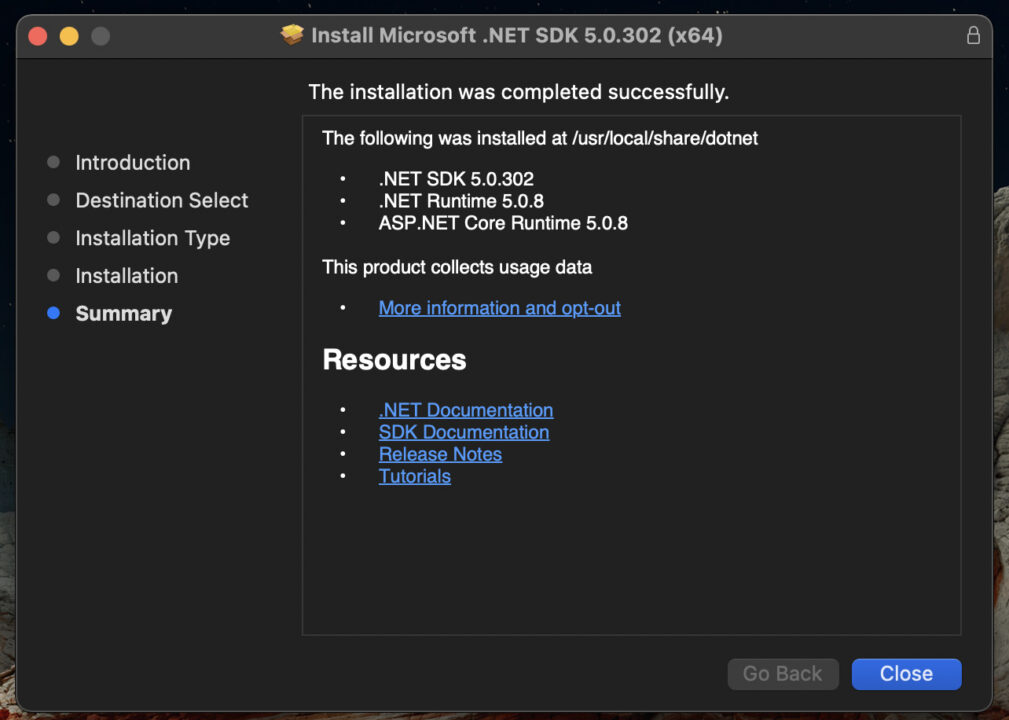
As we can see in the image above, this SDK includes the .NET Core and ASP.NET run times. So if you want to keep digging into C#, you’re all set for the future.
Installing and Setting Up Visual Studio Code
Installing VS Code is as simple as going to the website and downloading the version compatible with your operating system.

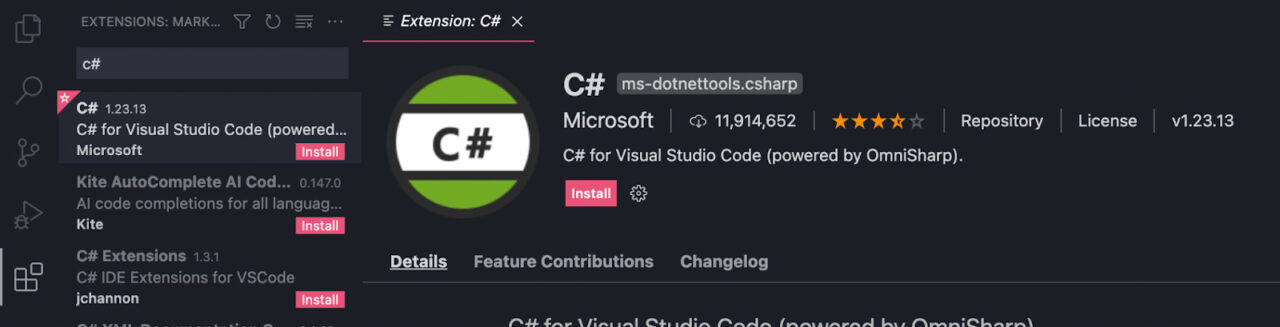
Once the installation is complete, launch the IDE and install the C# extension.
And we’re now ready to start our project.
Creating a New C# Project and Configuring Our Debugger
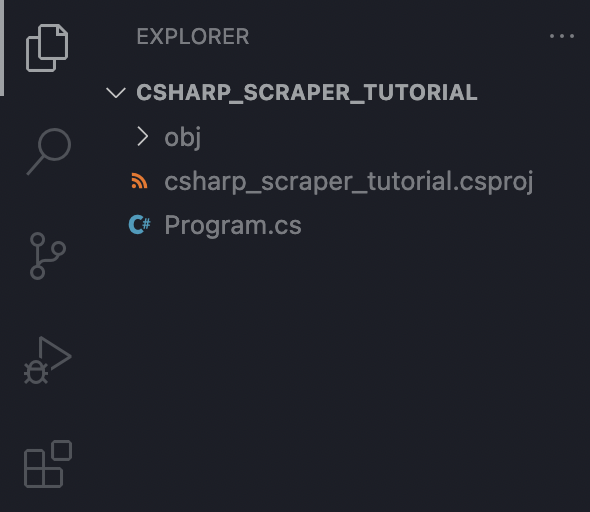
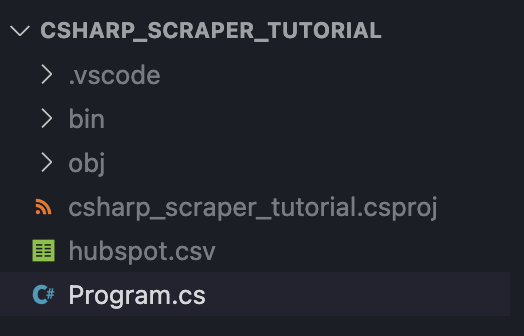
We will create a new folder named ‘csharp_scraper_tutorial’, open it on VS Code and then start a new terminal.

Inside the terminal, we’ll type the command dotnet new console to create all the necessary files we’ll need to run our scraper, including the ‘Program.cs’ file, where we’ll write our code.
Because we already installed the C# extension, we can click on the Debugger and noticed that the .NET Core Launch is selected – if not, just click on the dropdown and click on it.
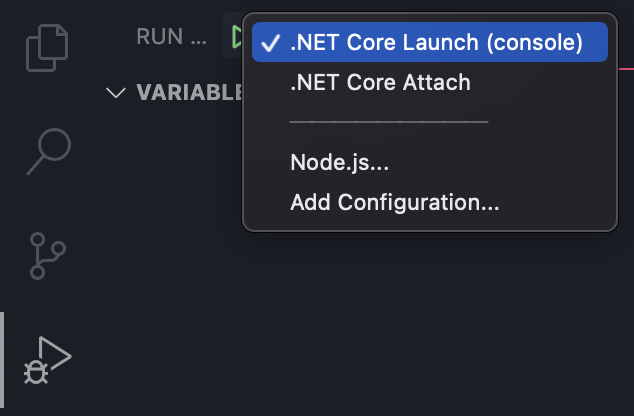
Note: This will be necessary for debugging and running our scraper, so make sure to have the right one selected.
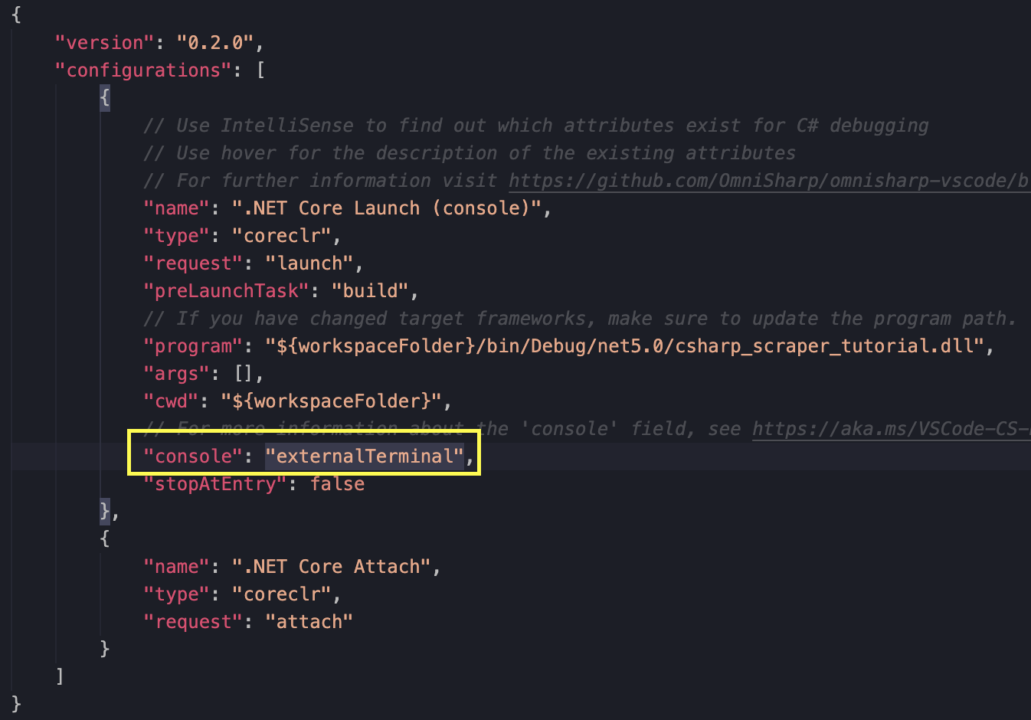
By default, the console property is set as internalConsole, but we have to change this if we want to be able to capture the input.
For this, let’s click on Settings to open the launch.json file.
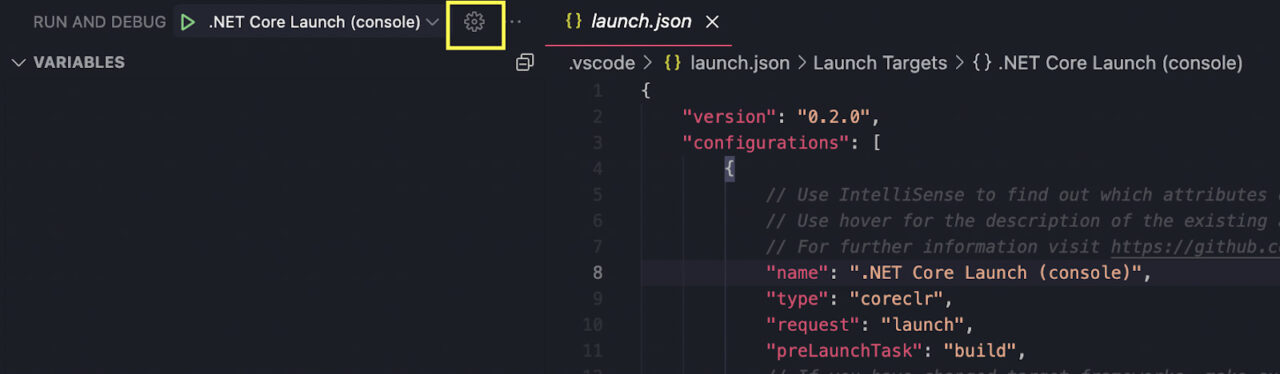
Inside the file, we’ll find the console property around the middle, and we’ll change the current setting to externalTerminal.
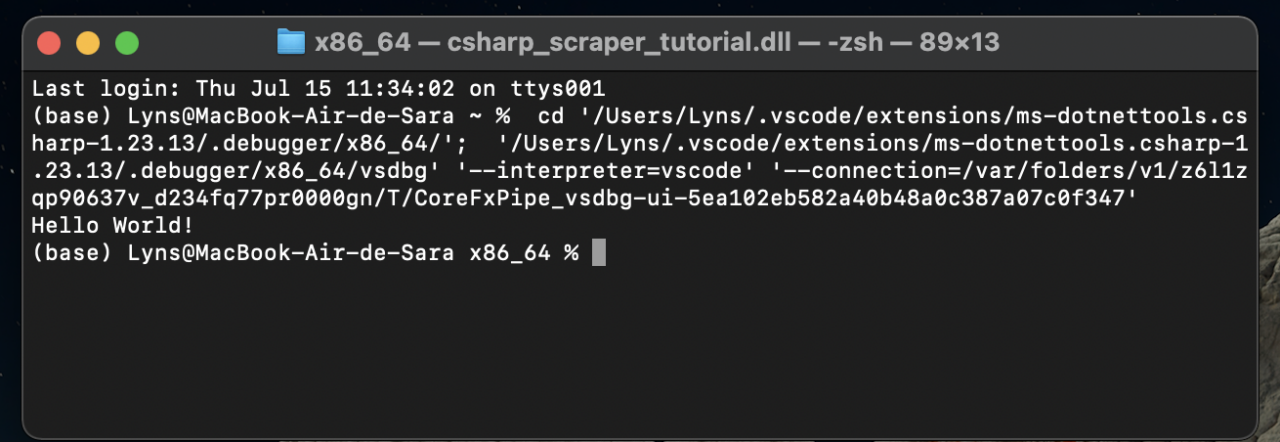
To verify that it’s working, run the Debugger. If it’s working, the program will print out ‘Hello World’ in your external terminal.
Adding ScrapySharp and CsvHelper to Our Project
We could definitely use C# alone to send an HTTP request and parse the response to extract the information we’re interested in.
However, that would be a waste of time and sanity for no good reason.
Remember that we decided to work with C# because it already has tools to make our work easier for us. Increasing efficiency and reducing our project’s costs.
ScrapySharp is an open-source web scraping library designed for c#. It also includes a web client to simulate a browser’s behavior (perfect for scraping dynamic pages or event-triggered content) and an HTMLAgilityPack extension (for selecting elements using CSS selectors).
Note: We’ll mainly use the HTMLAgilityPack in this tutorial for simplicity, but we still recommend installing ScrapySharp as we’ll use it a lot in more complex projects. In the scope of this tutorial, we’ll use one component of ScrapySharp (ScrapySharp.Extensions).
Adding this library to our project is as simple as typing the command dotnet add package ScrapySharp to import the Nuget package.
To finish setting up our C# development environment, type dotnet add package csvhelper on your terminal, and add the dependencies to our ‘Program.cs’ file.
using CsvHelper;
using HtmlAgilityPack;
using ScrapySharp.Extensions;
using System.IO;
using System.Collections.Generic;
using System.Globalization;
2. Send an HTTP Request to the Server
With all our dependencies ready to use, we can send a request to our target server to return the HTML of the page.
Inside our main method, replace the Console.WriteLine() method with the following code:
HtmlWeb web = new HtmlWeb();
HtmlDocument doc = web.Load("https://blog.hubspot.com/topic-learning-path/customer-retention");
Outside of the main method, we’ll create a new public class:
public class Row
{
    public string Title {get; set;}
}
What makes using scraping frameworks so elegant is that just by reading the code, almost anyone can understand what we’re telling our scraper to do. This is the efficiency and simplicity we’re looking for.
3. Selecting Elements Using CSS Selectors
Our Csharp scraper has downloaded the HTML DOM of the page. However, it will return a long string of HTML without much use to us, as is.
To tell our scraper what to look for, we first need to know it ourselves.
First, we’ll open the target website on the browser and inspect the page to find how titles are being served within the HTML.
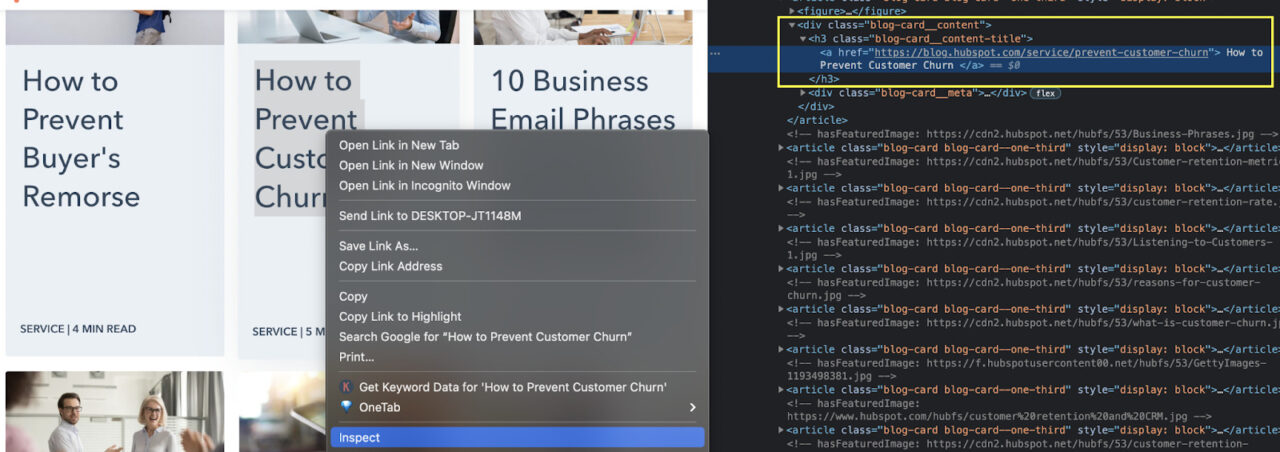
After inspecting one of the titles, we can see that the text is inside of <a> tags without class. Not a good start as we can not target it directly. So what do we do?
Notice that <a> tags themselves are wrapped inside <h3> tags with the class “blog-card__content-title”. That’s our target!
var Headers = doc.DocumentNode.CssSelect(“h3.blog-card__content-title > a”);
Note: By importing ScrapySharp.Extensions into our project is that we’re able to invoke Css.Select, underwise, VS Code will prompt you that HtmlNode doesn’t have a definition for it.
We construct the CSS selector by combining a tag element (h3) with its class (blog-card__content-title) using a dot. Then, the > symbol will tell our scraper to look for the <a> inside this element. The result is stored in a variable called Headers.
Of course, we could name it whatever we want, as long as it is descriptive. If we start using abstract names for variables, it can quickly become a nightmare.
4. Storing the Text of a Link in a CSV File
Using CsvHelper, we’ll now extract the text inside the link element (which is the title of every article) and create a new CSV file to store our data.
To do so, we’ll need to create a new variable:
var titles = new List<Row>();
And inside, iterate through each item our scraper is finding to extract all titles within the page.
foreach (var item in Headers)
    {
        titles.Add(new Row { Title = item.InnerText});
    }
Once we have the text, we need to create our file and write the information from the main variable (titles) into it.
using (var writer = new StreamWriter("hubspot.csv"))
using (var csv = new CsvWriter(writer, CultureInfo.InvariantCulture))
{
    csv.WriteRecords(titles);
}
5. Running Our Script
If you’ve been following along, the final code should look something like this:
//Dependencies of the project
using CsvHelper;
using HtmlAgilityPack;
using ScrapySharp.Extensions;
using System.IO;
using System.Collections.Generic;
using System.Globalization;
namespace csharp_scraper_tutorial
{
    class Program
    {
        static void Main(string[] args)
        {
            //Send the request to the server

            HtmlWeb web = new HtmlWeb();

            HtmlDocument doc = web.Load("https://blog.hubspot.com/topic-learning-path/customer-retention");

            //Select a specific node from the HTML doc

            var Headers = doc.DocumentNode.CssSelect("h3.blog-card__content-title > a");

            //Extract the text and store it in a CSV file

            var titles = new List<Row>();

            foreach (var item in Headers)
                {
                    titles.Add(new Row { Title = item.InnerText});
                }
            using (var writer = new StreamWriter("hubspot.csv"))
            using (var csv = new CsvWriter(writer, CultureInfo.InvariantCulture))
            {
                csv.WriteRecords(titles);
            }
            }
            public class Row
            {
            public string Title {get; set;}
        }
    }
}
To test if it’s working, type dotnet run on the terminal or use the debugger.
If it’s working, a new CSV file will appear on your project’s directory or in the path you specified inside StreamWriter().
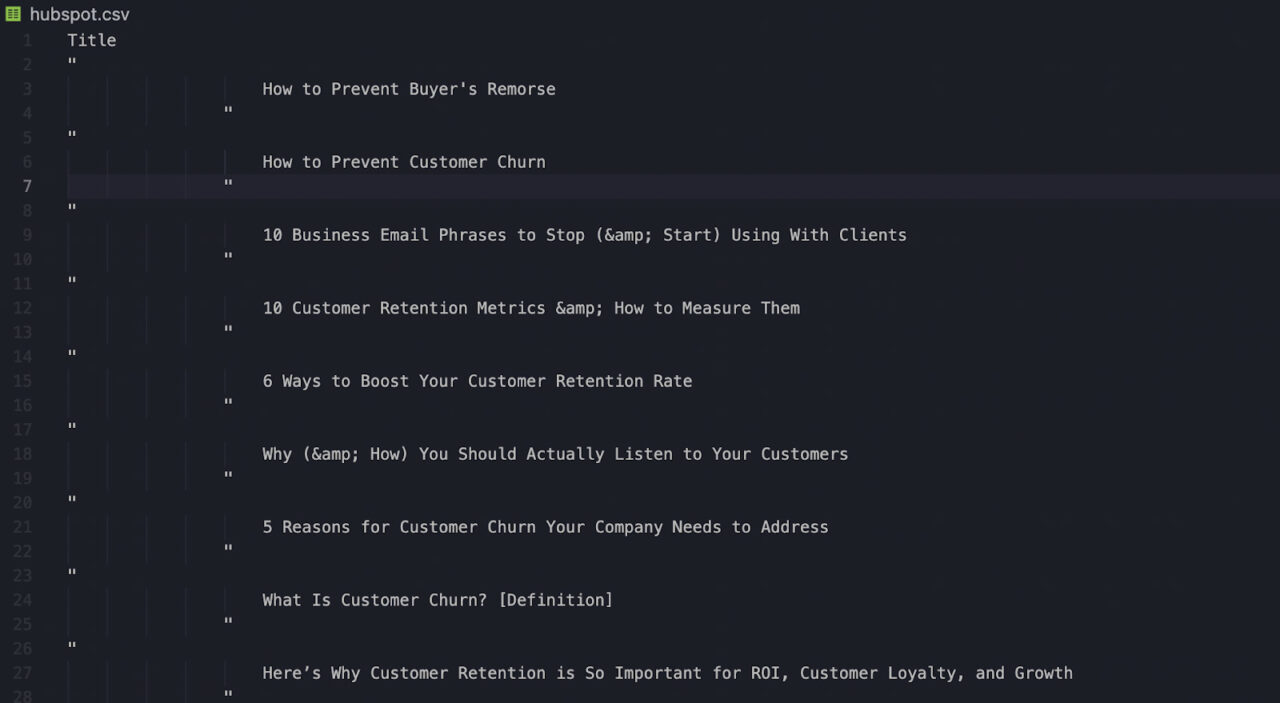
Awesome, all the tiles are inside the document. Congratulations on creating your first web scraper in C#!
Using ScraperAPI with C# for Scalability with a Single Line of Code
When we use the right tools, web scraping can be a simple task. Not easy, but simple.
It’s all about finding the proper logic behind a website’s structure and creating your script to use that logic to find and extract data.
However, there are many other challenges we’ll have to face when trying to scrape large sets of data.
Here’s how we can solve most of these problems by adding a simple line of code into our scraper.
Handle CAPTCHAs and Rotate Your IP Automatically
As data becomes more valuable, anti-scraping techniques have become more sophisticated over time.
For example, a server can monitor the frequency of requests from each IP. If the IP sends too many requests within a set time frame, the server will automatically block all following requests.
This ban can go over a few hours up or forever, depending on the website’s rules.
Another technique being used more frequently is the implementation of CAPTCHAs. These puzzle-like tests are meant to differentiate between humans and robots.
Our current script will pass neither of these obstacles as it is right now.
However, we can send our request through ScraperAPI servers to handle both automatically.
To use the API, we first need to create a free ScraperAPI account – it includes 5000 free API credits.
Once inside our dashboard, we’ll have access to our API Key and a few code examples.
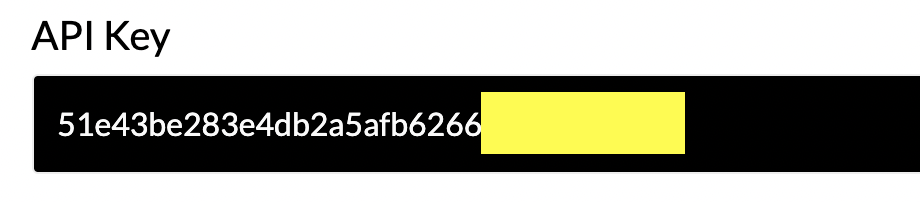
To implement the request, we’ll construct the URL of our request like this:
HtmlDocument doc = web.Load(“https://api.scraperapi.com?api_key=51e43be283e4db2a5afb6266xxxxxxxx&url=https://blog.hubspot.com/topic-learning-path/customer-retention”);
ScraperAPI will then choose the best proxy and header for each request, rotating the IP between each one. It will also avoid all CAPTCHAs that it encounters, retrying the request using a different combination.
It’s able to do this thanks to our machine learning algorithm, years of statistical data, and our huge browser farms.
Note: Only 200 successful requests will count against your available API credits. If a request fails, ScraperAPI will retry for about 60 seconds until returning a 400 status code.
This functionality is crucial for big scraping projects requiring extracting data from hundreds of pages to avoid bans and send concurrent requests to save time.
Execute JavaScript to Access Dynamic Pages
JavaScript-heavy websites are impossible to access through an ordinary HTTP request.
This is because our scraper doesn’t have a way to execute the JS script. So the response will most likely be an empty or partially downloaded HTML document.
A somewhat complicated way to solve this problem is by using a headless browser like PuppeteerSharp to simulate the behavior of a web browser. Nonetheless, this will require changing more than a few lines of code from our script and might even be overkill.
Unless you need to click on buttons or submit a form, you can just use ScraperAPI’s render parameter to execute JavaScript.
For this, we’ll add render=true at the end of our URL.
“https://api.scraperapi.com?api_key=51e43be283e4db2a5afb6266xxxxxxxx&url=https://blog.hubspot.com/topic-learning-path/customer-retention&render=true”
Accessing Geosensitive Data
Some websites like Amazon and Google will show different results depending on the geolocalization of the IP address we’re sending the request from.
However, if we want to get into new markets, our data needs are different from our current location.
We can use ScraperAPI and tell it to send the HTTP request with a specific country code. Thus, granting us access to the data as our potential new market will see it.
Just like before, we’ll now add a new parameter to our URL:
“https://api.scraperapi.com?api_key=51e43be283e4db2a5afb6266xxxxxxxx&url=https://blog.hubspot.com/topic-learning-path/customer-retention&render=true&country_code=cn”
The country_code=cn parameter will tell our ScraperAPI to return the response as we were in China.
For a complete list of available country codes and more functionalities, visit our documentation and our ScraperAPI Cheat Sheet.
We hope you enjoyed our C# scraping tutorial and learned a few things along the way.
In future articles, we’ll dive deeper into ScrapySharp and PuppeteerSharp so you can use C# for bigger, more complex projects.
Until next time, happy Scraping!
